Part 2: Utilize
This is Part 2 of a multi-part, self-paced quick start exercise.
What Will You Do
In part 2, you will access the console as the previously created user with the cluster template user role. You will then use the cluster template to provision a cluster.
Step 1: Provision Cluster
In this step, you will provision a cluster using the previously created cluster template.
- Ensure you are logged into the console as the cluster template user
- In your project, navigate to Infrastructure -> Clusters
- Click on "New Cluster"
- Select "Create New Cluster From Template"
- Click "Continue"
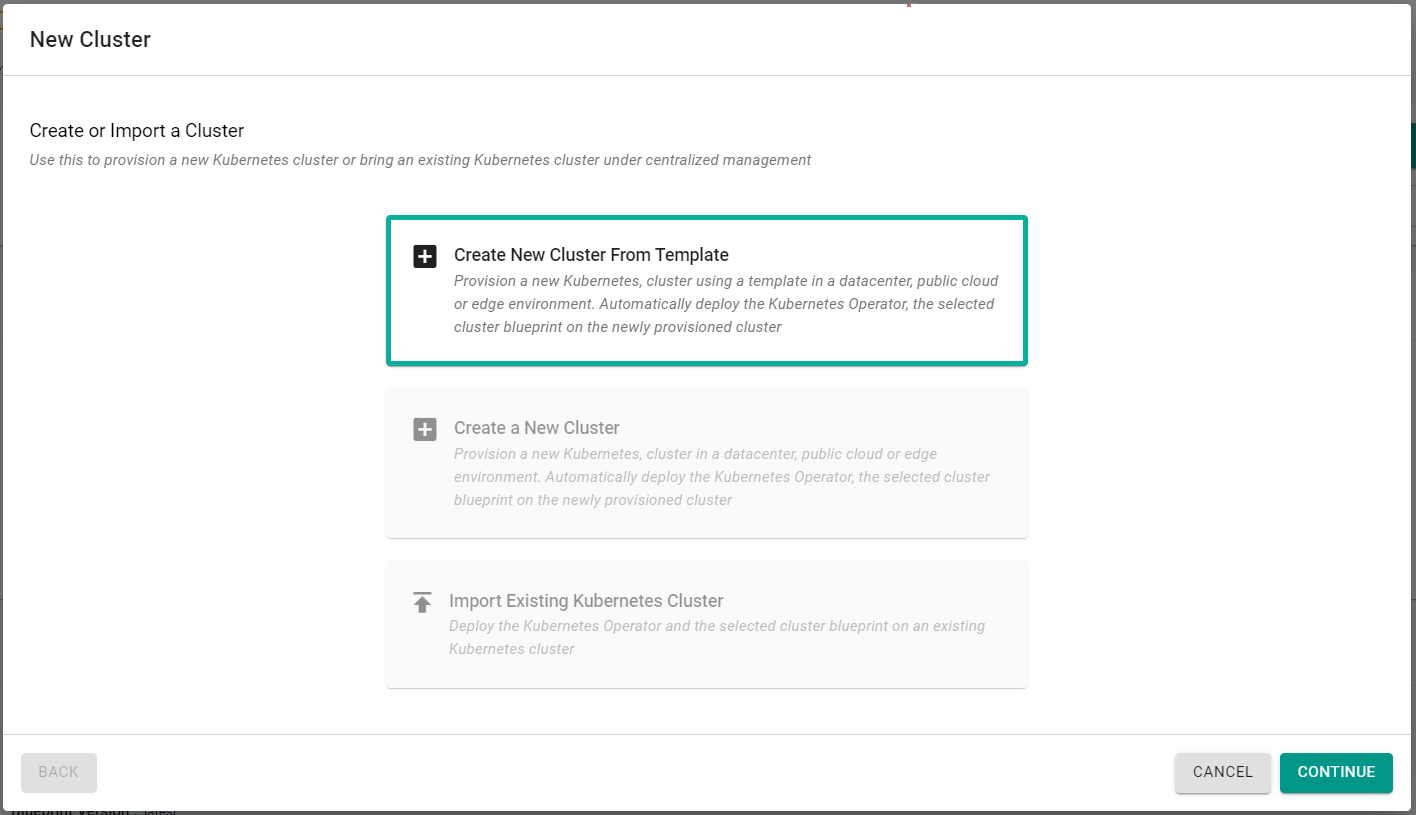
Note, since the user is using the cluster template user role, they are unable to provision clusters directly, they must use a template which is controlled by a higher permissioned role.
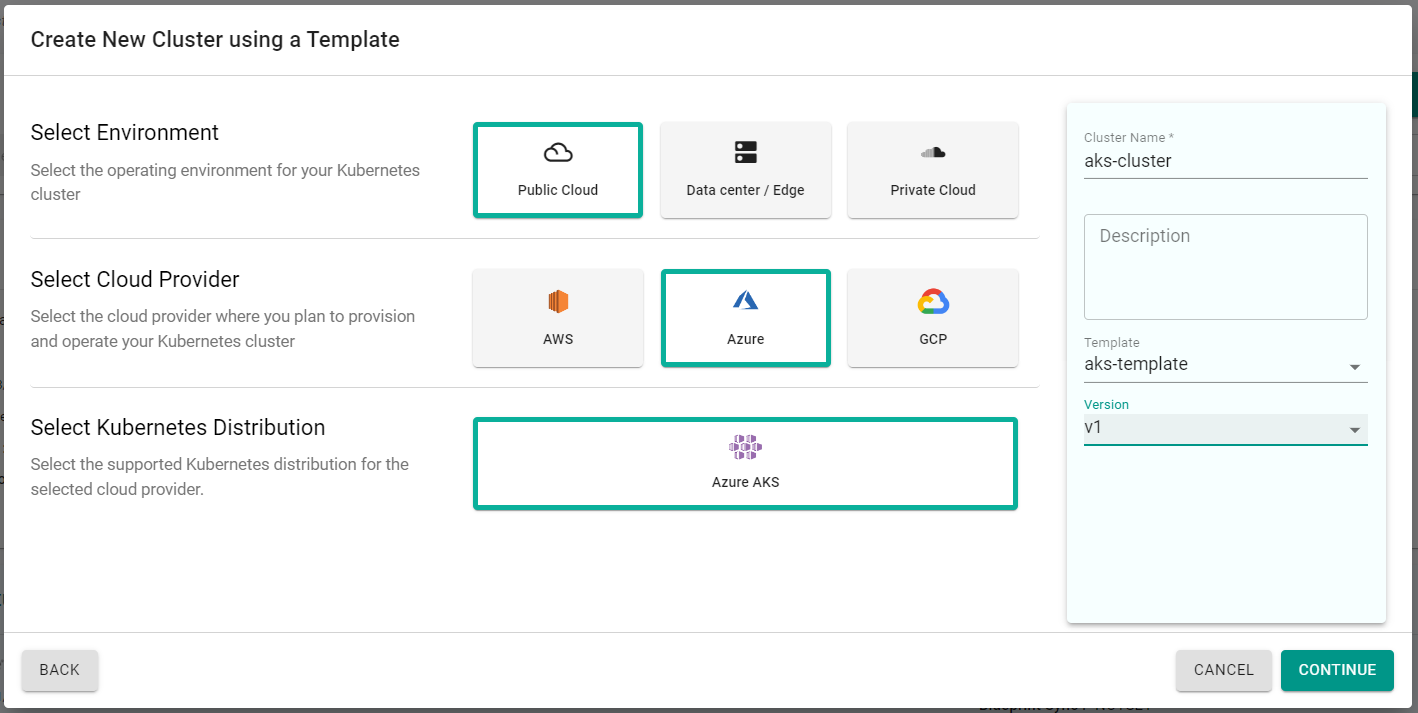
- Select "Public Cloud"
- Select "Azure"
- Select "Azure AKS"
- Enter a cluster name
- Select the previously created template
- Select the previously created version
- Click "Continue"
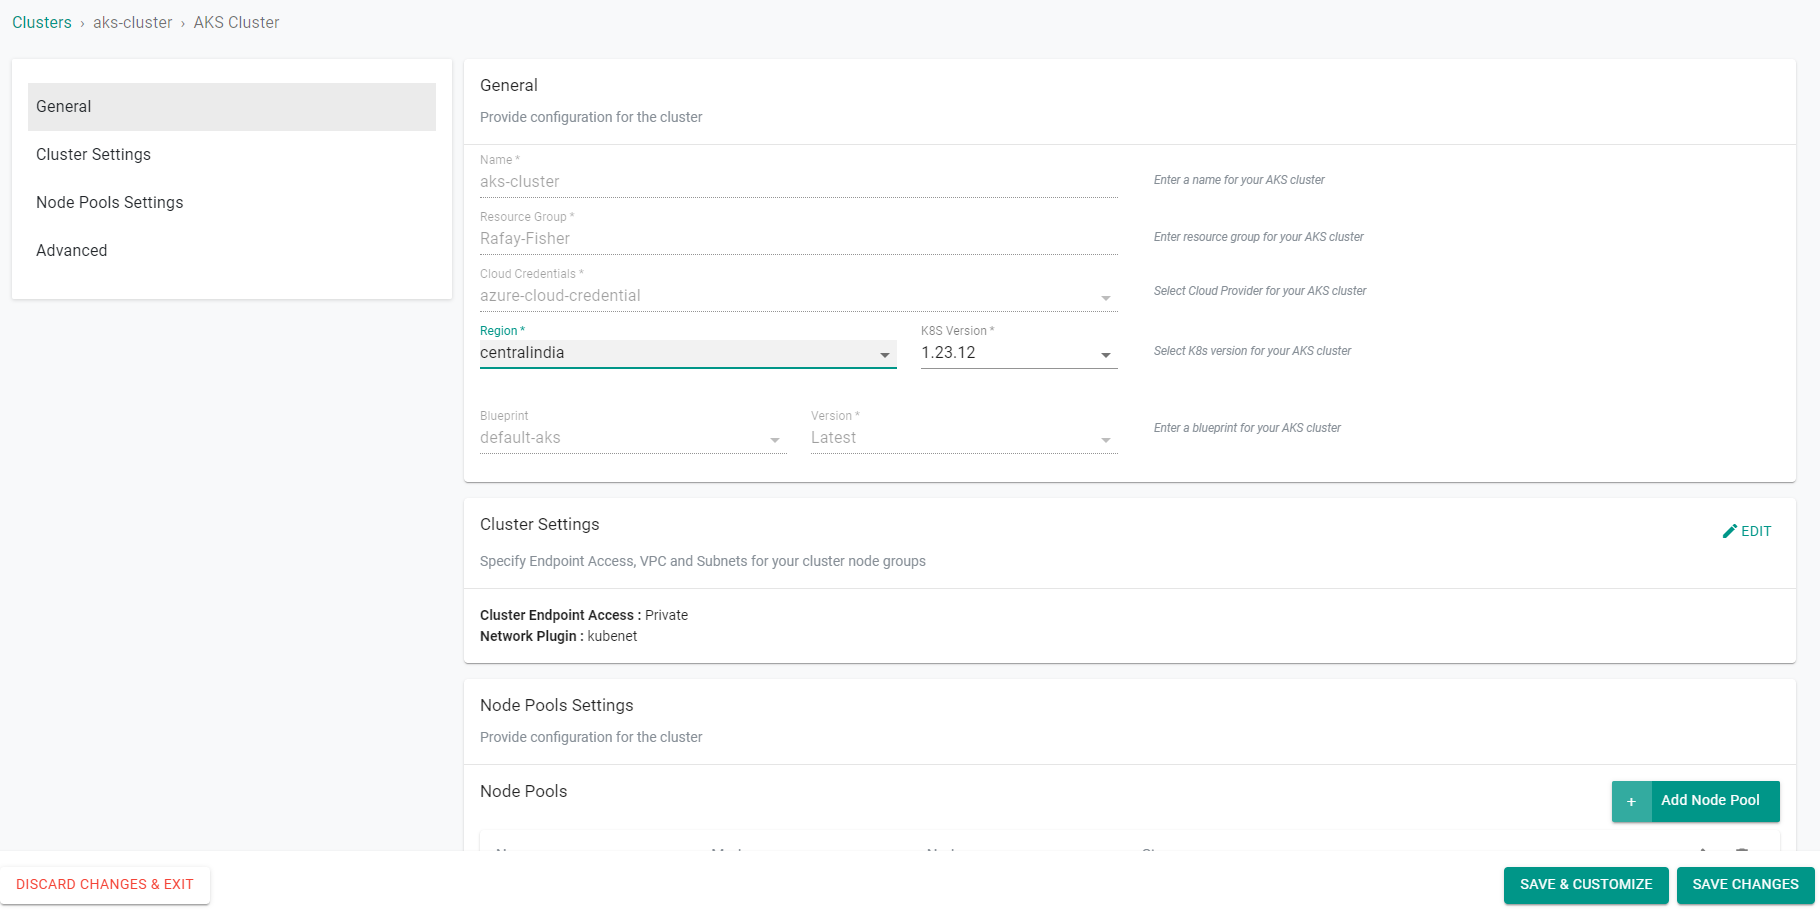
You will now be directed to the cluster configuration page. You will notice that the cluster configuration options are limited. This is because you are using a cluster template that is limiting the available configuration options the user has to choose from. In this case, you are only able to configure the following parameters:
- Region
- Kubernetes Version
- Node Pool Instance Size
- Node Pool Min Count
These are the same parameters you configured previosuly in the cluster template.
- Click "Save Changes"
- Click "Provision"
The cluster will begin provisioning using the user's cluster configuration selections.
Recap
In this part, you have provisioned a cluster using a cluster template. This template was used to limit the configuration options available to the less privledge user role.