Part 1: Setup
This is Part 1 of a multi-part, self-paced quick start exercise.
What Will You Do
In part 1, you will setup the environment for use within this exercise. You will:
- Create a Group
- Create a User
- Create a Cluster Template
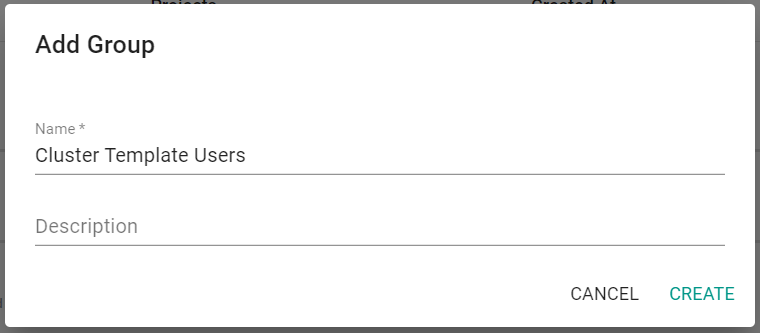
Step 1: Create Group
In this step, you will create a Group. The group will have access to a project of your choice with the "Cluster Template User" role. The cluster template user role will allow users in this group to view and manage cluster resources as they have been defined within the cluster template.
- Ensure you are logged into the console as an Org Admin user
- Navigate to System -> Groups
- Click "New Group"
- Provide a name for the group
- Click "Create"
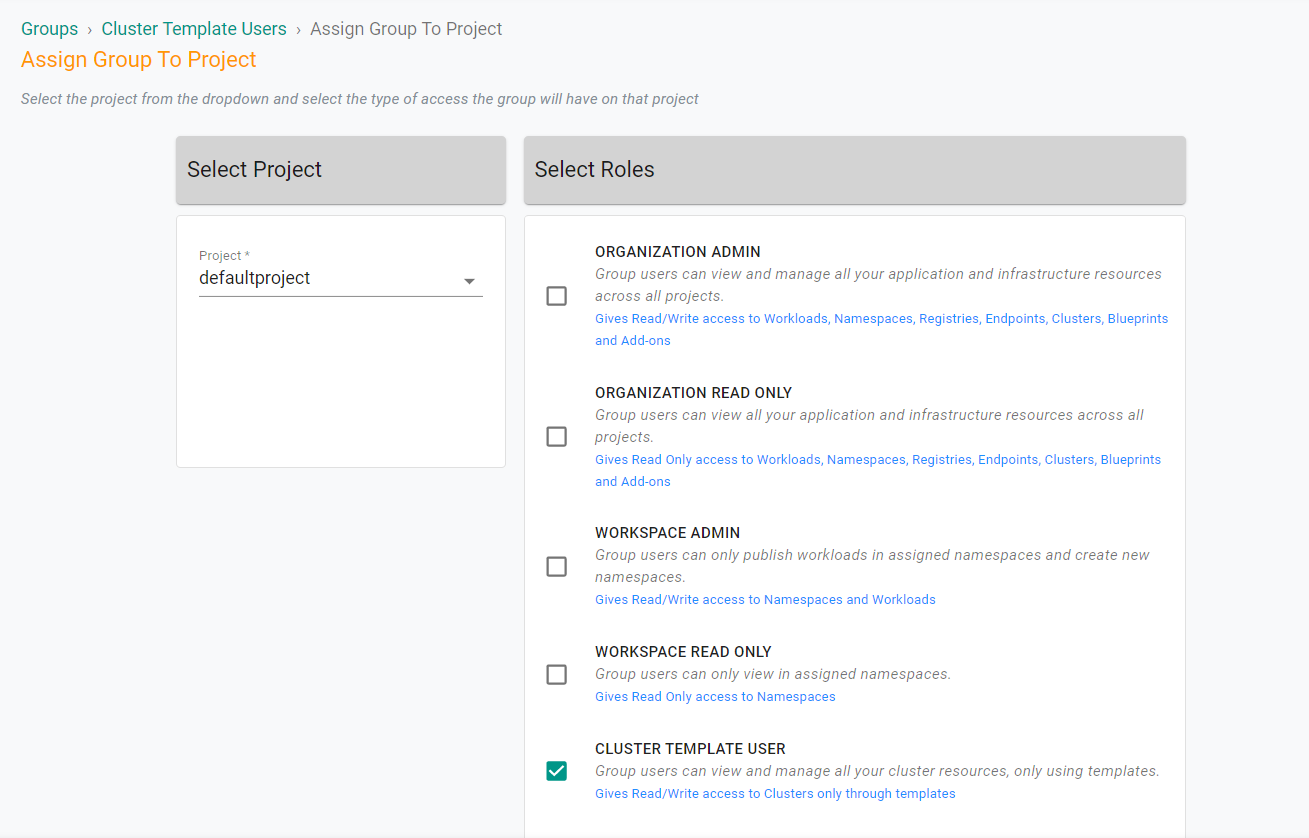
- Click the "Projects" tab
- Click "Assign Group to Project"
- Select a project to use in the drop down menu
- Select "Cluster Template User" for the role
- Click "Save & Exit"
Step 2: Create User
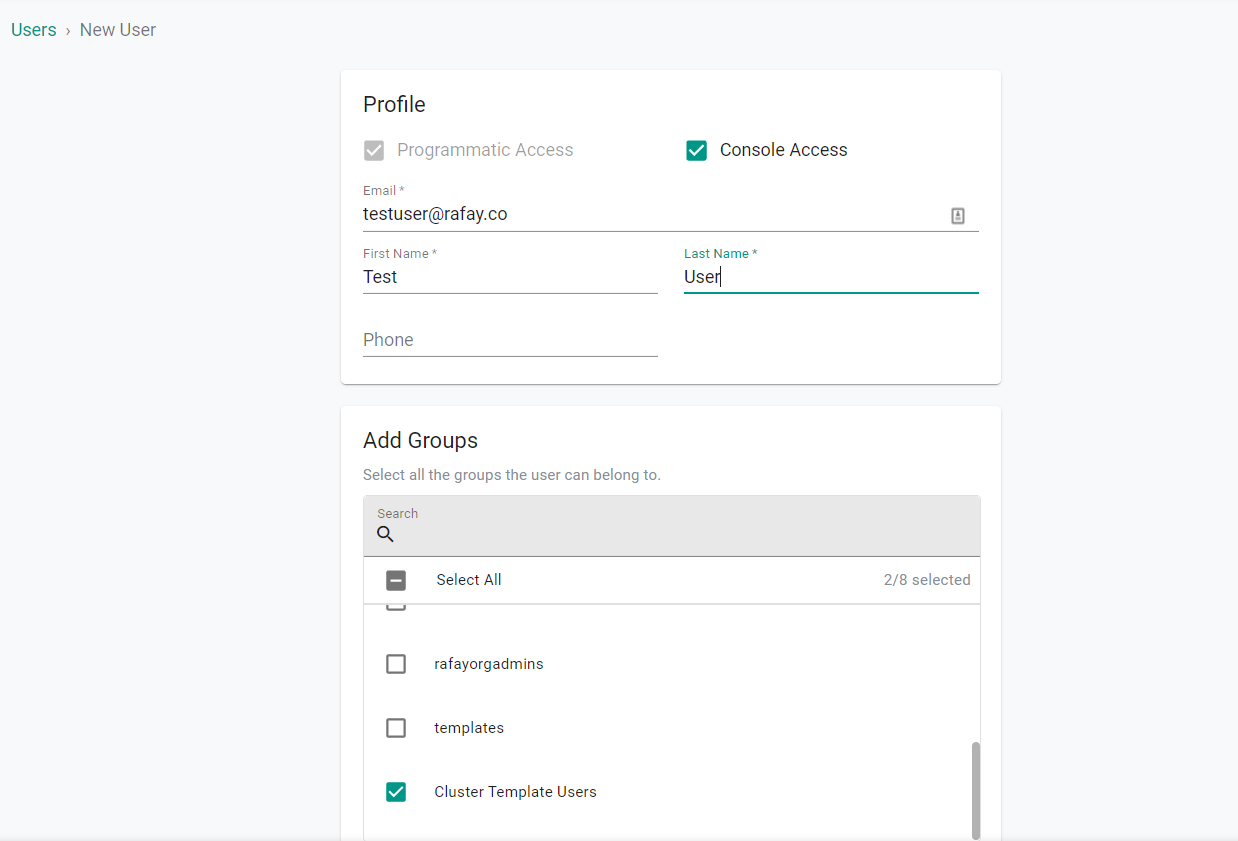
You will now create a new user who will be assigned to the previously created group.
- Ensure you are logged into the console as an Org Admin user
- Navigate to System -> Users
- Click "New User"
- Enter an email address for the user
- Enter a First Name for the user
- Enter a Last Name for the user
- Select the previously created group under "Add Groups"
- Click "Save & Exit"
You will now receive an email to the email address provided for the user. The email will contain a temporary password that will be needed to login to the console later in this guide.
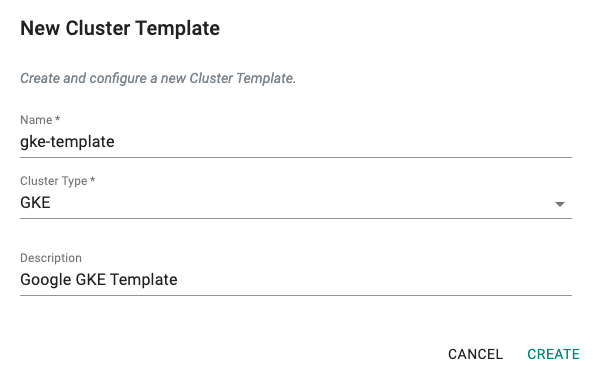
Step 3: Create Cluster Template
You will now create a cluster template that will be used to limit the cluster configuration options available to lower privilege users.
- Ensure you are logged into the console as an Org Admin user
- Navigate to Infrastructure -> Cluster Templates
- Click "New Template"
- Enter a name for the template
- Select "GKE" as the Cluster Type
- Click "Create"
- Click "New Version"
- Enter a version name
- Select Cloud Credentials
- Select "Zonal" as the Location Type
For the Zone, select "Allow Limited" for the Override. This will allow you to limit the possible region selections that a user can choose from when using the cluster template.
- Select the Zones you will use for your K8s cluster and worker nodes
For the K8S Version, select "Allow Limited" for the Override. This will allow you to limit the possible kubernetes version selections that a user can choose from when using the cluster template.
- Click "Add Version"
- Select the latest version
- Click "Add Version" again
- Select the next latest version
- Select the default blueprint

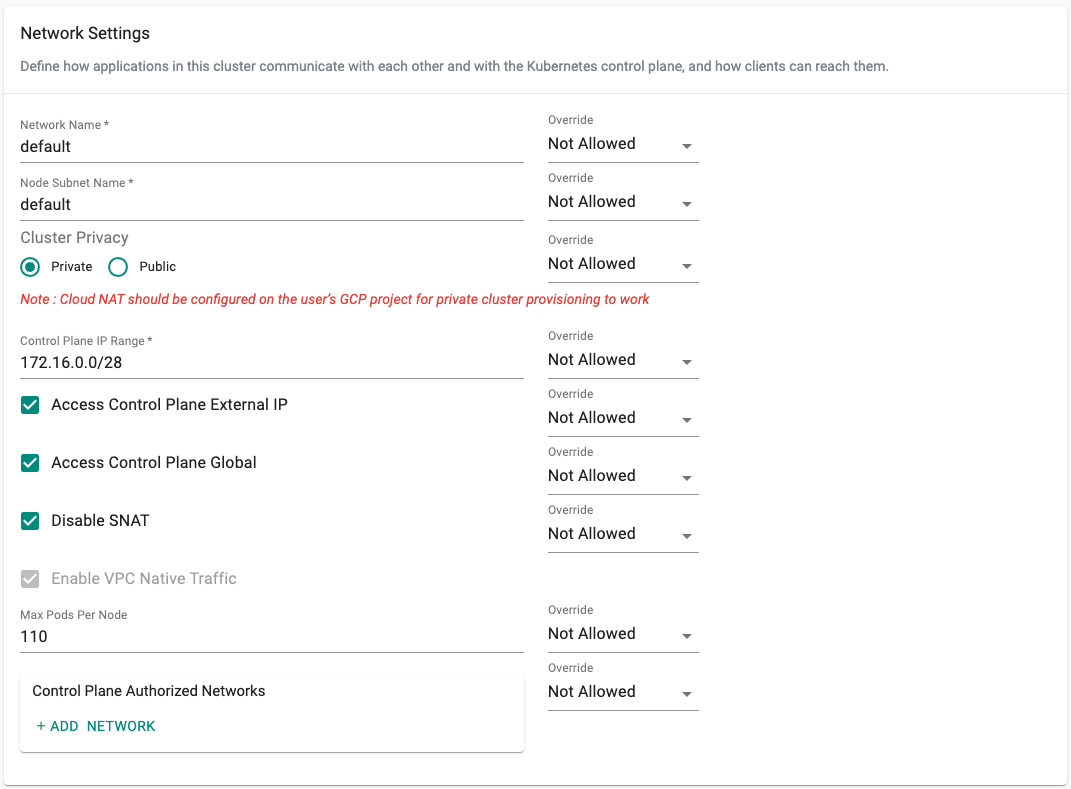
- Navigate to the "Network Settings"
If you have not created a custom network and custom subnets, you can use the default network and subnets. You can leave the defaults as is and select "Not Allowed" for all Network Settings.
- Navigate to the "Node Pools"
- Edit the Node Pool "default-nodepool"
For the K8S Version, select "Allow Limited" for the Override. This will allow you to limit the possible kubernetes version selections that a user can choose from when using the cluster template.
- Add the same K8s versions that were added above
- Change the "Number of Nodes" override to "Allowed"
- Change the "Number of Nodes" value to "3"
For the Machine Type, select "Allow Limited" for the Override. This will allow you to limit the possible instance size selections that a user can choose from when using the cluster template.
- Click "Add Machine Type"
- Select "e2-standard-2"
- Click "Save"
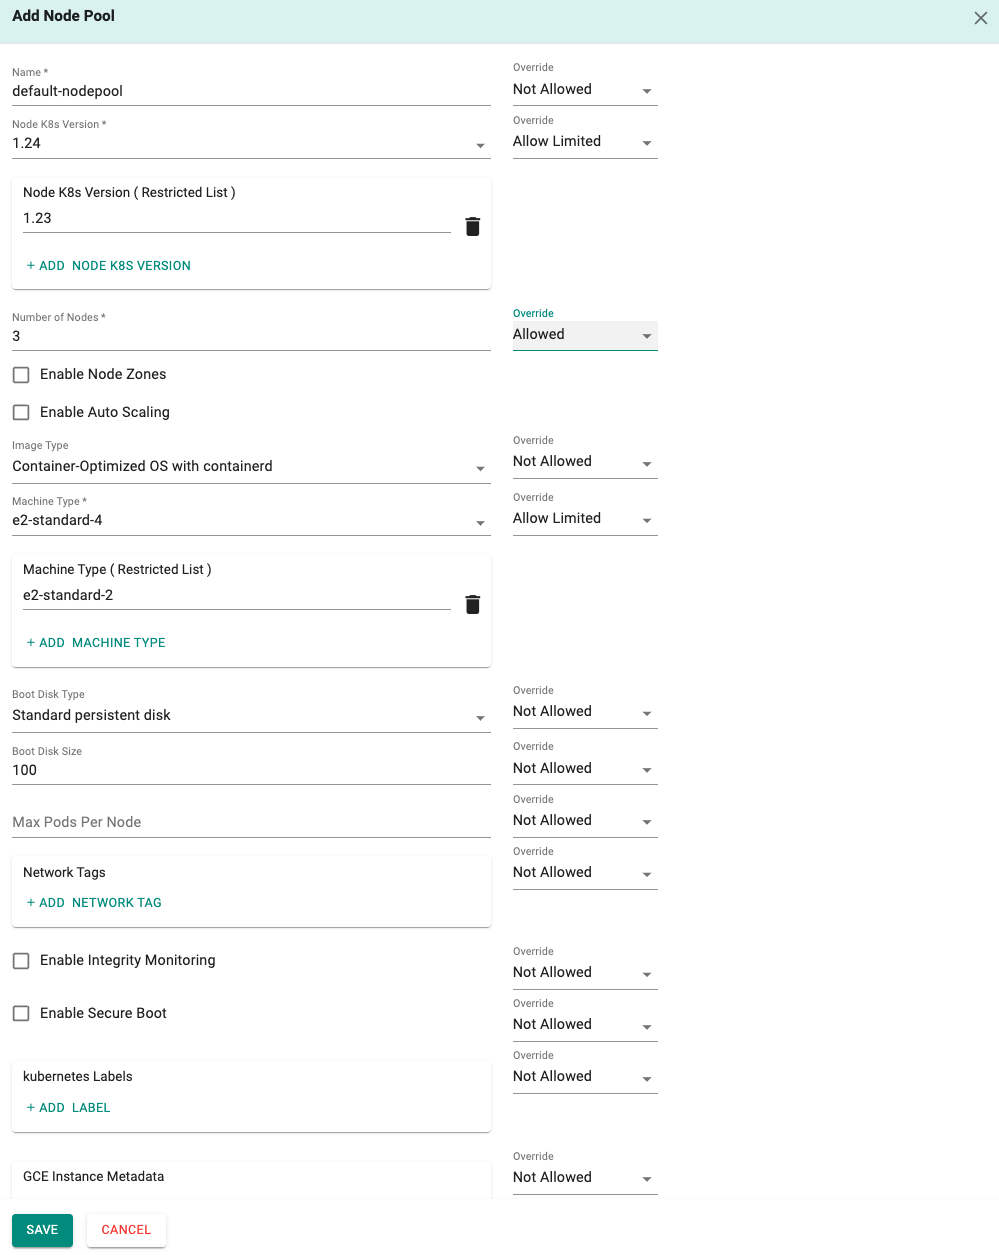
Security Settings, Feature Settings, and Advanced Settings can be left with the default values.
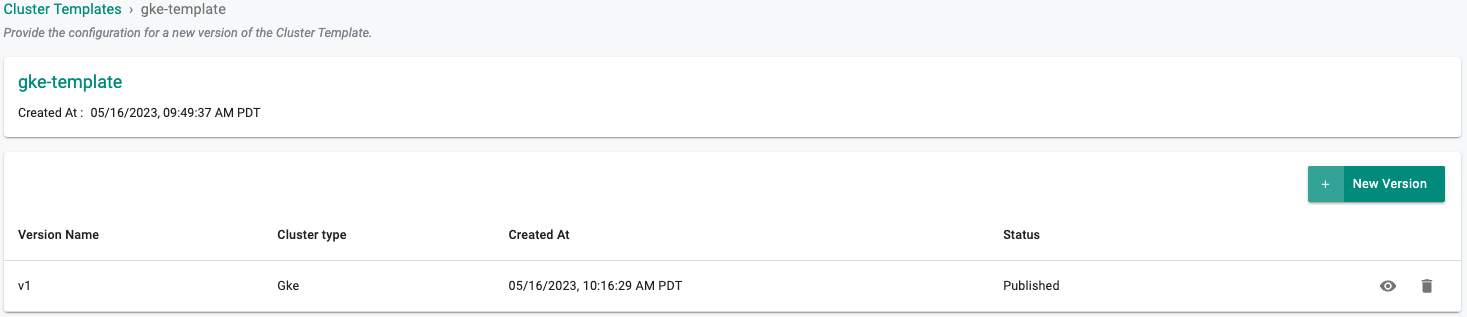
- Select "SAVE CHANGES"
Recap
In this part, you successfully created a user with a limited role that can only provision clusters from cluster templates. You also successfully created a cluster template that the user can use.