Part 4: Self-Service via RBAC
What Will You Do
In order to enable developer-self service in Kubernetes, platform teams typically create namespaces for developers that they can use to build and test application changes. However, one of the biggest challenges when it comes to network visibility today is that platform teams do not appreciate the nuances of the applications that developers are building. In order to remove any operational bottlenecks when it comes to troubleshooting applications, platform teams can delegate visibility and configuration of policies for specific applications to developers while providing the higher-level default policies for isolation, cluster-wide defaults, and more.
In this part of the self-paced exercise, we will simulate a situation where we will create a user which has only namespace admin privileges. In this case, the namespace admin, a stormtrooper who is part of the empire, will only have access to the empire namespace from the previous steps. The platform admin gets to see everything but the namespace admin (the developer/stormtrooper in this case) only has visibility over their specific namespace and any application communicating with the pods/apps belonging to their specific namespace.
Create User
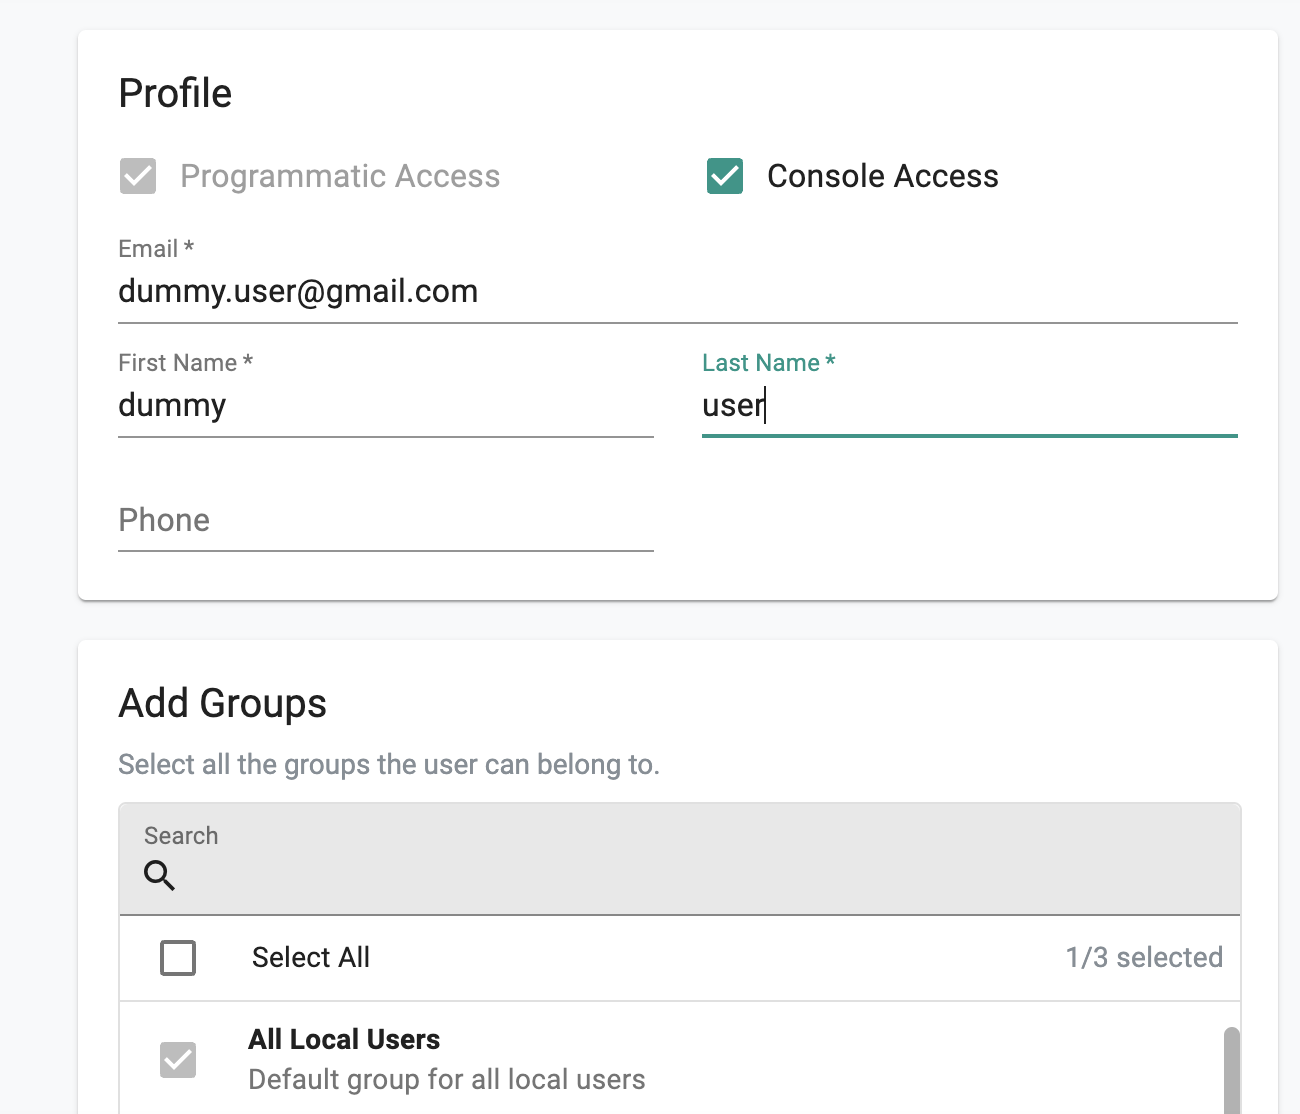
- Navigate to home and go to system and click users
- Click new user
- Enable console access for the user
- Enter in an email that you would like to use for testing. You can delete this user after testing.
- For the groups, only select All Local Users. Click save and next. When you get the message about not having access to any resources, click yes.
- Search for the user in the list and click it.

Assign User To Project and Namespace Admin Role
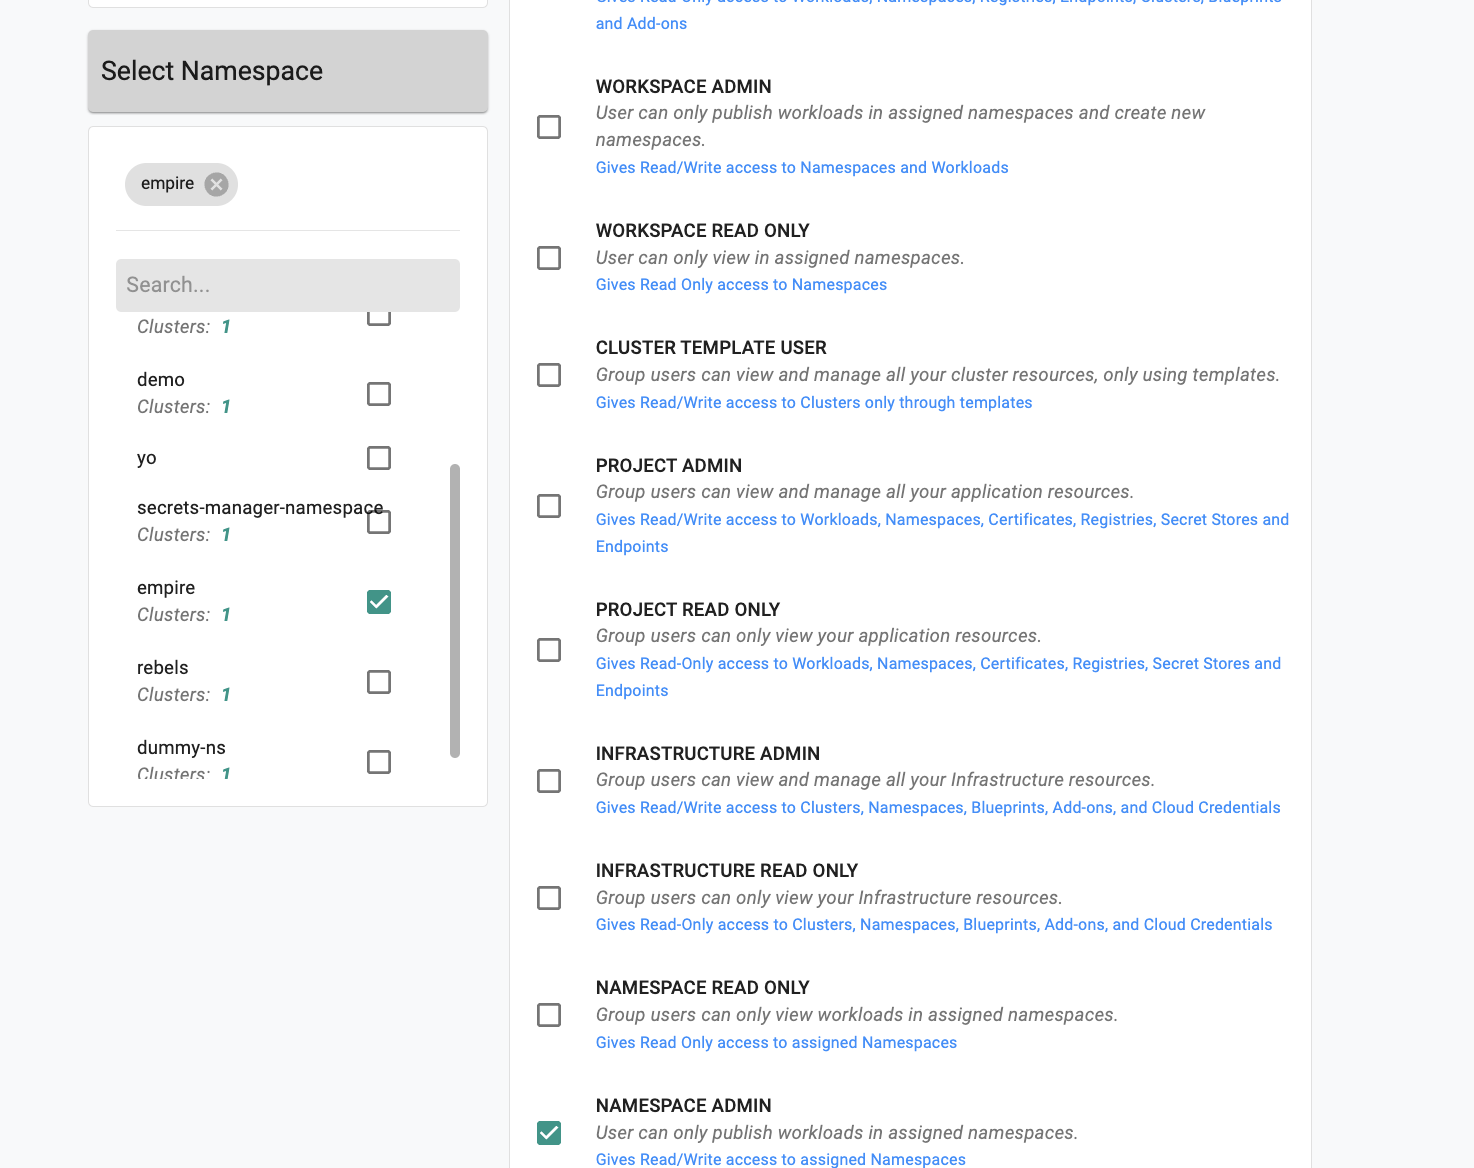
- Under projects tab, click assign user to project.
- Select the project in the dropdown that your cluster is in.
- For the role, select Namespace Admin.
- In the namespace dropdown on the left, find and check the empire namespace. Click save and exit.

Navigate to the visibility dashboards as a namespace admin
- Go to your email and sign into the Rafay console with the information provided.
- Go to dashboards then network policy.
- Use the dropdown menus to select project and cluster.
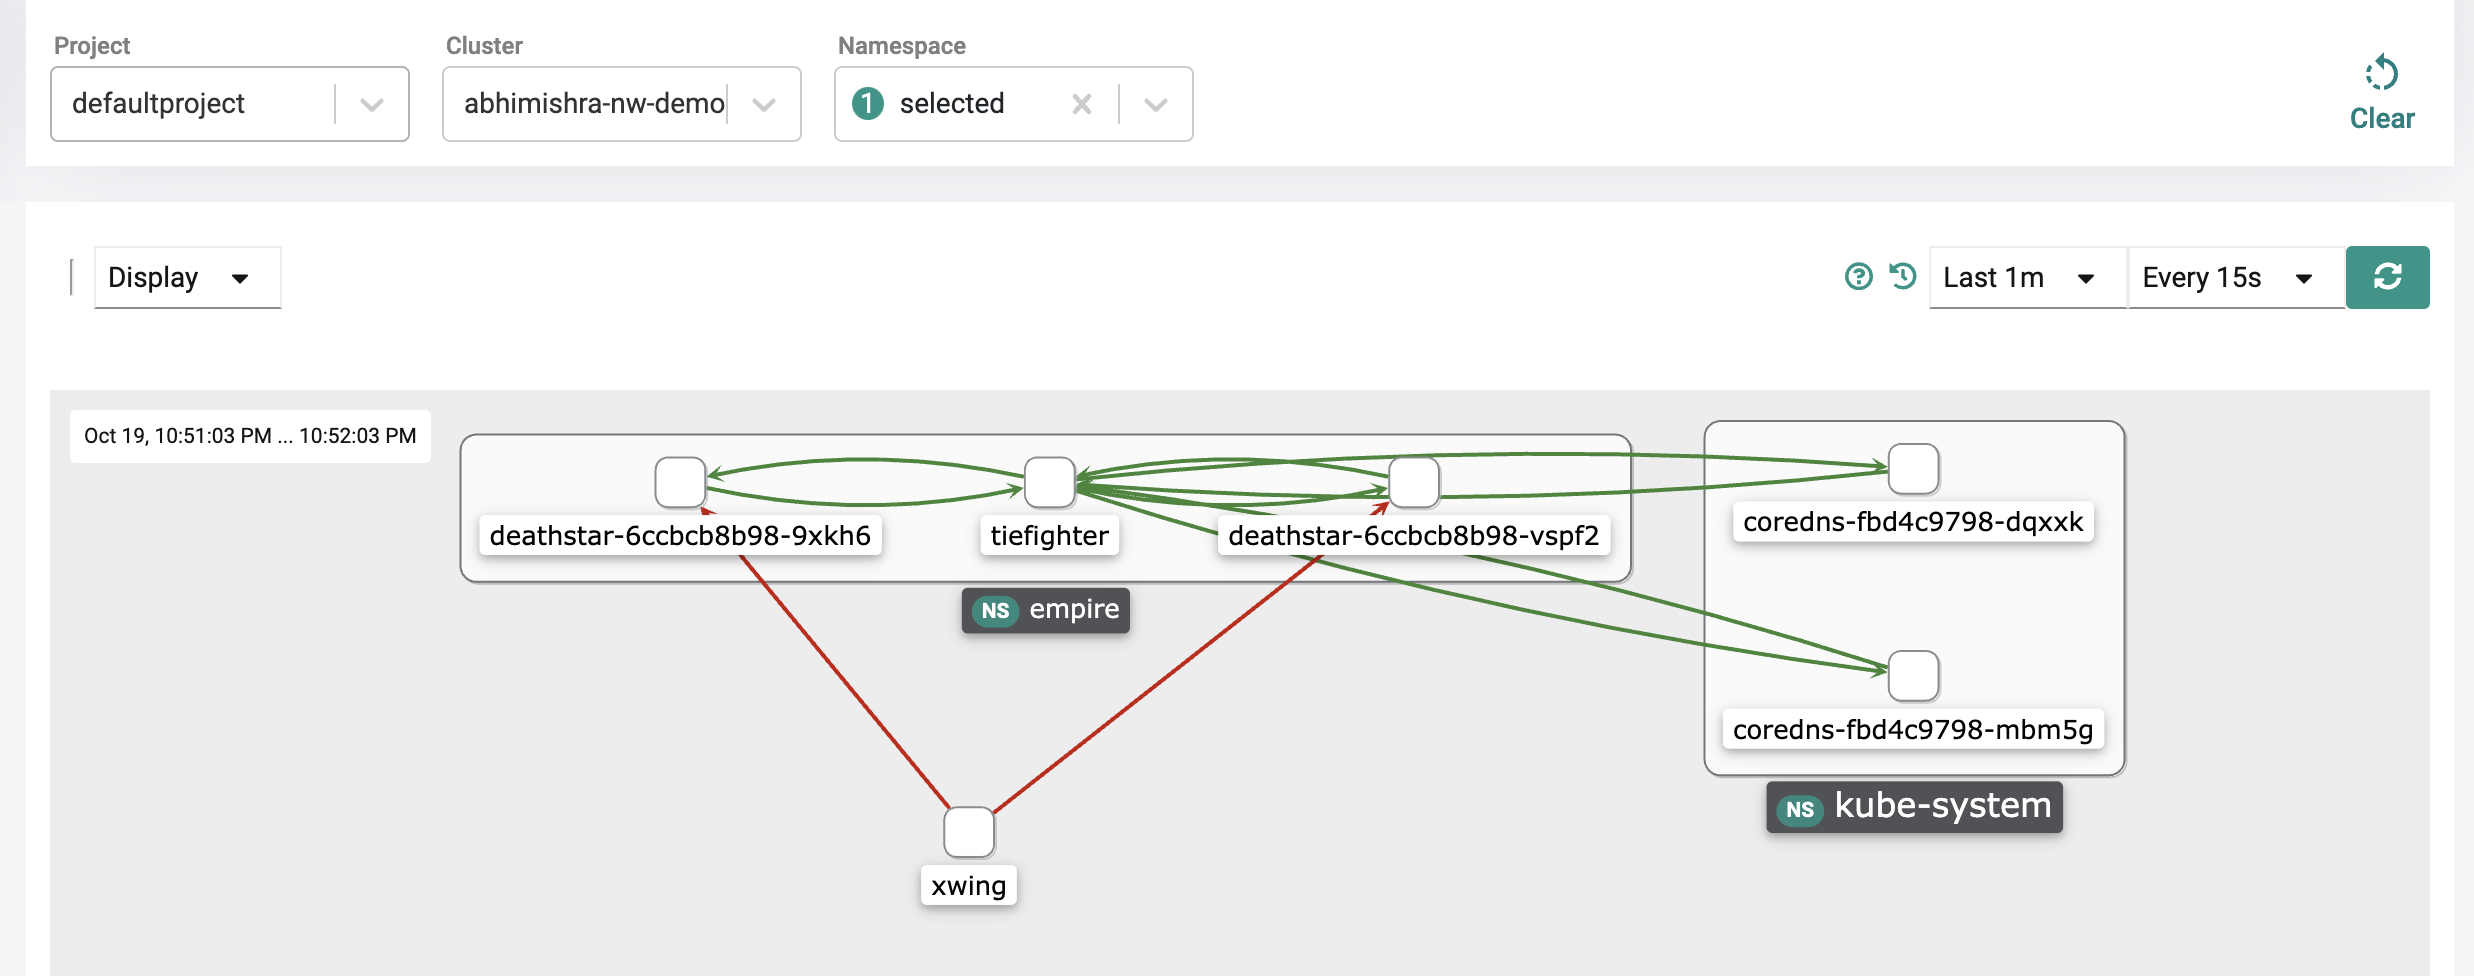
- Under the namespace dropdown, as a namespace admin with access only to empire, you should only see the empire namespace and not rebels. Select the empire namespace.
- Under the visibility screen, you can view traffic for your specific empire namespace.

Notice that while you had visibility into all the namespaces before, namespace admins only have visibility into their specific applications (based on namespace ownership) and any other pod that is communicating with their specific applications. In this case, this means that the namespace admin sees the tiefighter and deathstar of course, but sees xwing as an "unknown" pod communicating with their application. The namespace admin cannot see that the xwing belongs to the rebels namespace. The namespace admin would be able to look at this and then inform the platform admin that traffic is coming from an unknown entity as an example.
This functionality allows delegation of responsibilities and ownership via RBAC making sure that developers don't have visibility into other applications belonging to other teams. This allows you to remove any operational bottlenecks as developers can troubleshoot communication flows for their specific applications themselves and only involve platform and operations admins when they are unable to troubleshoot.
Delete the test user
- Logout as the namespace admin and login with your original user credentials you were using before.
- Go to system and users.
- Find the test user you created.
- Click delete (the trash icon to the right of the user).
Recap
Congratulations! At this point, you have successfully validated self-service via RBAC controls for network visibility and policies.