Provision
This is Part 1 of a multi-part, self-paced quick start exercise that will focus on provisioning a PaaS environment in AWS using Terraform.
What Will You Do
In part 1, you will:
- Create the following resources using Rafay's Terraform provider
- Project
- Group
- Group Association
- Cloud Credential
- Custom Blueprint
- Custom OPA Policy
- Custom OPA Installation Profile
- Add-ons
- nginx
- cert-manager
- karpenter
- karpenter-nodepool
- Cluster Override
- nginx
- cert-manager
- karpenter
- Repositories
- nginx
- cert-manager
- rafay-gs
- OPA Constraints / Constraint Templates
- allow-privilege-escalation-container-custom
- allowed-users-custom
- app-armor-custom
- flex-volumes-custom
- forbidden-sysctls-custom
- host-filesystem-custom
- host-namespace-custom
- host-network-ports-custom
- linux-capabilities-custom
- privileged-container-custom
- proc-mount-custom
- read-only-root-filesystem-custom
- se-linux-custom
- seccomp-custom
- volume-types-custom
- disallowed-tags-custom
- replica-limits-custom
- required-annotations-custom
- required-labels-custom
- required-probes-custom
- allowed-repos-custom
- block-nodeport-services-custom
- https-only-custom
- image-digests-custom
- container-limits-custom
- container-resource-ratios-custom
- EKS Cluster
- Verify cluster health
- Review available dashboards
Step 1: Configure & Provision Rafay Resources
In this step, you will configure and customize your AWS EKS Cluster using Terraform with some configuration files.
Make sure the following are installed or available.
- Terraform
- Text editor (or ability to update files using a terminal)
Make sure you have the following information. You may need to create these in your AWS environment or in the console.
- AWS Role ARN
- AWS External ID
- Subnet IDs (Optional if full IAM policy used)
To provision a cluster using Terraform:
- Download and decompress the Get Started package. Navigate to the
terraform/caas_terraformfolder. - Download the CLI config from the "MY TOOLS" section in the console.
- Replace the
config.jsonfile downloaded in the previous step. The file location is terraform/caas_terraform/artifacts/credentials/config.json. - Edit the
terraform.tfvarsfile. The file location is terraform/caas_terraform/eks/terraform.tfvars. Below is a list of variables you might change for this exercise.projectrolearnexternalidcluster_namek8s_versioncluster_locationcluster_tagscluster_admin_iam_roles(optional)private_subnet_ids(optional, subnets & sg require tags for Karpenter)public_subnet_ids(optional)instance_profile(optional)cluster_labels(optional)node_tags(optional)infra_addons(optional)constrain_templates(optional)opa-repo(optional)opa-branch(optional)opa_excluded_namespaces(optional)base_blueprint_versionoverrides_config
- Open the terminal or command line.
- Navigate to the
terraform/caas_terraform/eksfolder. - Run
terraform init.- Initializes the directory containing the Terraform configuration files, preparing the directory for use with Terraform.
- Run
terraform validate.- Validates the configuration files in the directory, without accessing any remote services.
- Run
terraform apply. Enteryeswhen prompted.- Provisions the cluster.
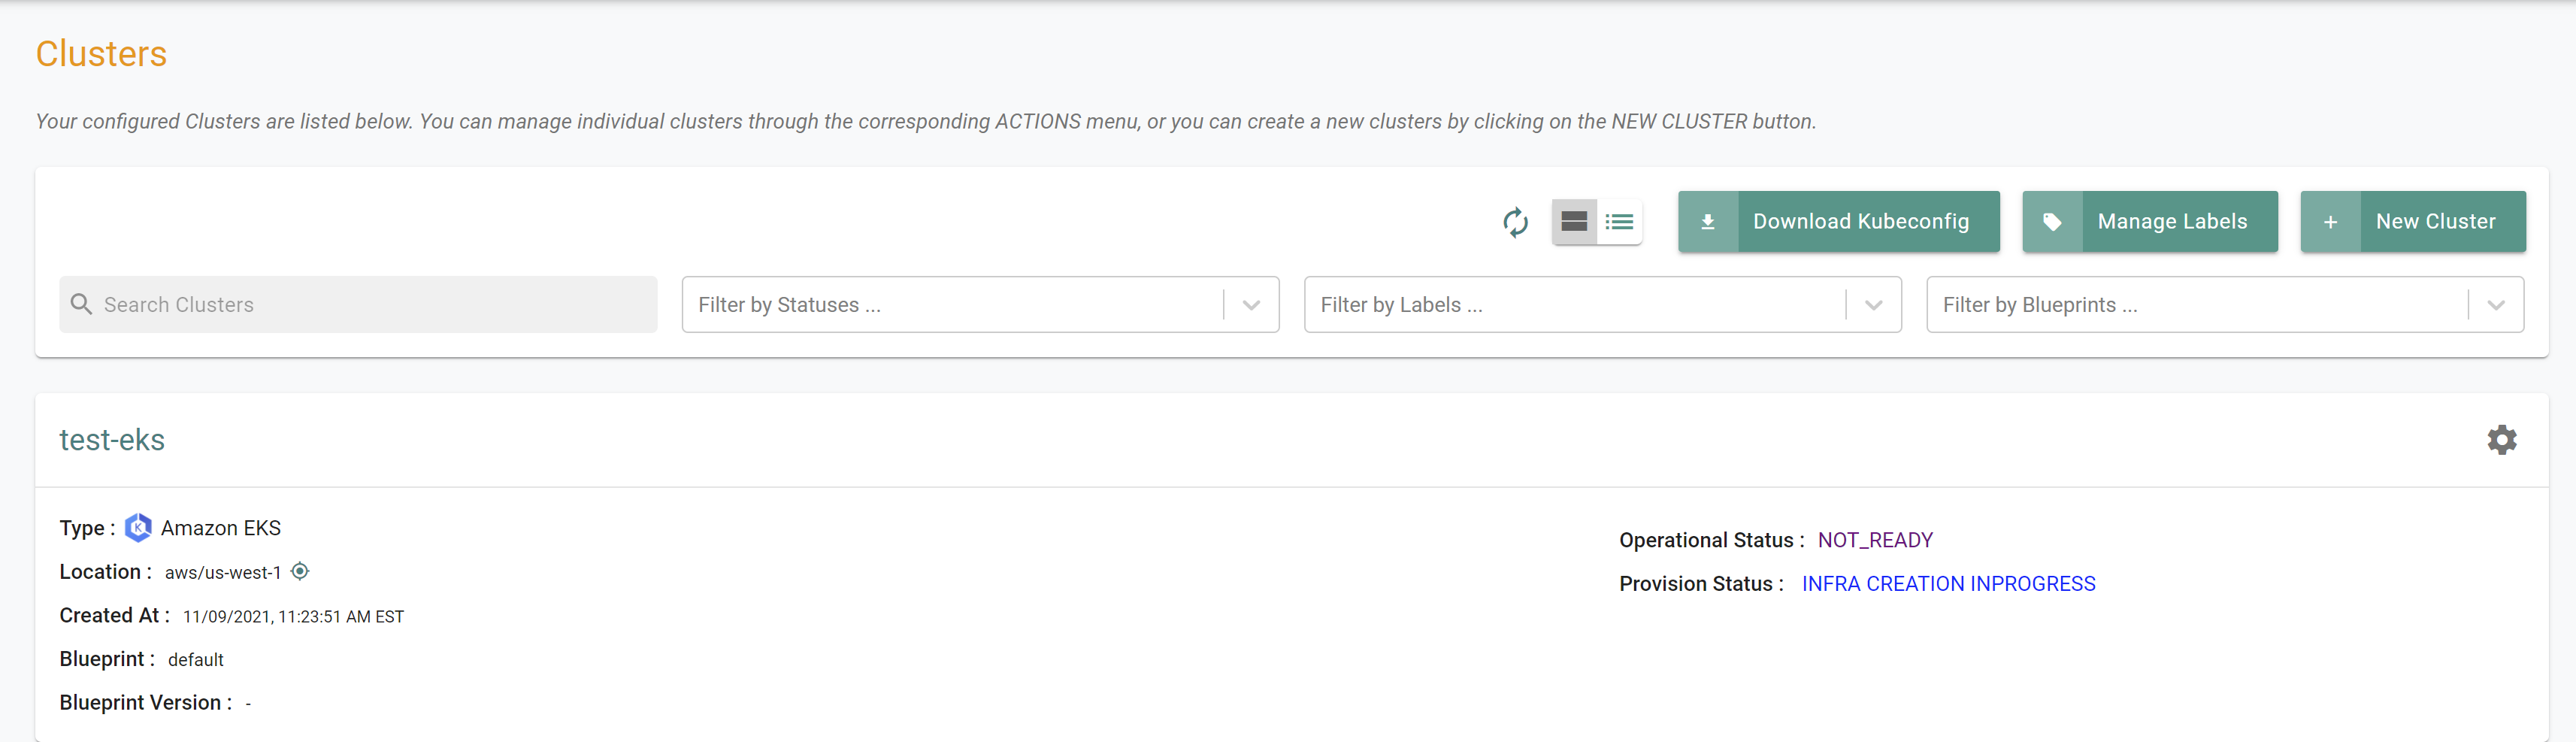
It can take 30 minutes to provision the cluster. Check the console for the provisioning status.
Step 2: Verify Cluster
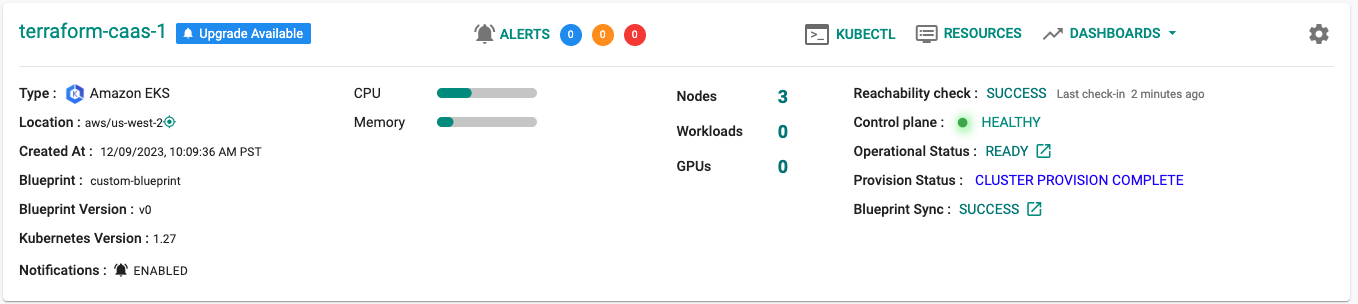
Once provisioning is complete, you should have a ready to use Amazon EKS Cluster. We will verify the cluster by checking its health and status.
Step 3: Cluster Status & Health
The Kubernetes management operator automatically deployed on the cluster by the controller will "maintain a heartbeat" with the controller and will "proactively monitor" the status of the components on the worker node required for communication with the control plane and the controller.
- Cluster reachability should be not more than 1 minute
- Control plane should report as Healthy
Step 4: Zero Trust Kubectl
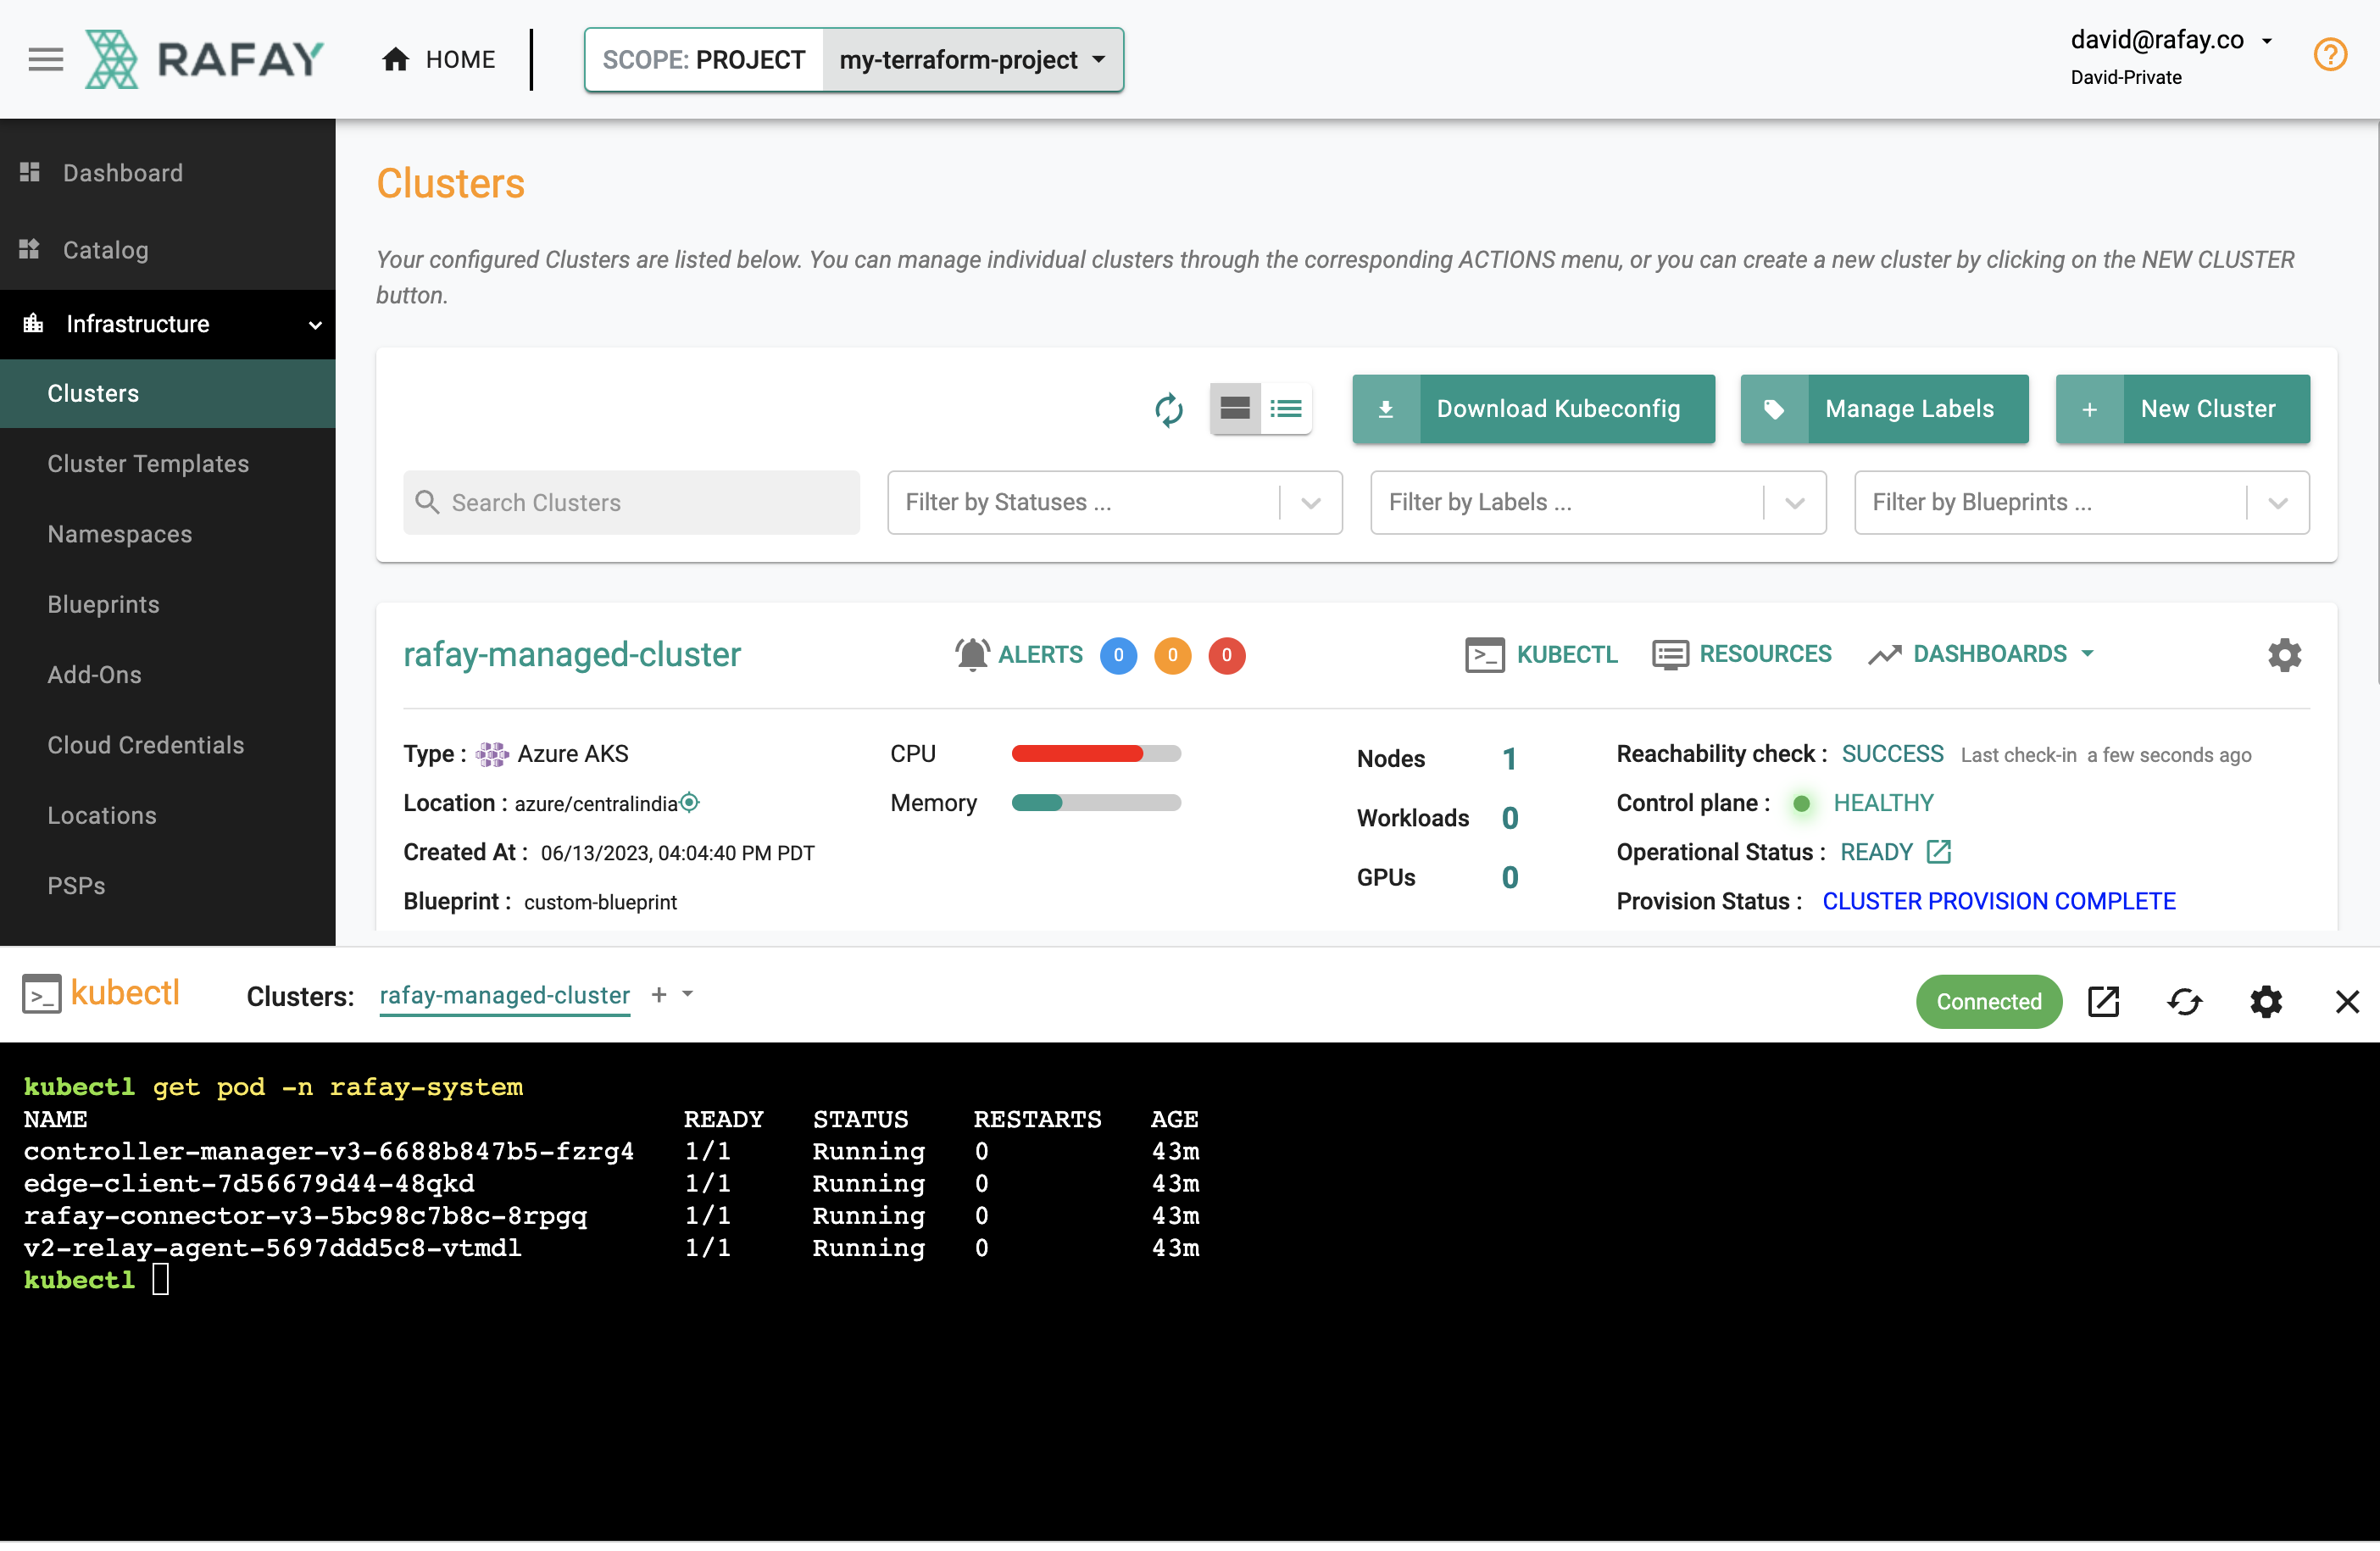
Your EKS Cluster's API Server is private and secure (i.e. cloaked and not directly reachable on the Internet). The controller provides a zero trust kubectl channel for authorized users.
- Click the "Kubectl" button on the cluster card.
- This will launch a web based kubectl shell for you to securely interact with the API server over a zero trust channel
- Type something like "kubectl get pod -n rafay-system"
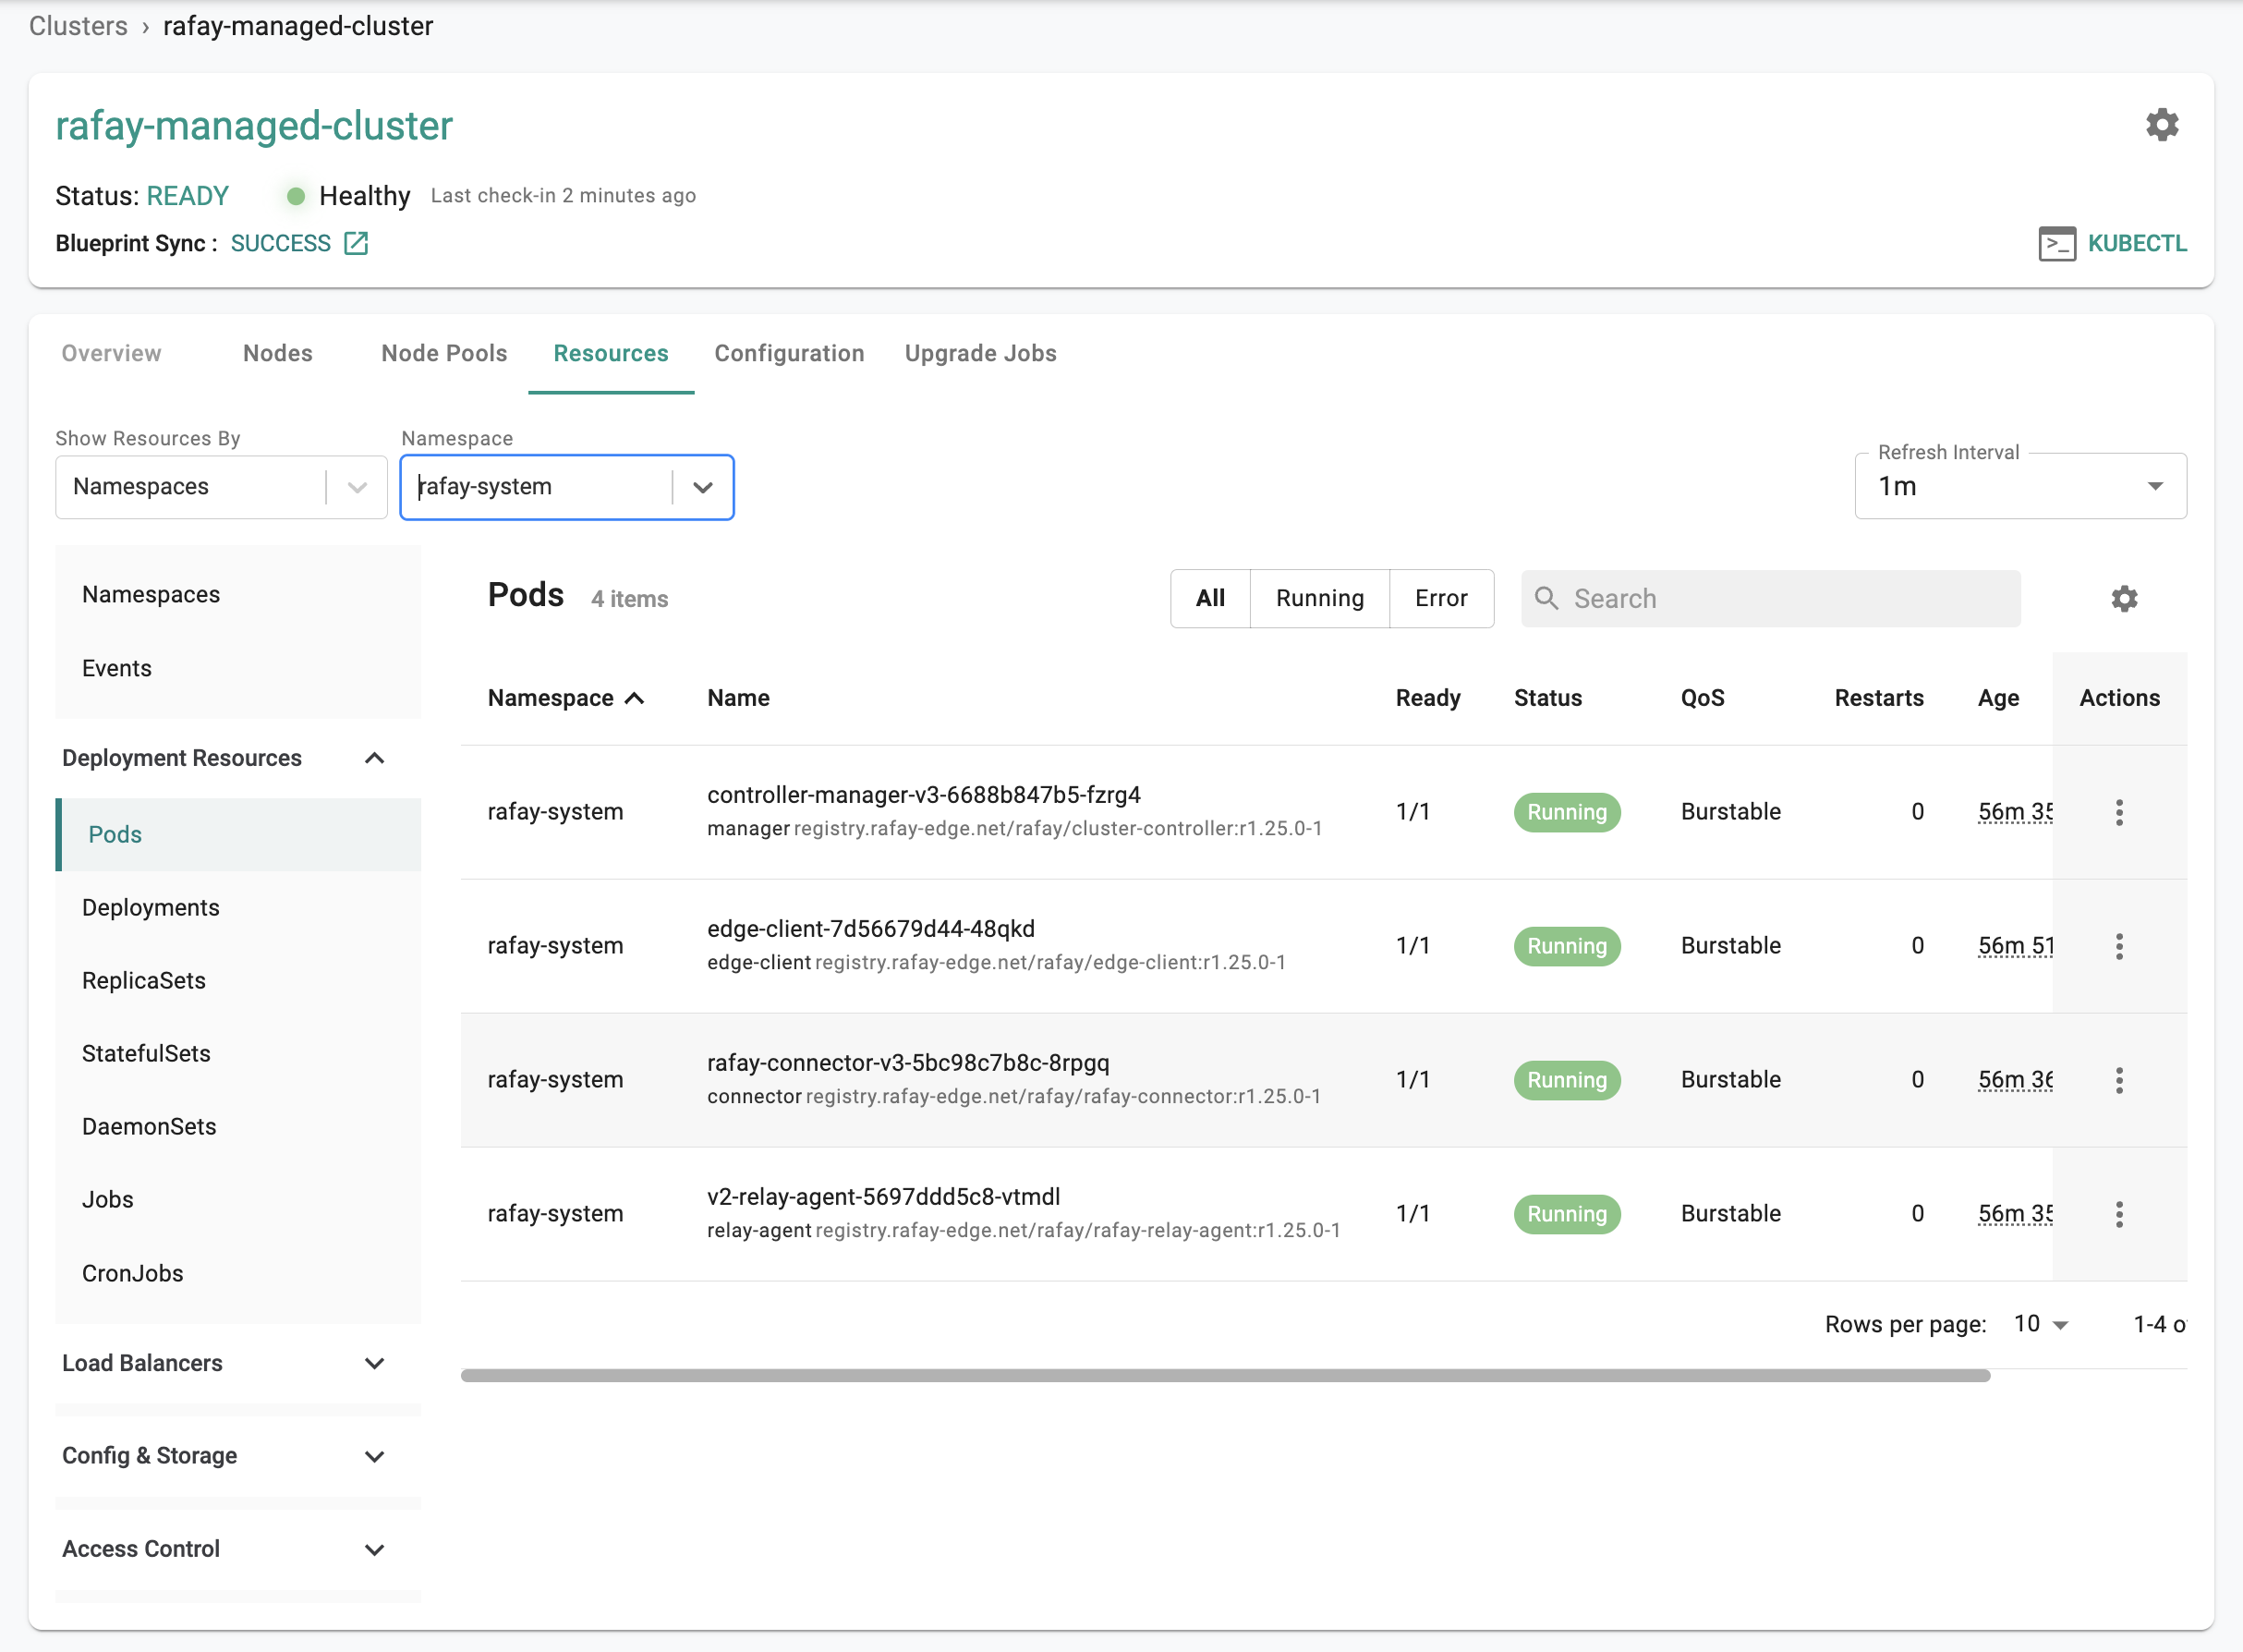
Step 5: Kubernetes Resources
The dashboard also comes with an integrated Kubernetes dashboard. Click on "Resources" and you will be presented with all the Kubernetes resources organized using a number of filters.
Recap
Congratulations! At this point, you have
- Successfully configured and provisioned an Amazon EKS cluster
- Used zero trust kubectl to securely access the cluster's API server
- Used the integrated k8s dashboards to monitor and view details about the cluster