Part 1: Setup
What Will You Do
This is Part 1 of a multi-part, self-paced quick start exercise. In this part, you will perform a few "one-time" tasks required for cluster provisioning and lifecycle management.
Step 1: Download RCTL (Optional)
If you plan on performing the remainder of this excercise using a declarative based approach, you will need to install the RCTL CLI.
The RCTL CLI allows you to programmatically interact with the controller enabling users to construct sophisticated automation workflows.
- Login into your Org
- Navigate to "My Tools" to download both the RCTL CLI and the "CLI Config" file
- Initialize RCTL using the step-by-step instructions
- Ensure you update your OS's Path environment variable for RCTL
Step 2: Create Gateway
In this step you will provision a gateway VM in the vSphere environment. To facilitate the installation of Kubernetes clusters into private datacenters without a direct incoming connection from the management console, a gateway is necessary. Users can install the gateway by deploying an OVF in vSphere vCenter.
First, you will create the gateway resource in the console.
- Navigate to a project in your Org
- Select Infrastructure -> Gateway
- Click "New Gateway"
- Enter a name for the gateway
- Click "Create"

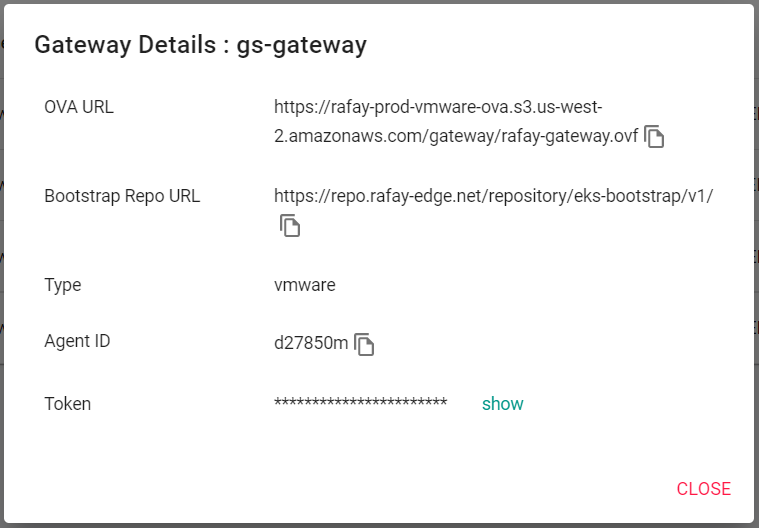
- Click "View Details" of the newly created gateway.
The information in this screen will be needed to deploy the gateway in vSphere.
Next, you will deploy the gateway OVF in vSphere.
- Navigate to your vCenter server
- Right-click on the datacenter where the OVF is to be deployed
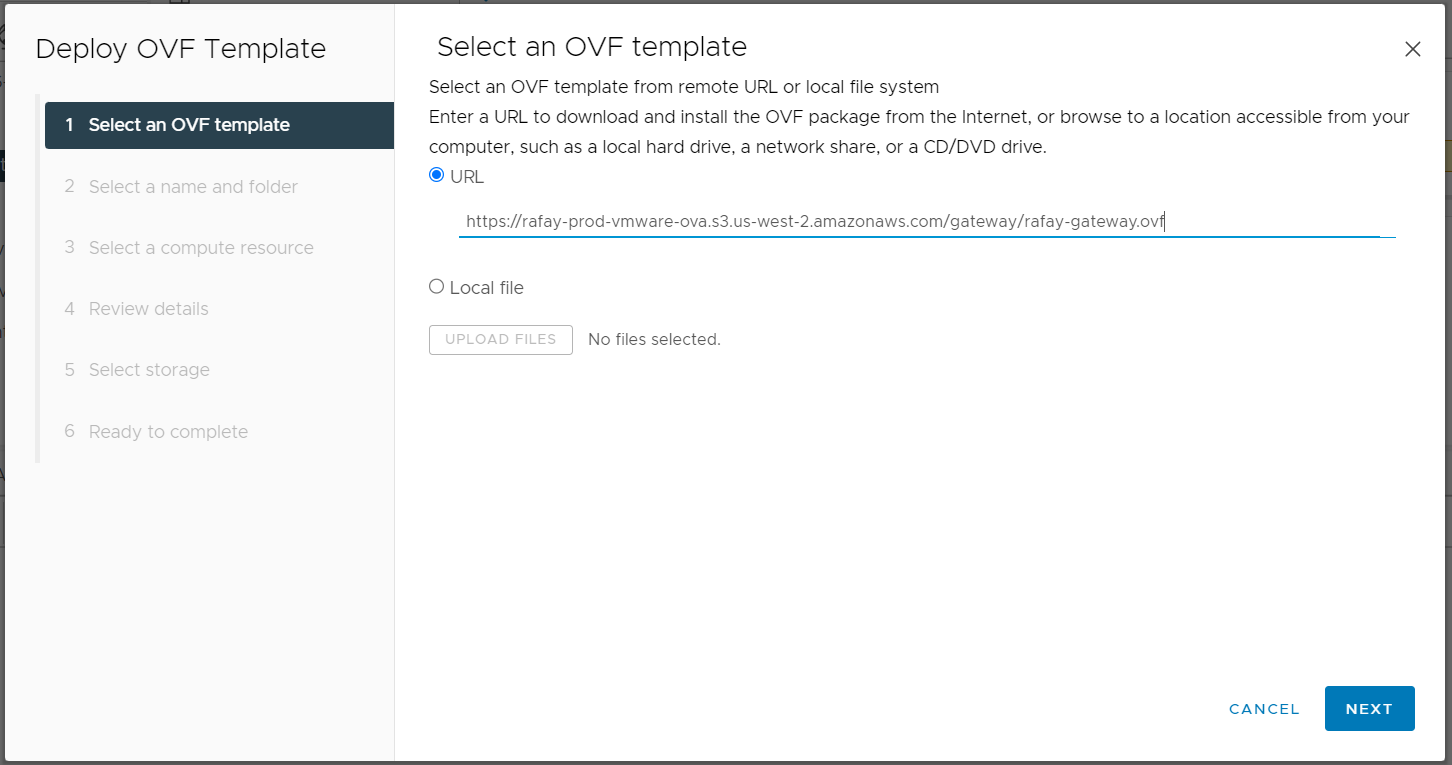
- Select "Deploy OVF Template"
- Copy and paste the OVA URL from the gateway details screen into the URL section of the wizard
- Click "Next"
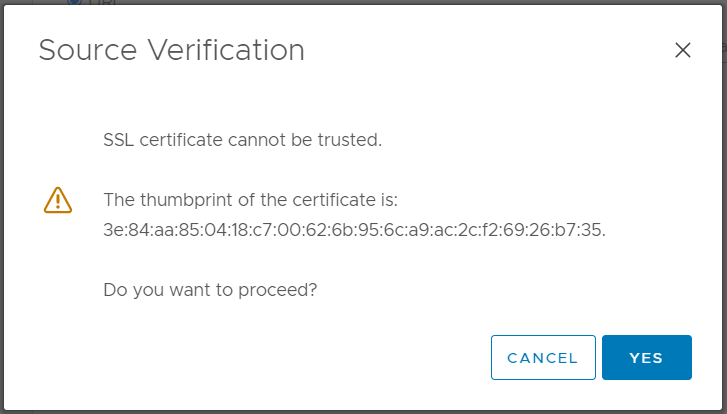
- Click "Yes" for the source verification and proceed
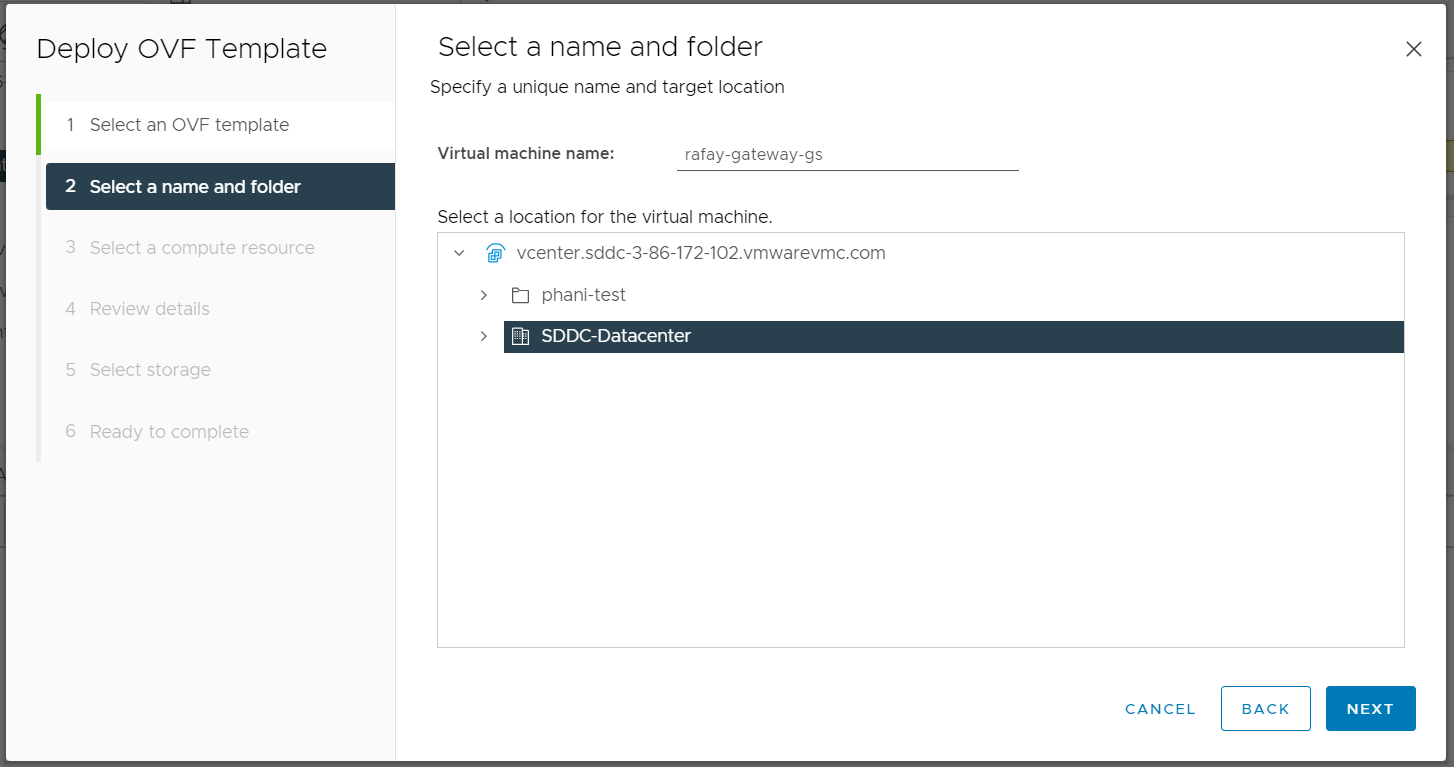
- Enter a "Virtual machine name" for the gateway VM
- Select a folder location for the virtual machine to reside
- Click "Next"
- Select a compute resource to run the gateway VM
- Click "Next"
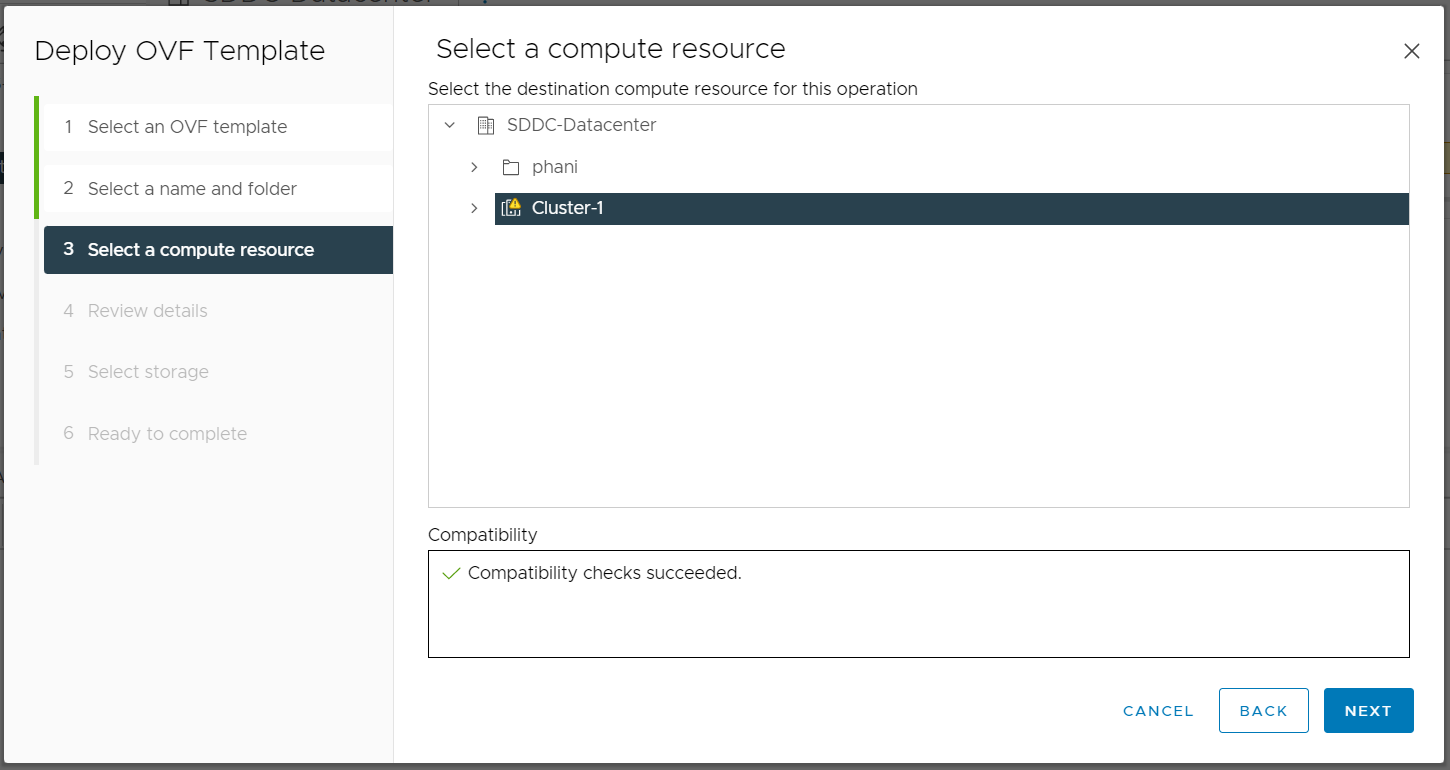
- Review the configuration details screen
- Click "Next"

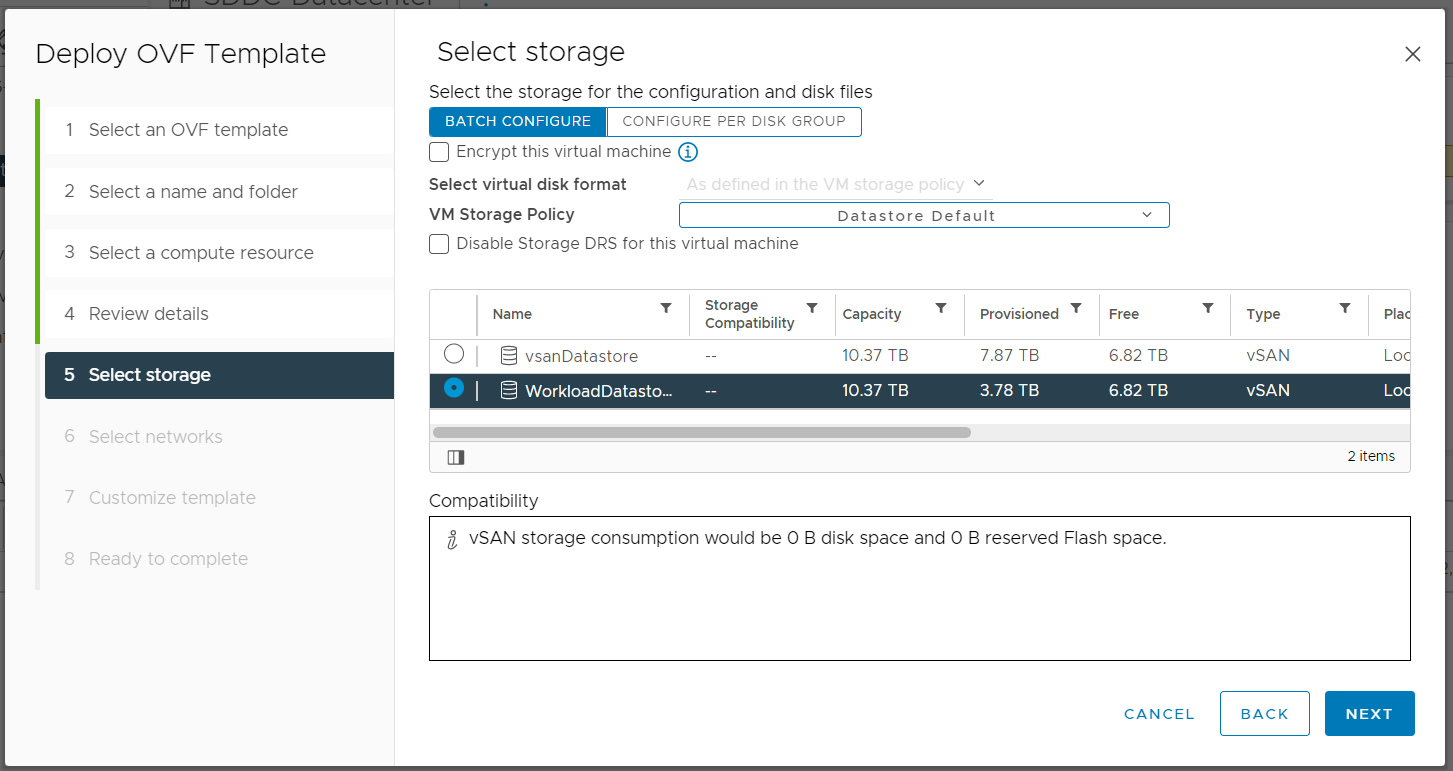
- Select the storage location to store the gateway VM
- Click "Next"
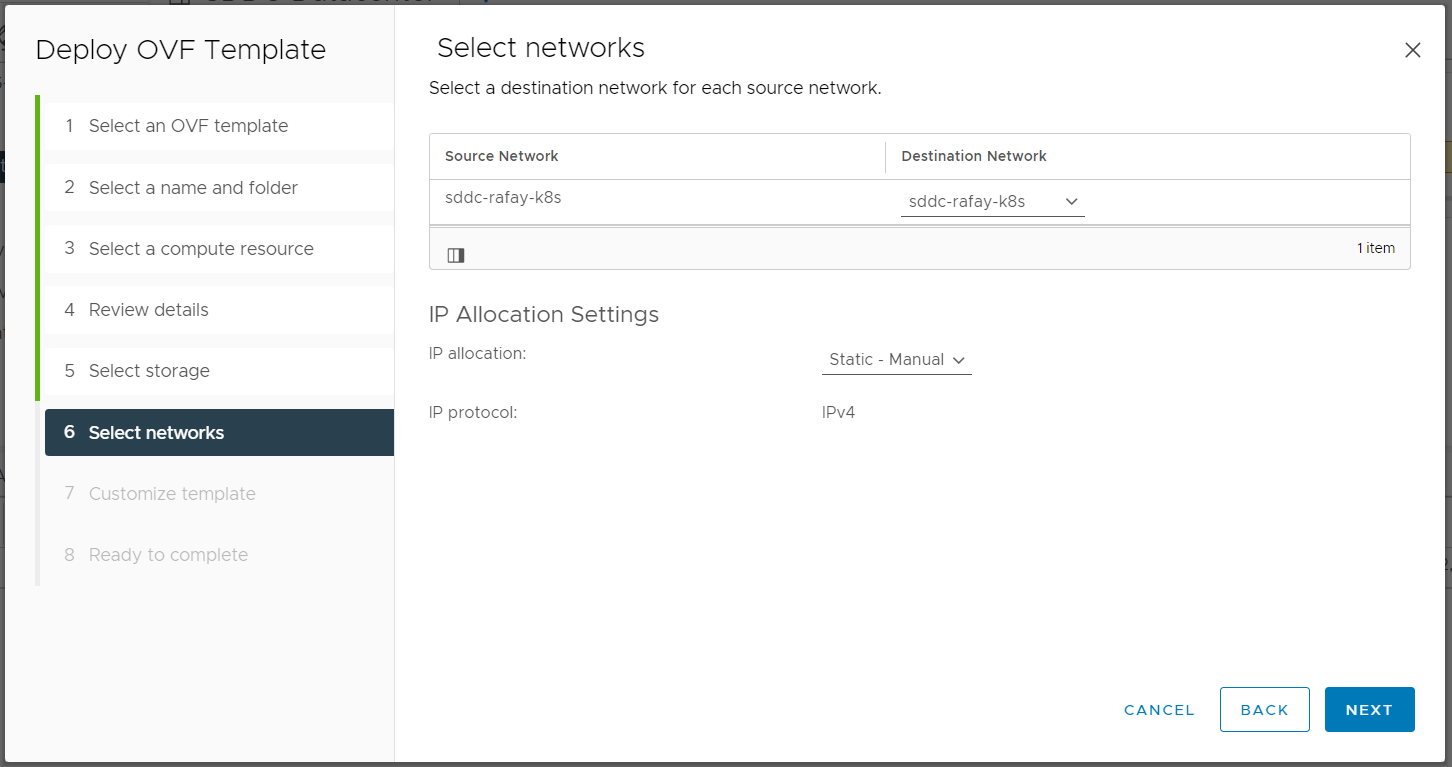
-
Select the network for the gateway VM Note: The network must have DHCP and allow access to the external controller
-
Click "Next"
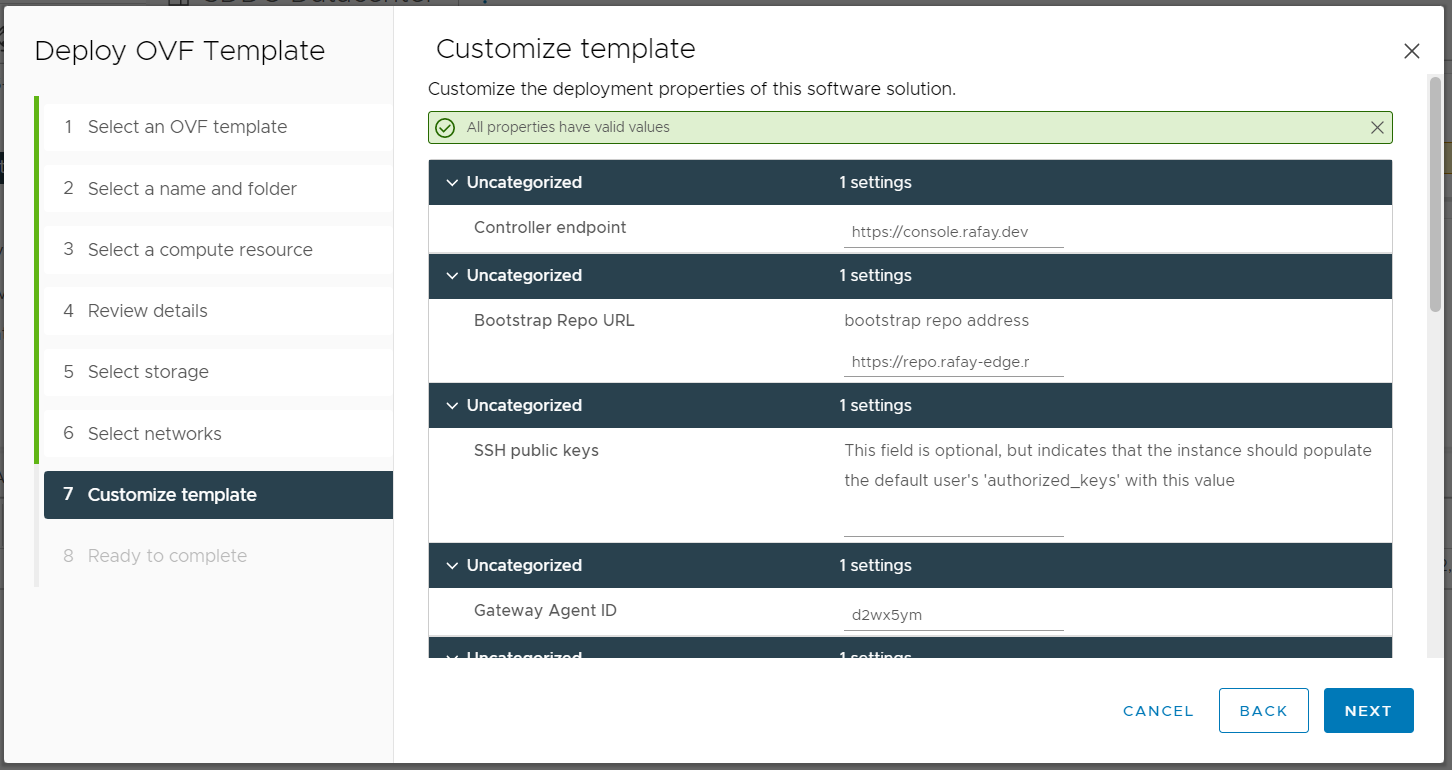
Populate the template custimization screen. The following sections should be populated with the information from the Gateway details screen in the console
- Bootstrap Repo URL
- Gateway Agent ID
- Gateway Token
If required, populate the proxy server information
- Click "Next"
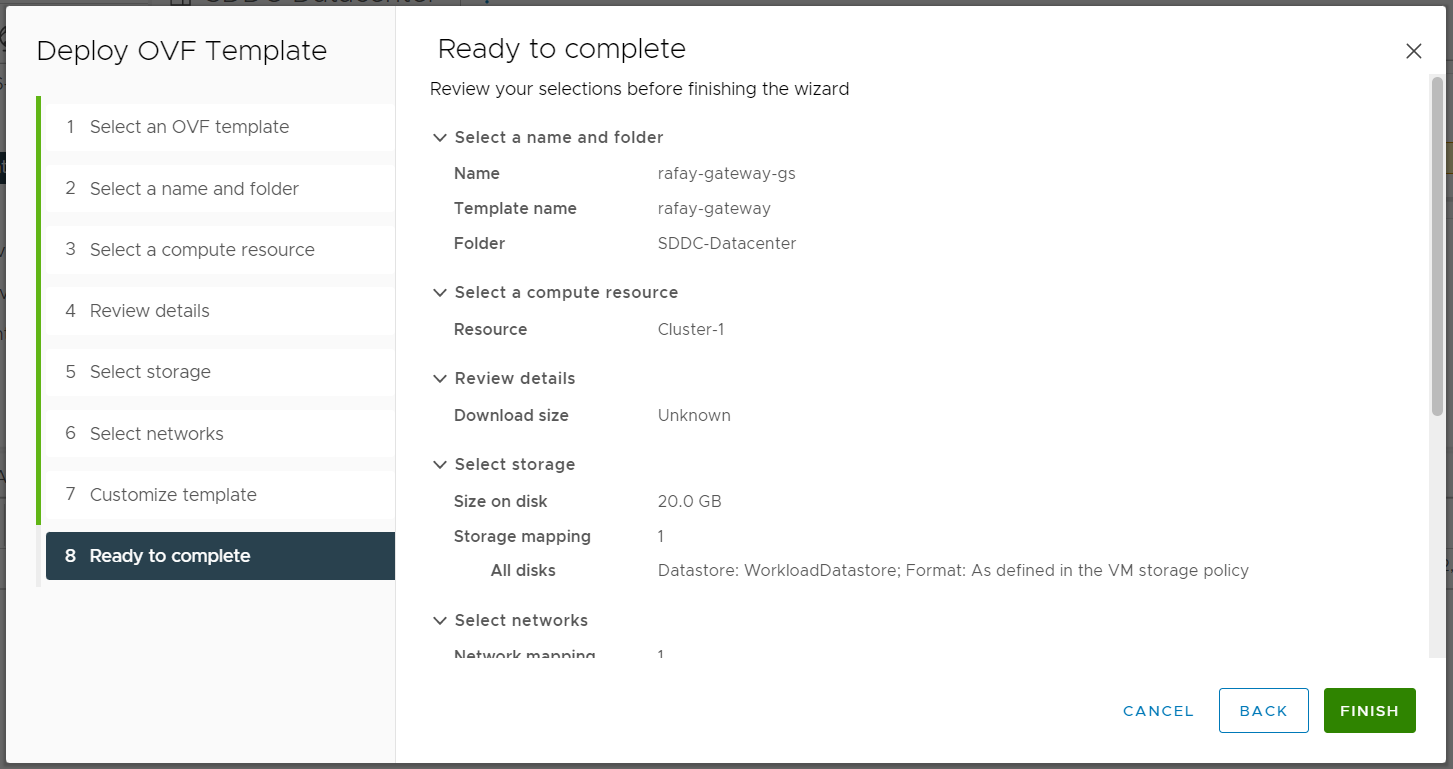
- Review the configuration details
- Click "Finish"
You can view the deployment progress in the "Recent Tasks" section

- Once the gateway is deployed, Power on the VM
Step 3: Create Cloud Credentials
In this step, you will create a cloud credential. Cloud credentials provide privileges to programmatically interact with your vSphere vCenter so that the lifecycle of infrastructure associated with the vSphere clusters can be managed.
- Navigate to your project
- Select Infrastructure -> Cloud Credentials
- Click "New Credential"
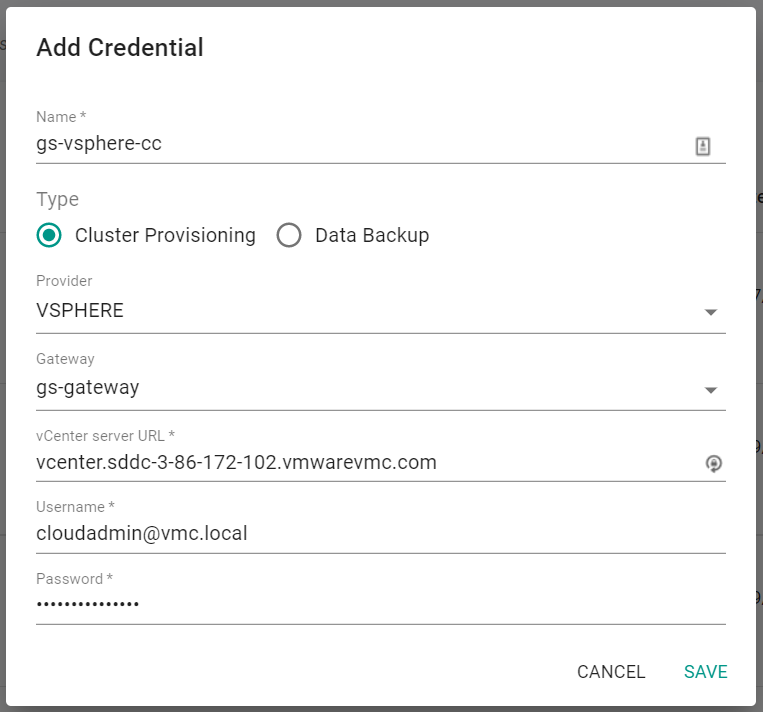
- Enter a name for the credential
- Select "Cluster Provisioning" for the type
- Select "VSPHERE" for the provider
- Select the previously created gateway
- Enter the vCenter server URL (NOTE: Do NOT include the "https://" when entering the URL )
- Enter the vCenter username for a user with the appropriate permissions
- Enter the vCenter user password
- Click "Save"
Step 2: Create Gateway
In this step you will provision a gateway VM in the vSphere environment. To facilitate the installation of Kubernetes clusters into private datacenters without a direct incoming connection from the management console, a gateway is necessary. Users can install the gateway by deploying an OVF in vSphere vCenter.
First, you will create the gateway resource using the RCTL CLI.
- Open a terminal (on macOS/Linux) or Command Prompt (Windows)
- Type the command below to create the gateway. Note, the name of the gateway, gs-gateway, in the command below can be changed.
rctl create gateway gs-gateway --gatewaytype vmware
- Navigate to the default project in your Org
- Select Infrastructure -> Gateway
You will see the gateway created.
Next, you will obtain the details of the gateway. The gateway details are needed in order to create the gateway in vCenter.
- Open a terminal (on macOS/Linux) or Command Prompt (Windows)
- Type the command below to get the gateway config details. Note, the name of the gateway, gs-gateway, in the command below should be changed to match the name of your gateway.
rctl get gateway gs-gateway -i
The gateway details are returned and look similar to the following:
{"agentID":"d27850m",
"agentName":"agent-gw-gs-gateway",
"bootstrapRepoUrl":"https://repo.rafay-edge.net/repository/eks-bootstrap/v1/",
"gatewayName":"gs-gateway",
"gatewayType":"vmware",
"ovaDownloadURL":"https://rafay-prod-vmware-ova.s3.us-west-2.amazonaws.com/gateway/rafay-gateway.ovf",
"relays":[{"addr":"app.rafay.dev:443",
"name":"rafay-core-infra-relay-agent",
"token":"ceuqs6am809ul7tf9230"}]}
The information in this output will be needed to deploy the gateway in vSphere.
Next, you will deploy the gateway OVF in vSphere.
- Navigate to your vCenter server
- Right-click on the datacenter where the OVF is to be deployed
- Select "Deploy OVF Template"
- Copy and paste the OVA URL from the gateway details obtained previously
- Click "Next"
- Click "Yes" for the source verification and proceed
- Enter a "Virtual machine name" for the gateway VM
- Select a folder location for the virtual machine to reside
- Click "Next"
- Select a compute resource to run the gateway VM
- Click "Next"
- Review the configuration details screen
- Click "Next"
- Select the storage location to store the gateway VM
- Click "Next"
-
Select the network for the gateway VM Note: The network must have DHCP and allow access to the external controller
-
Click "Next"
Populate the template custimization screen. The following sections should be populated with the gateway details obtained previously
- Bootstrap Repo URL
- Gateway Agent ID
- Gateway Token
If required, populate the proxy server information
- Click "Next"
- Review the configuration details
- Click "Finish"
You can view the deployment progress in the "Recent Tasks" section
- Once the gateway is deployed, Power on the VM
Step 3: Create Cloud Credentials
In this step, you will create a cloud credential. Cloud credentials provide privileges to programmatically interact with your vSphere vCenter so that the lifecycle of infrastructure associated with the vSphere clusters can be managed.
- Open a terminal (on macOS/Linux) or Command Prompt (Windows)
-
Type the command below to create the cloud credential. Note, the details in the command below should be updated to match your environment.
- Use the previously created gateway name
- Use the vCenter server URL (NOTE: Do NOT include the "https://" when entering the URL )
- Use the vCenter username for a user with the appropriate permissions
- Use the vCenter user password
rctl create credential vsphere gs-vpshere-cc --username administrator@vsphere.local --password password123 --vsphere-server vcenter.sddc-3-209-68-95.vmwarevmc.com --gateway gs-gateway
- Navigate to the default project in your Org
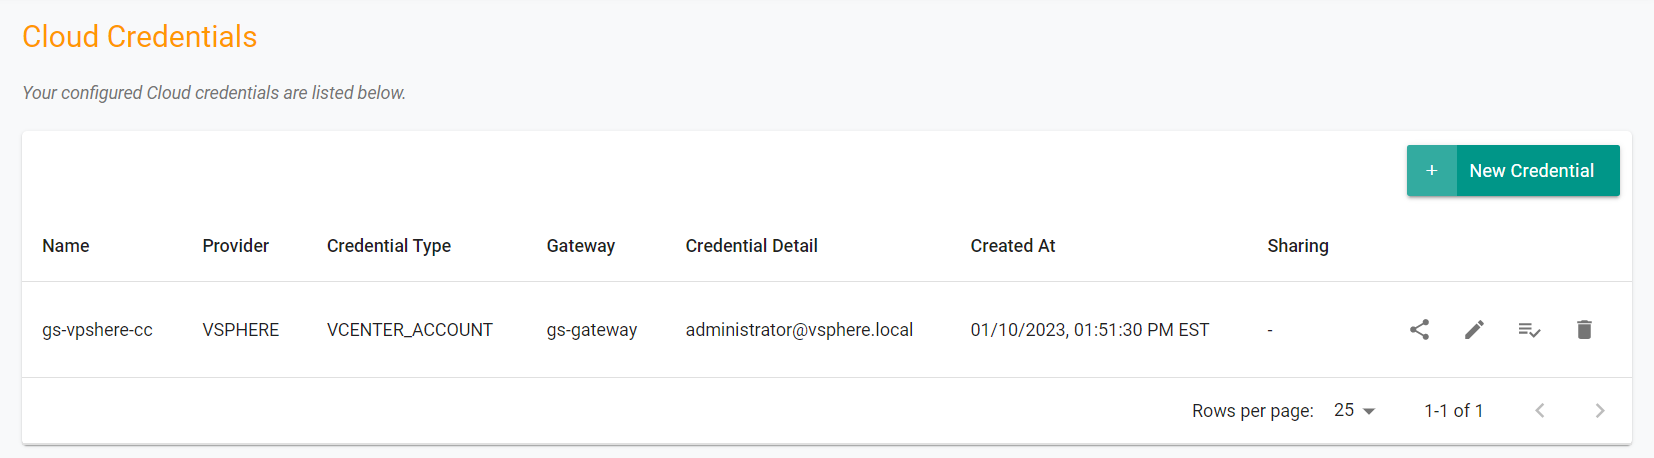
- Select Infrastructure -> Cloud Credentials
You will see the cloud credential created.
Recap
At this point, you have everything setup and configured to provision a vSphere cluster.