Azure AD
Follow the steps documented below to integrate your Org and AzureAD for Single Sign On (SSO).
Important
Only users with "Organization Admin" privileges can configure SSO in the Web Console.
Step 1: Create IdP
- Login into the Web Console as an Organization Admin
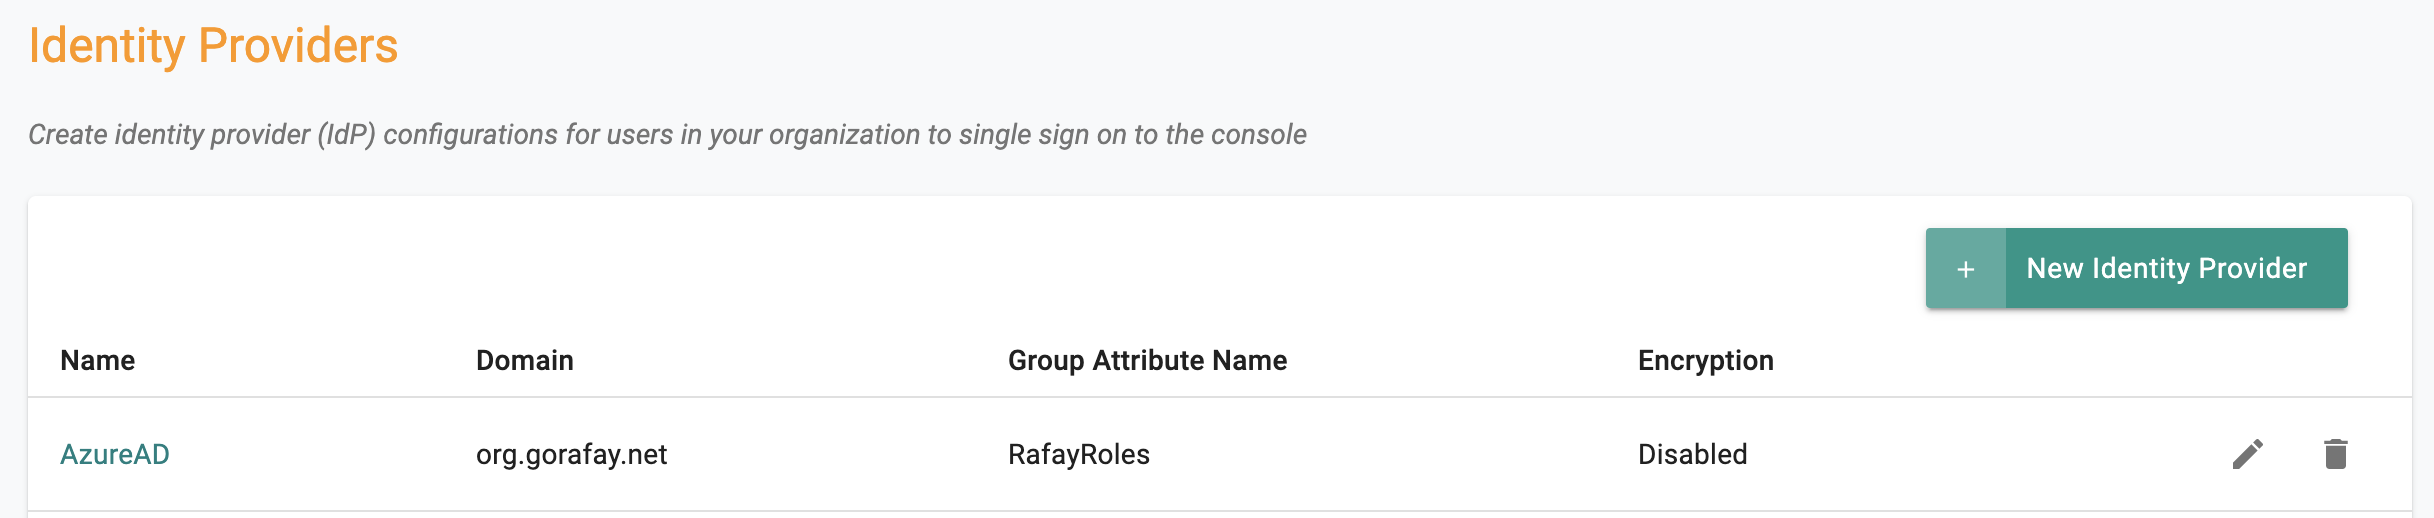
- Click on System and Identity Providers
- Click on "New Identity Provider"
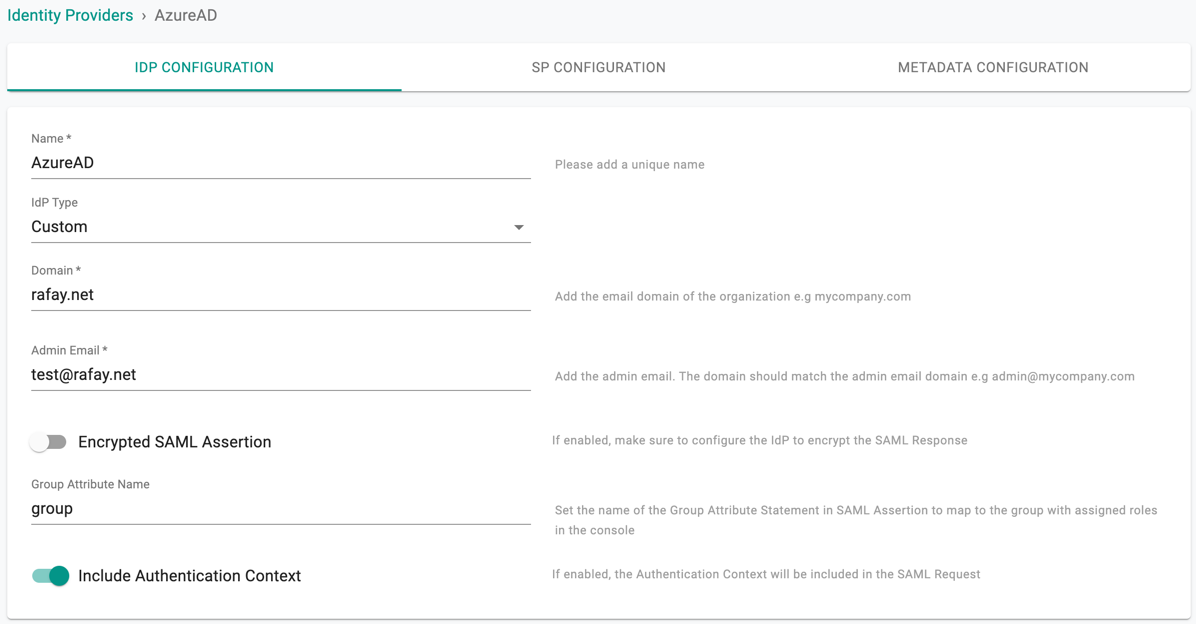
- Provide a name, select "Custom" from the "IdP Type" drop down
- Enter the "Domain" for which you would like to enable SSO
Important
Within an org, the domain of an IdP cannot be used for another IdP. A domain existing in an org can be used in multiple orgs (for one IdP in each org)
- Optionally, toggle "Encryption" if you wish to send/receive encrypted SAML assertions
- Provide a name for the "Group Attribute Name"
- Optionally, toggle "Include Authentication Context" if you wish to send/receive auth context information in assertion
- Click on Save & Continue
Important
Encrypting SAML assertions is optional because privacy is already provided at the transport layer using HTTPS. Encrypted assertions provide an additional layer of security on top ensuring that only the SP (Org) can decrypt the SAML assertion.
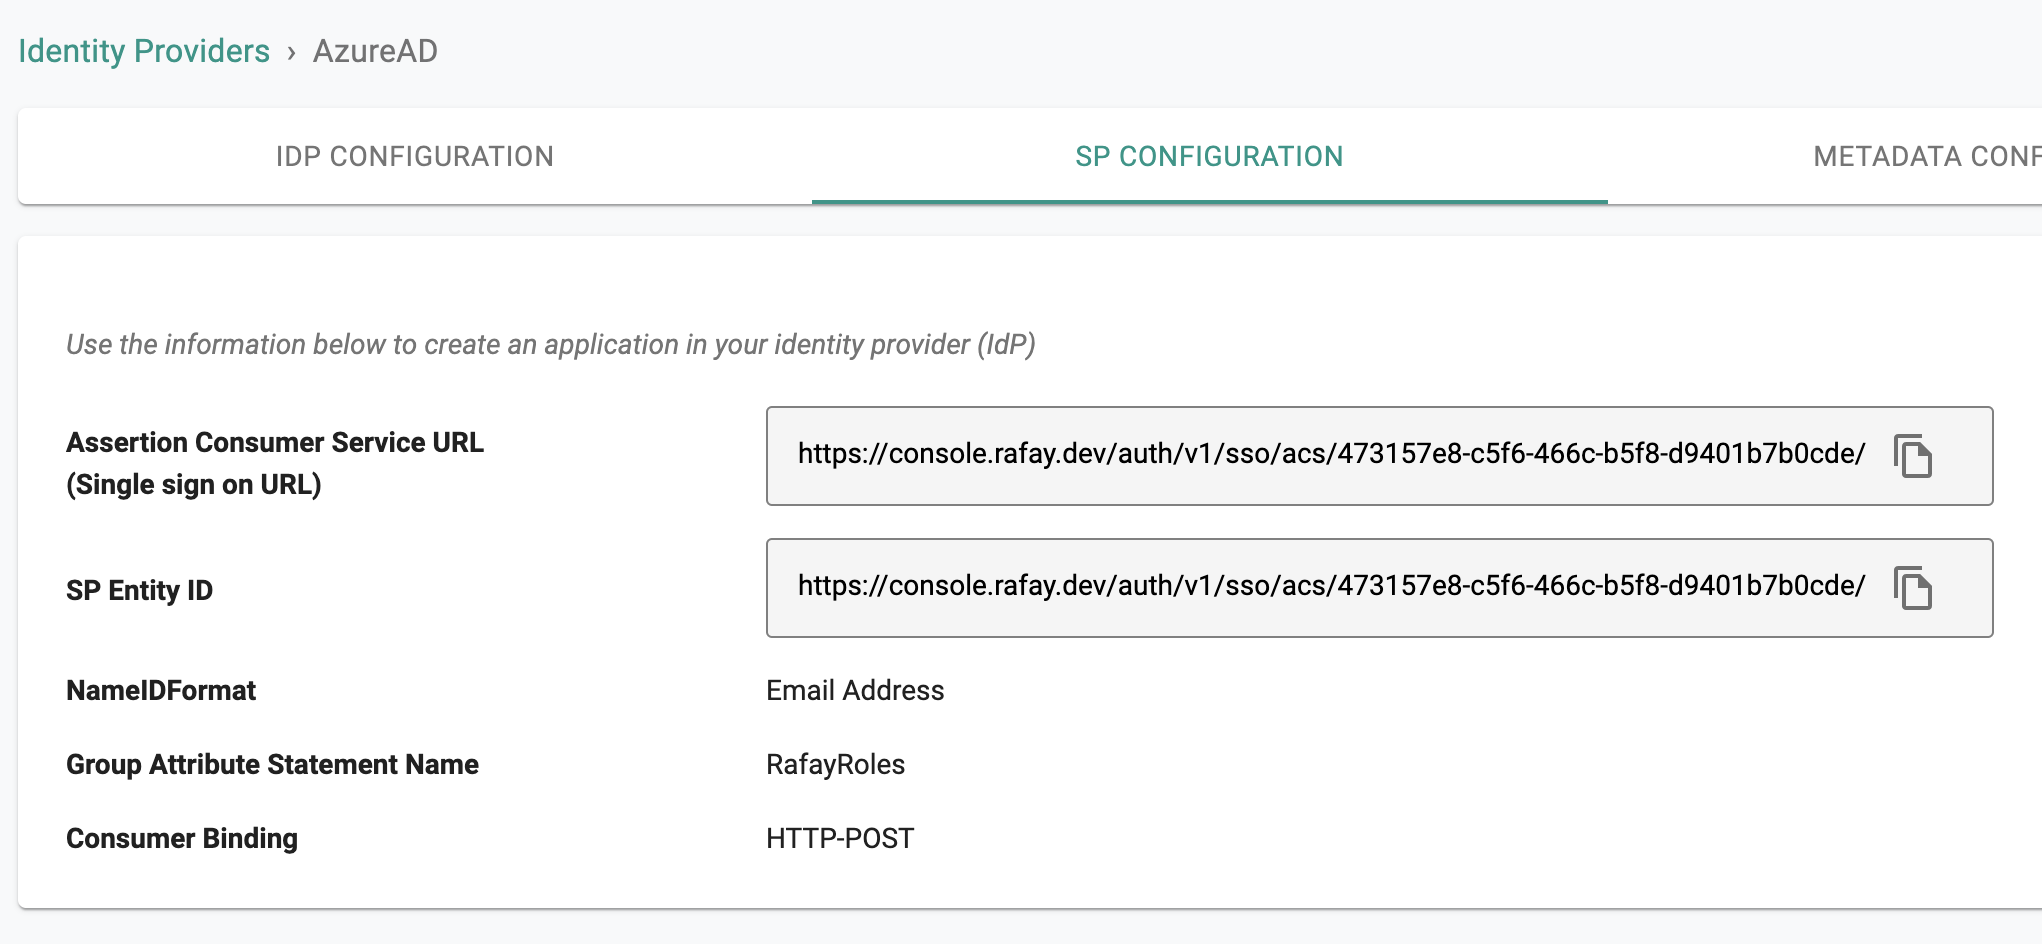
Step 2: View SP Details
The IdP configuration wizard will display critical information that you need to copy/paste into your AzureAD Enterprise Application. Provide the following information to your AzureAD administrator.
- Assertion Consumer Service (ACS) URL
- SP Entity ID
- Name ID Format
Step 3: Create App in AzureAD
- Login into your AzureAD as an Administrator
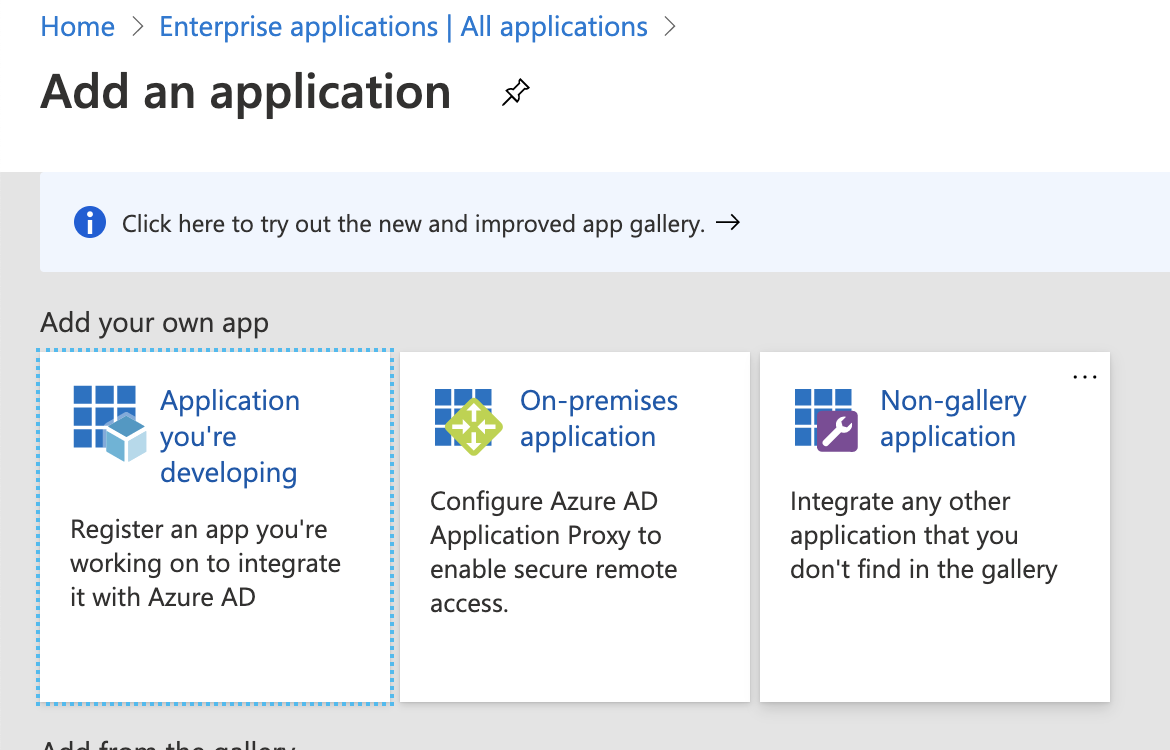
- Select Enterprise applications and New application
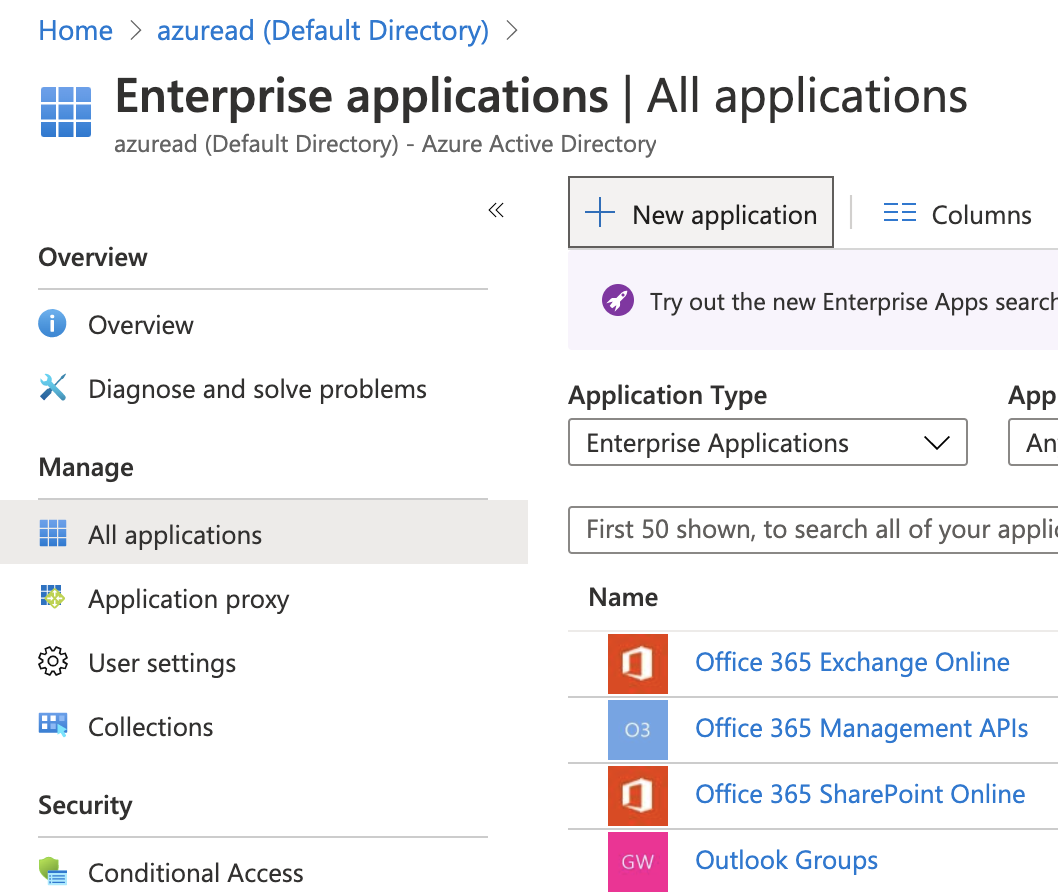
- Select "Non-gallery application" to create a new application
Step 4: General Settings
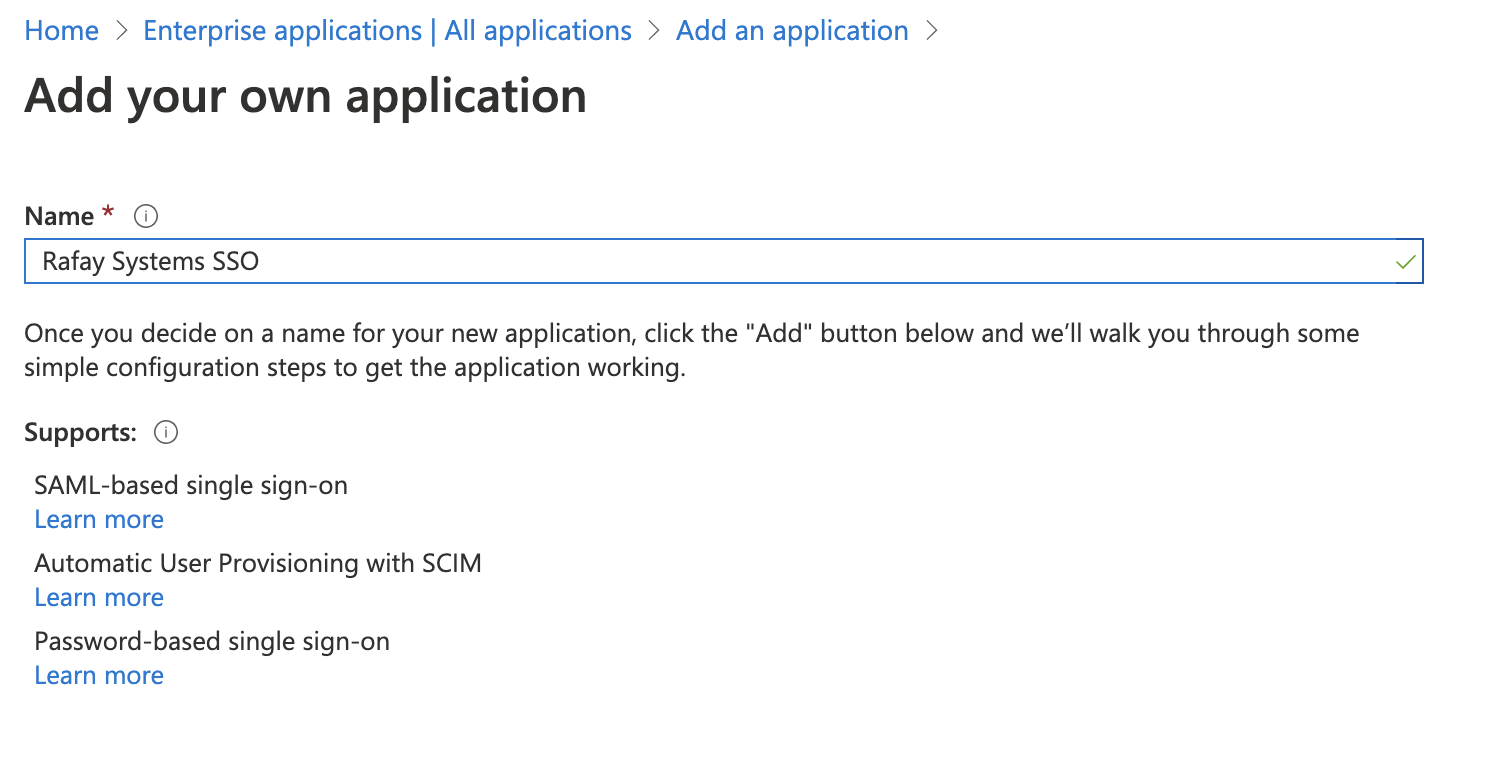
In Add your own application page:
- Provide an App Name for the Web Console
- Click "Add" button to add the application
Step 5: Configure SAML
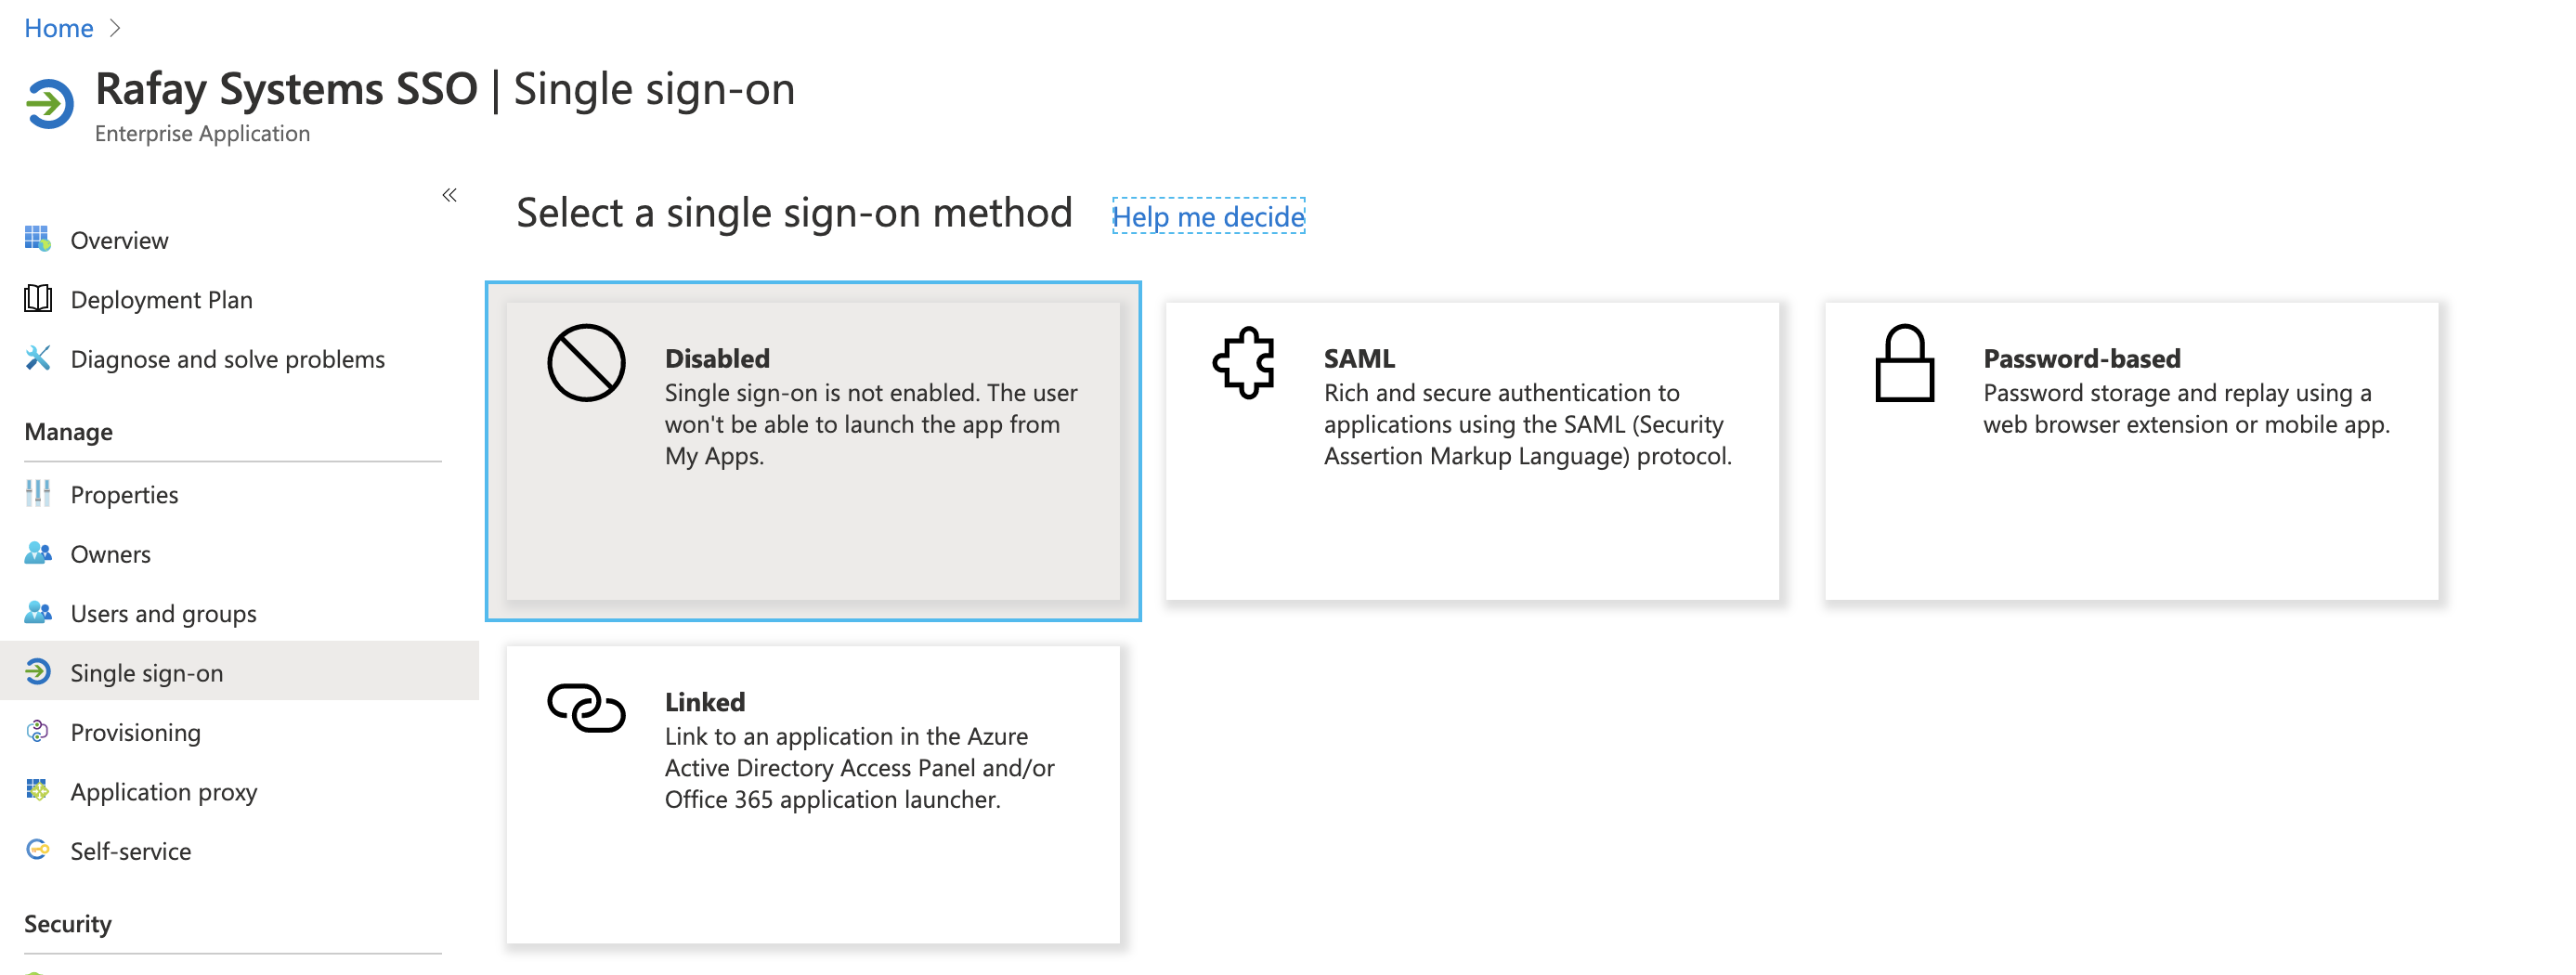
In the application configuration page
- Go to Single sign-on and select "SAML"
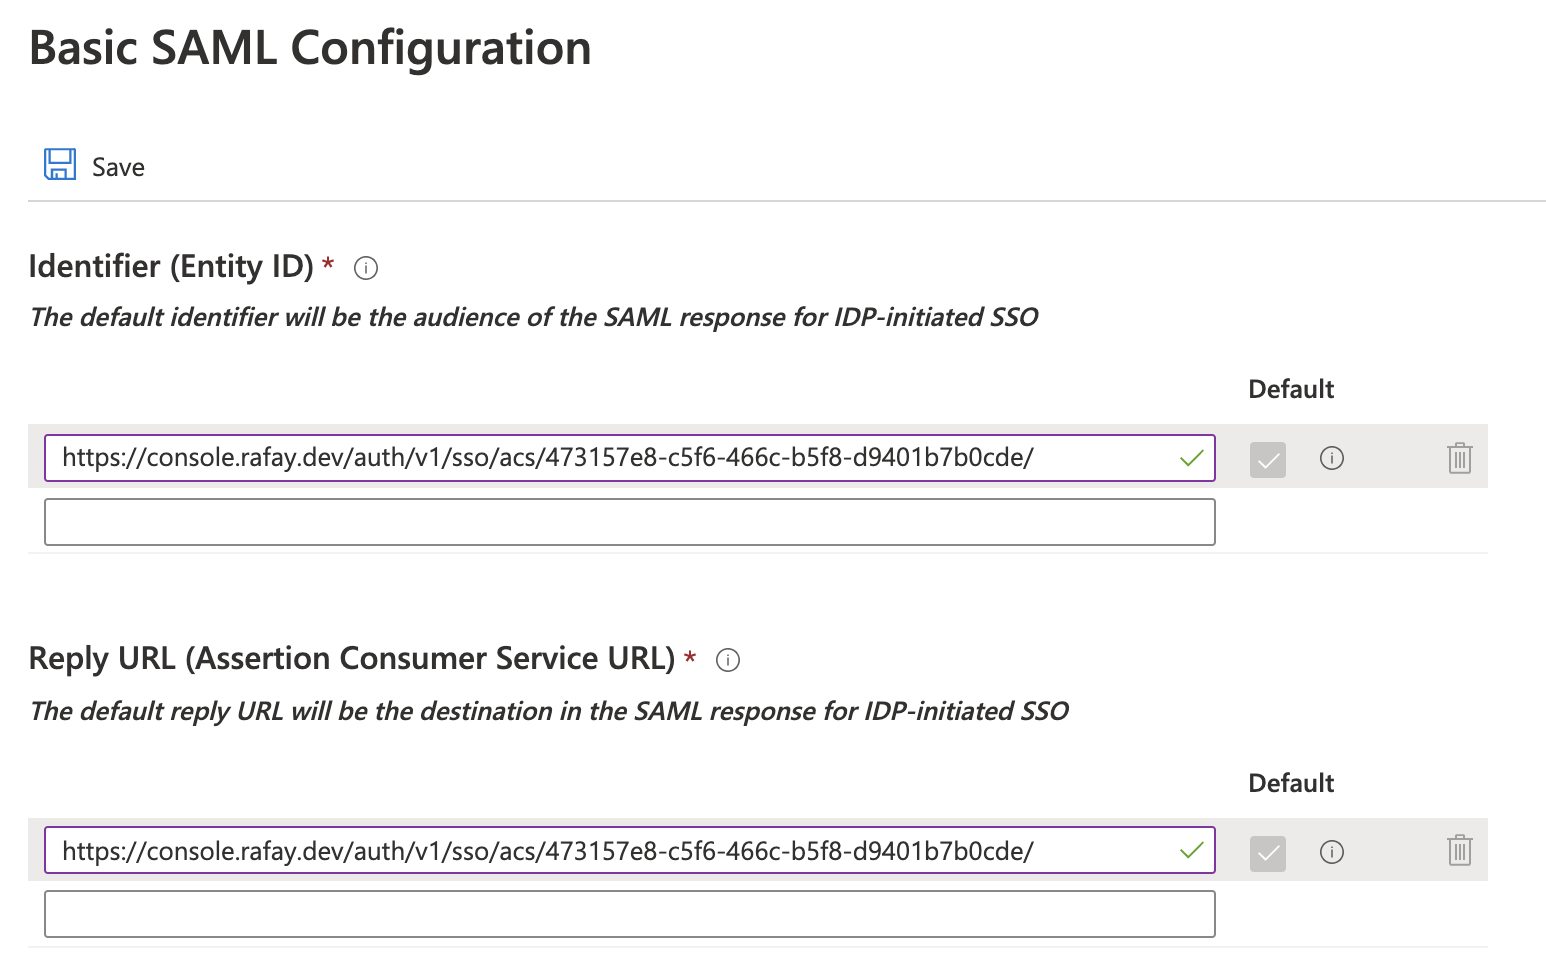
- Click Edit Basic SAML Configuration
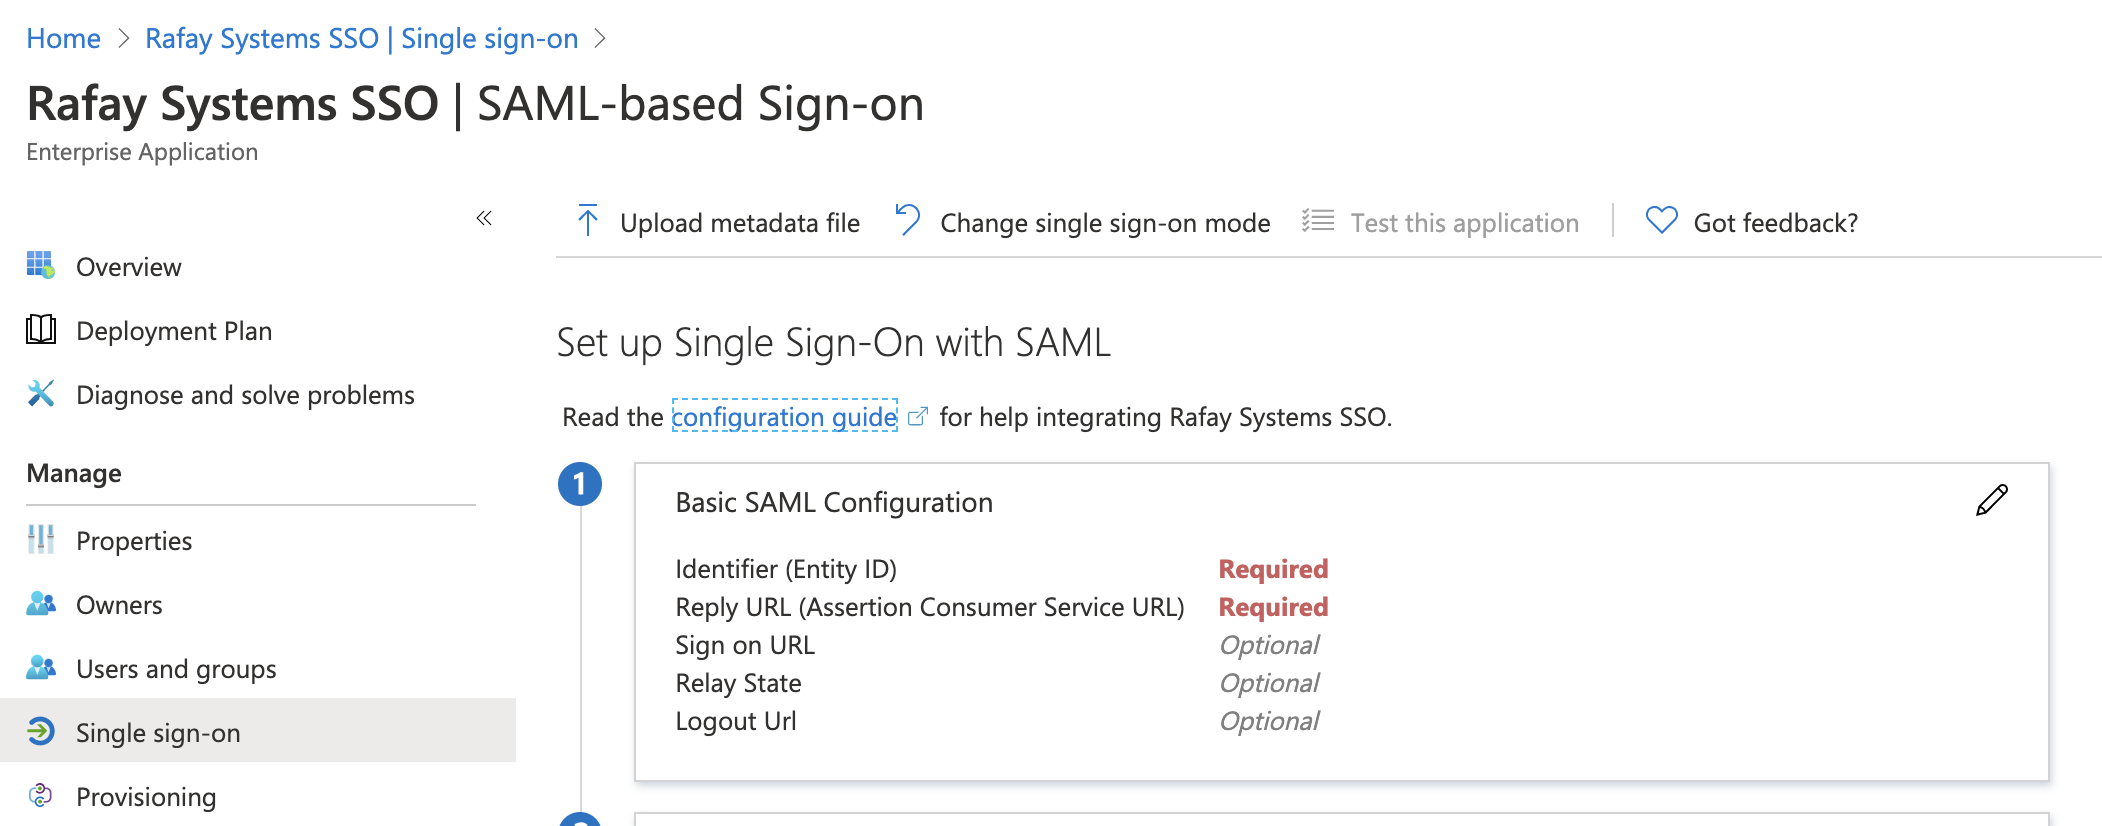
- Copy/Paste the Entity ID from Step 2
- Copy/Paste the ACS URL from Step 2 into the "Reply URL"
- Then Save the configuration
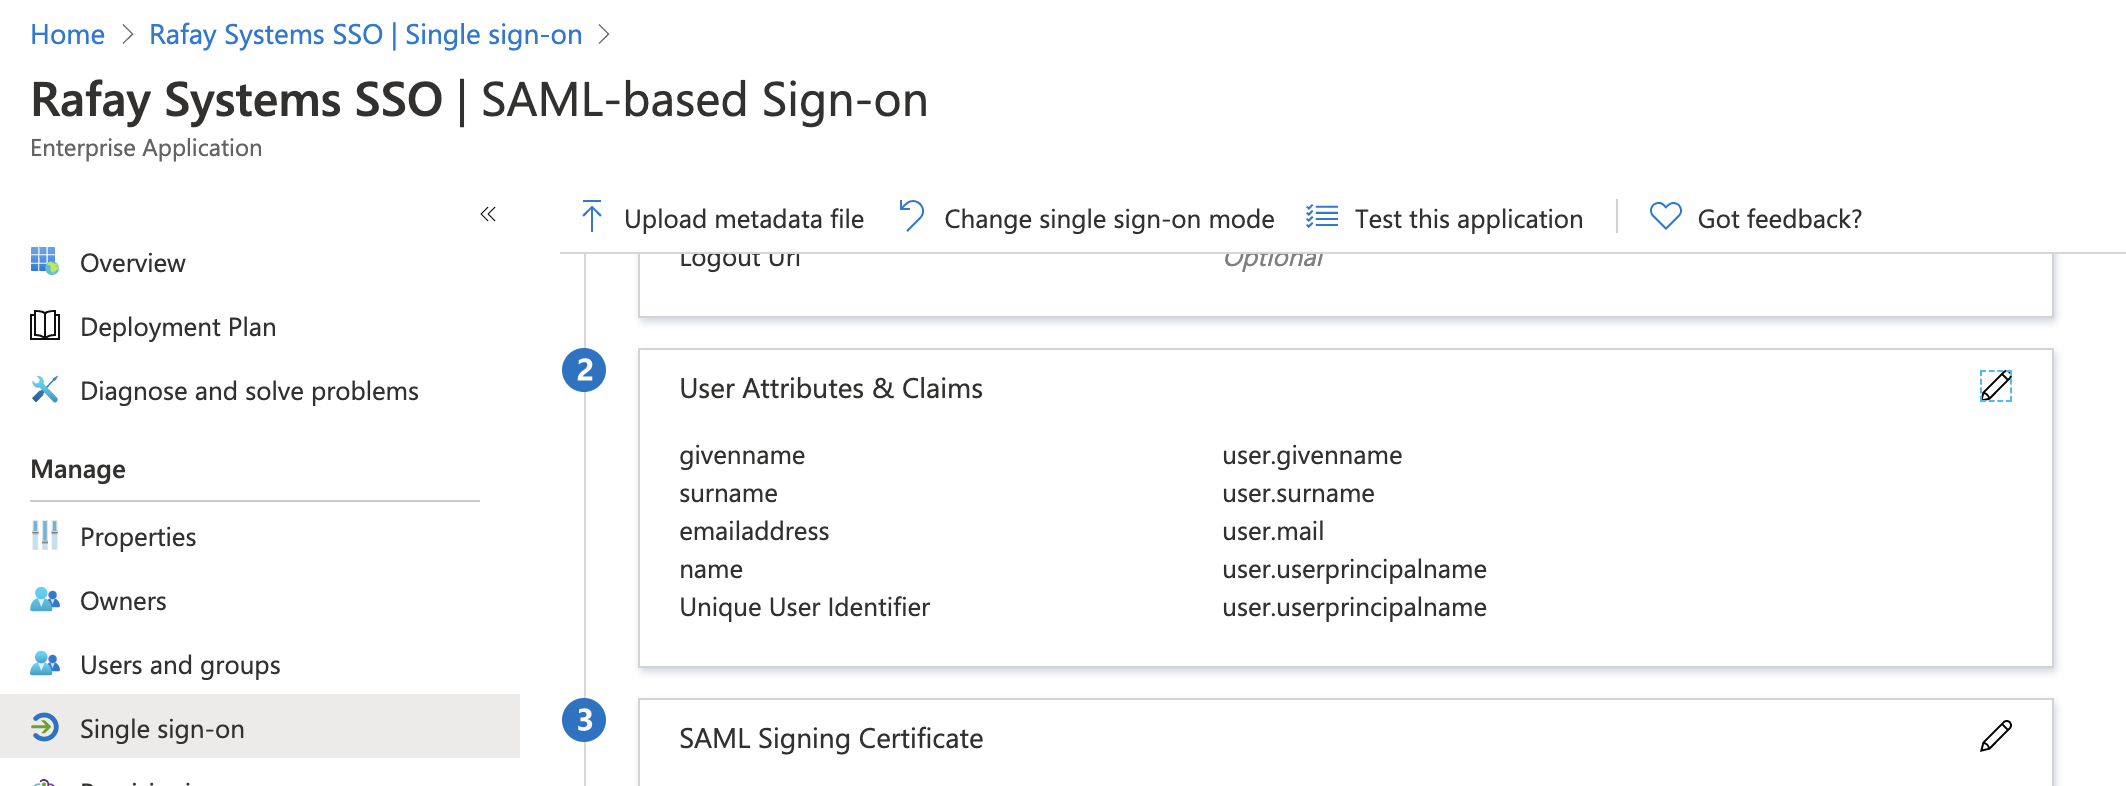
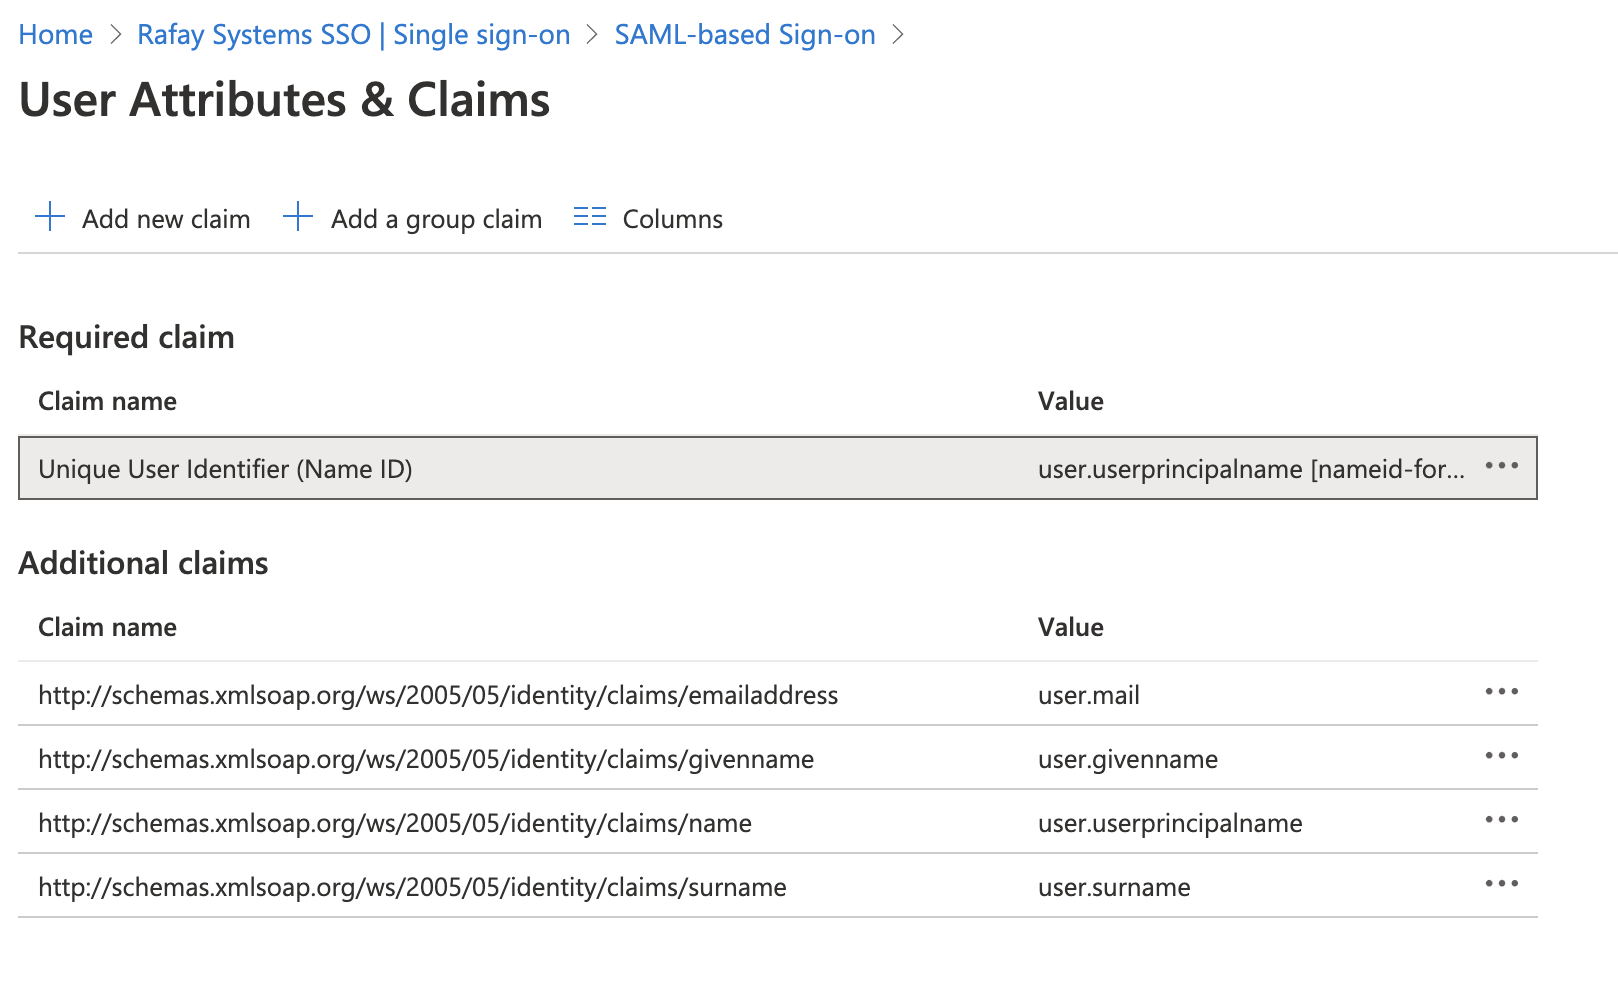
- Click Edit User Attributes & Claims
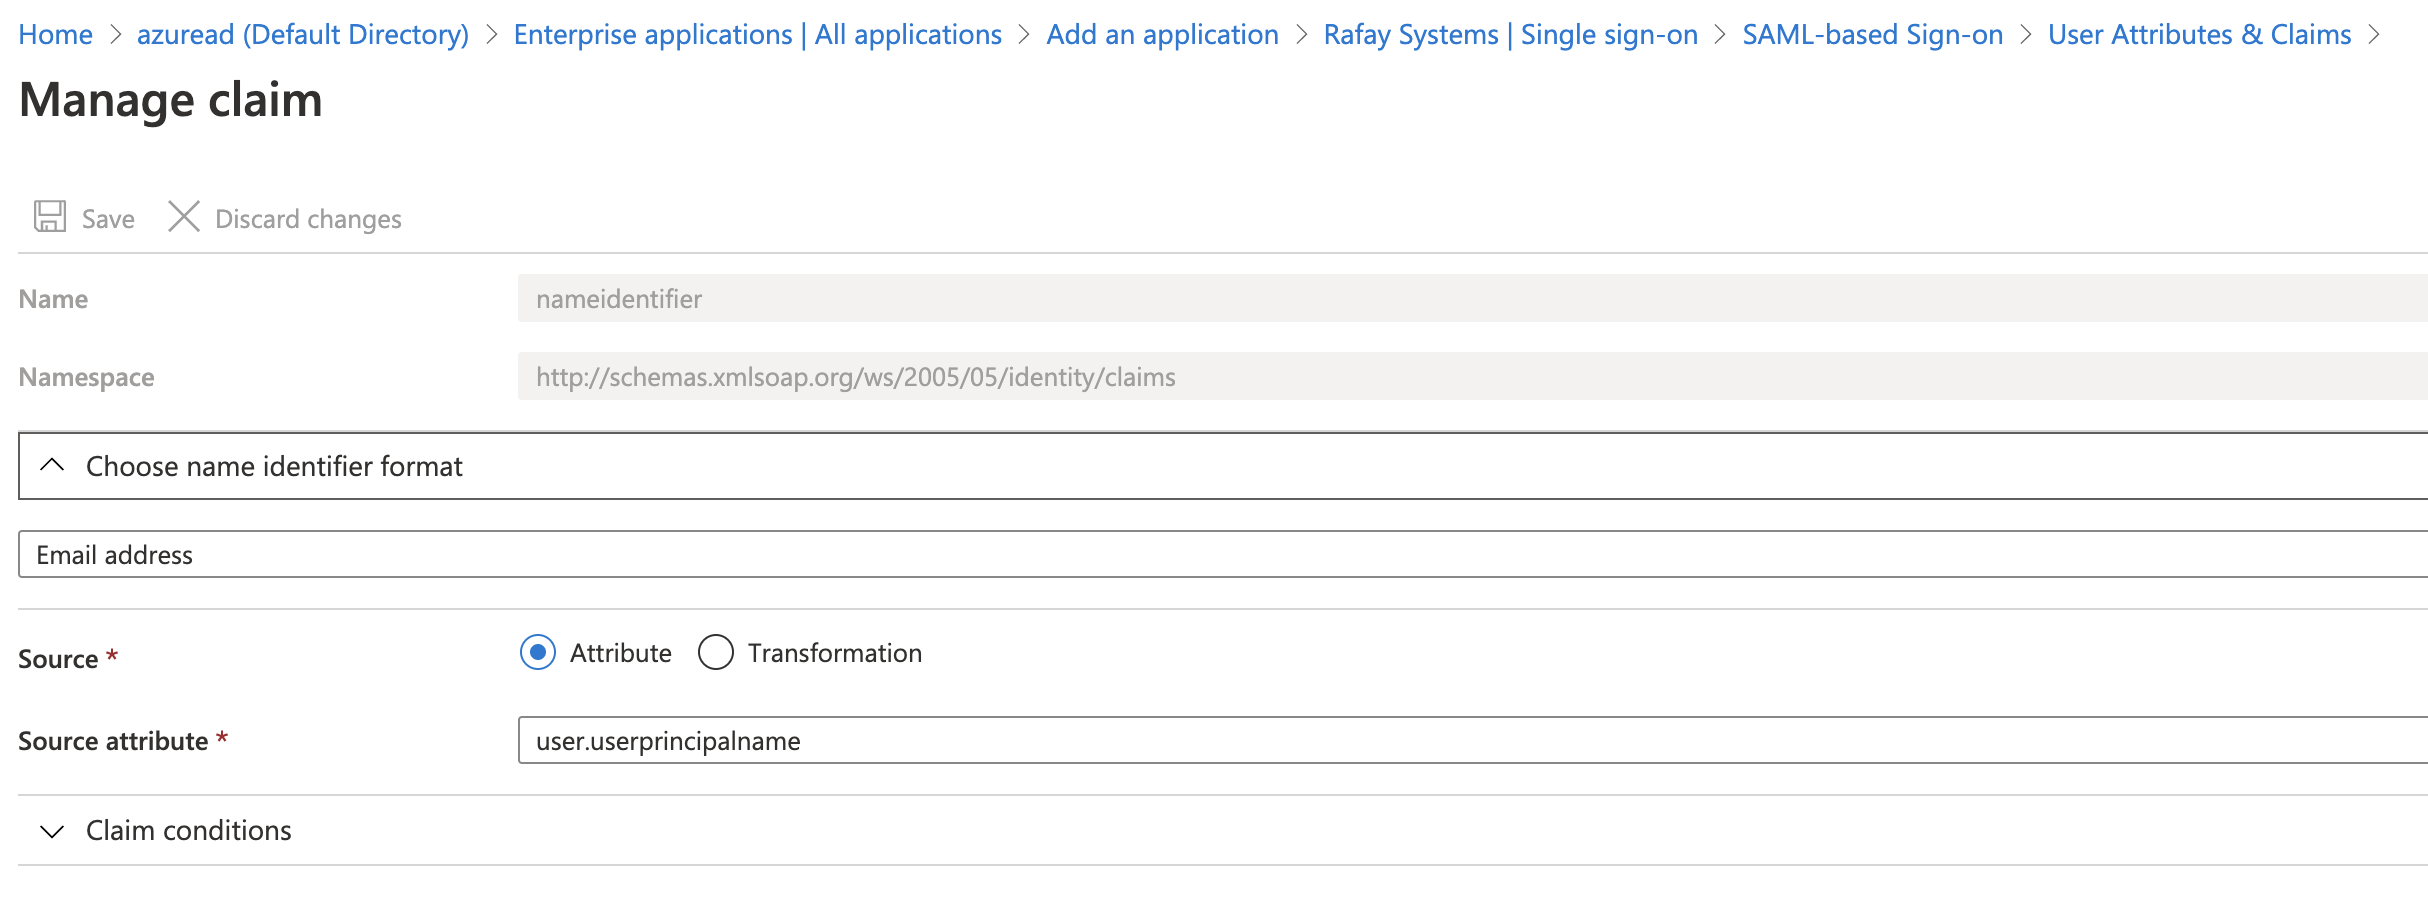
- Click on the Name ID claim to edit the Claim
- Select "Email address" in the Name ID format dropdown
- Select the right "Source attribute" of the user which has the email format and the domain matched the email domain configured in your Org in Step 1
- Save the settings
Step 6: Assign Users and Groups to Application And Configure Group Claim
The "Group" configuration step is critical because it will ensure that AzureAD will send the groups the user belongs to as part of the SSO process. The controller uses the group information to transparently map users to the correct group/role.
If you have the users and groups synced from Active Directory to your AzureAD tenant, follow Step 6.1 below to configuration the Group Claims
Otherwise, follow Step 6.2 to use appRoles for Group attribute to send to the controller.
Step 6.1: Configure Group Claim for Users and Groups Synced from Active Directory
Assign Active Directory Users and Groups to the App:
- Go to Enterprise application > Rafay_App > Users and groups > Add user
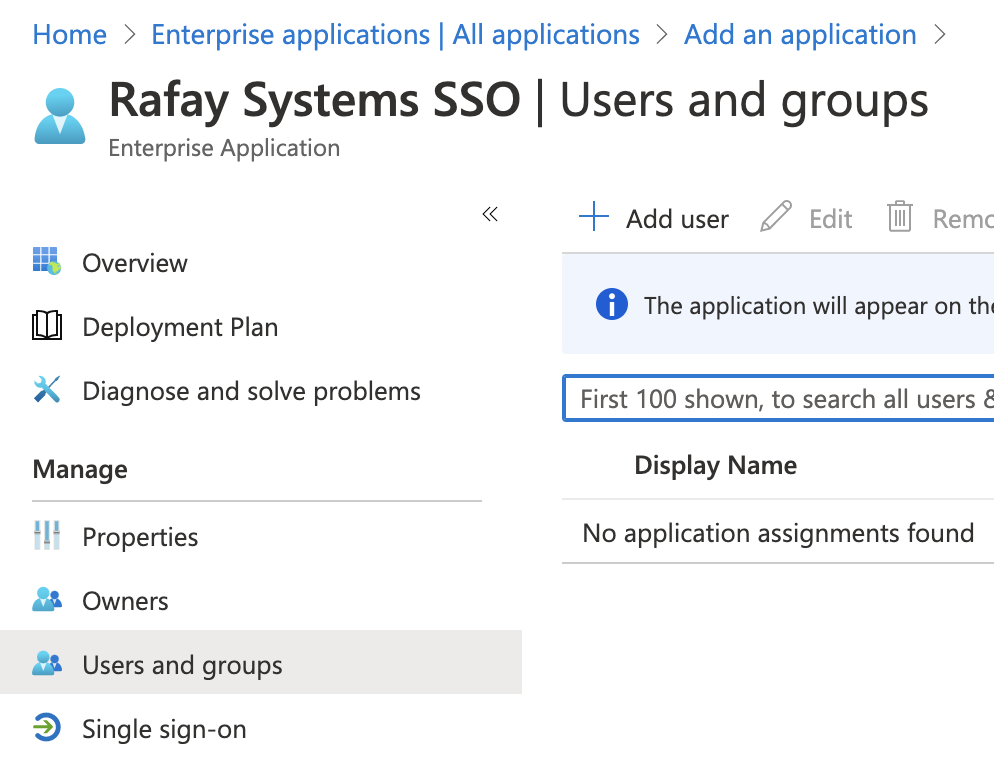
- Select the Users and/or Groups synced from Active Directory to allow access to the Web Console
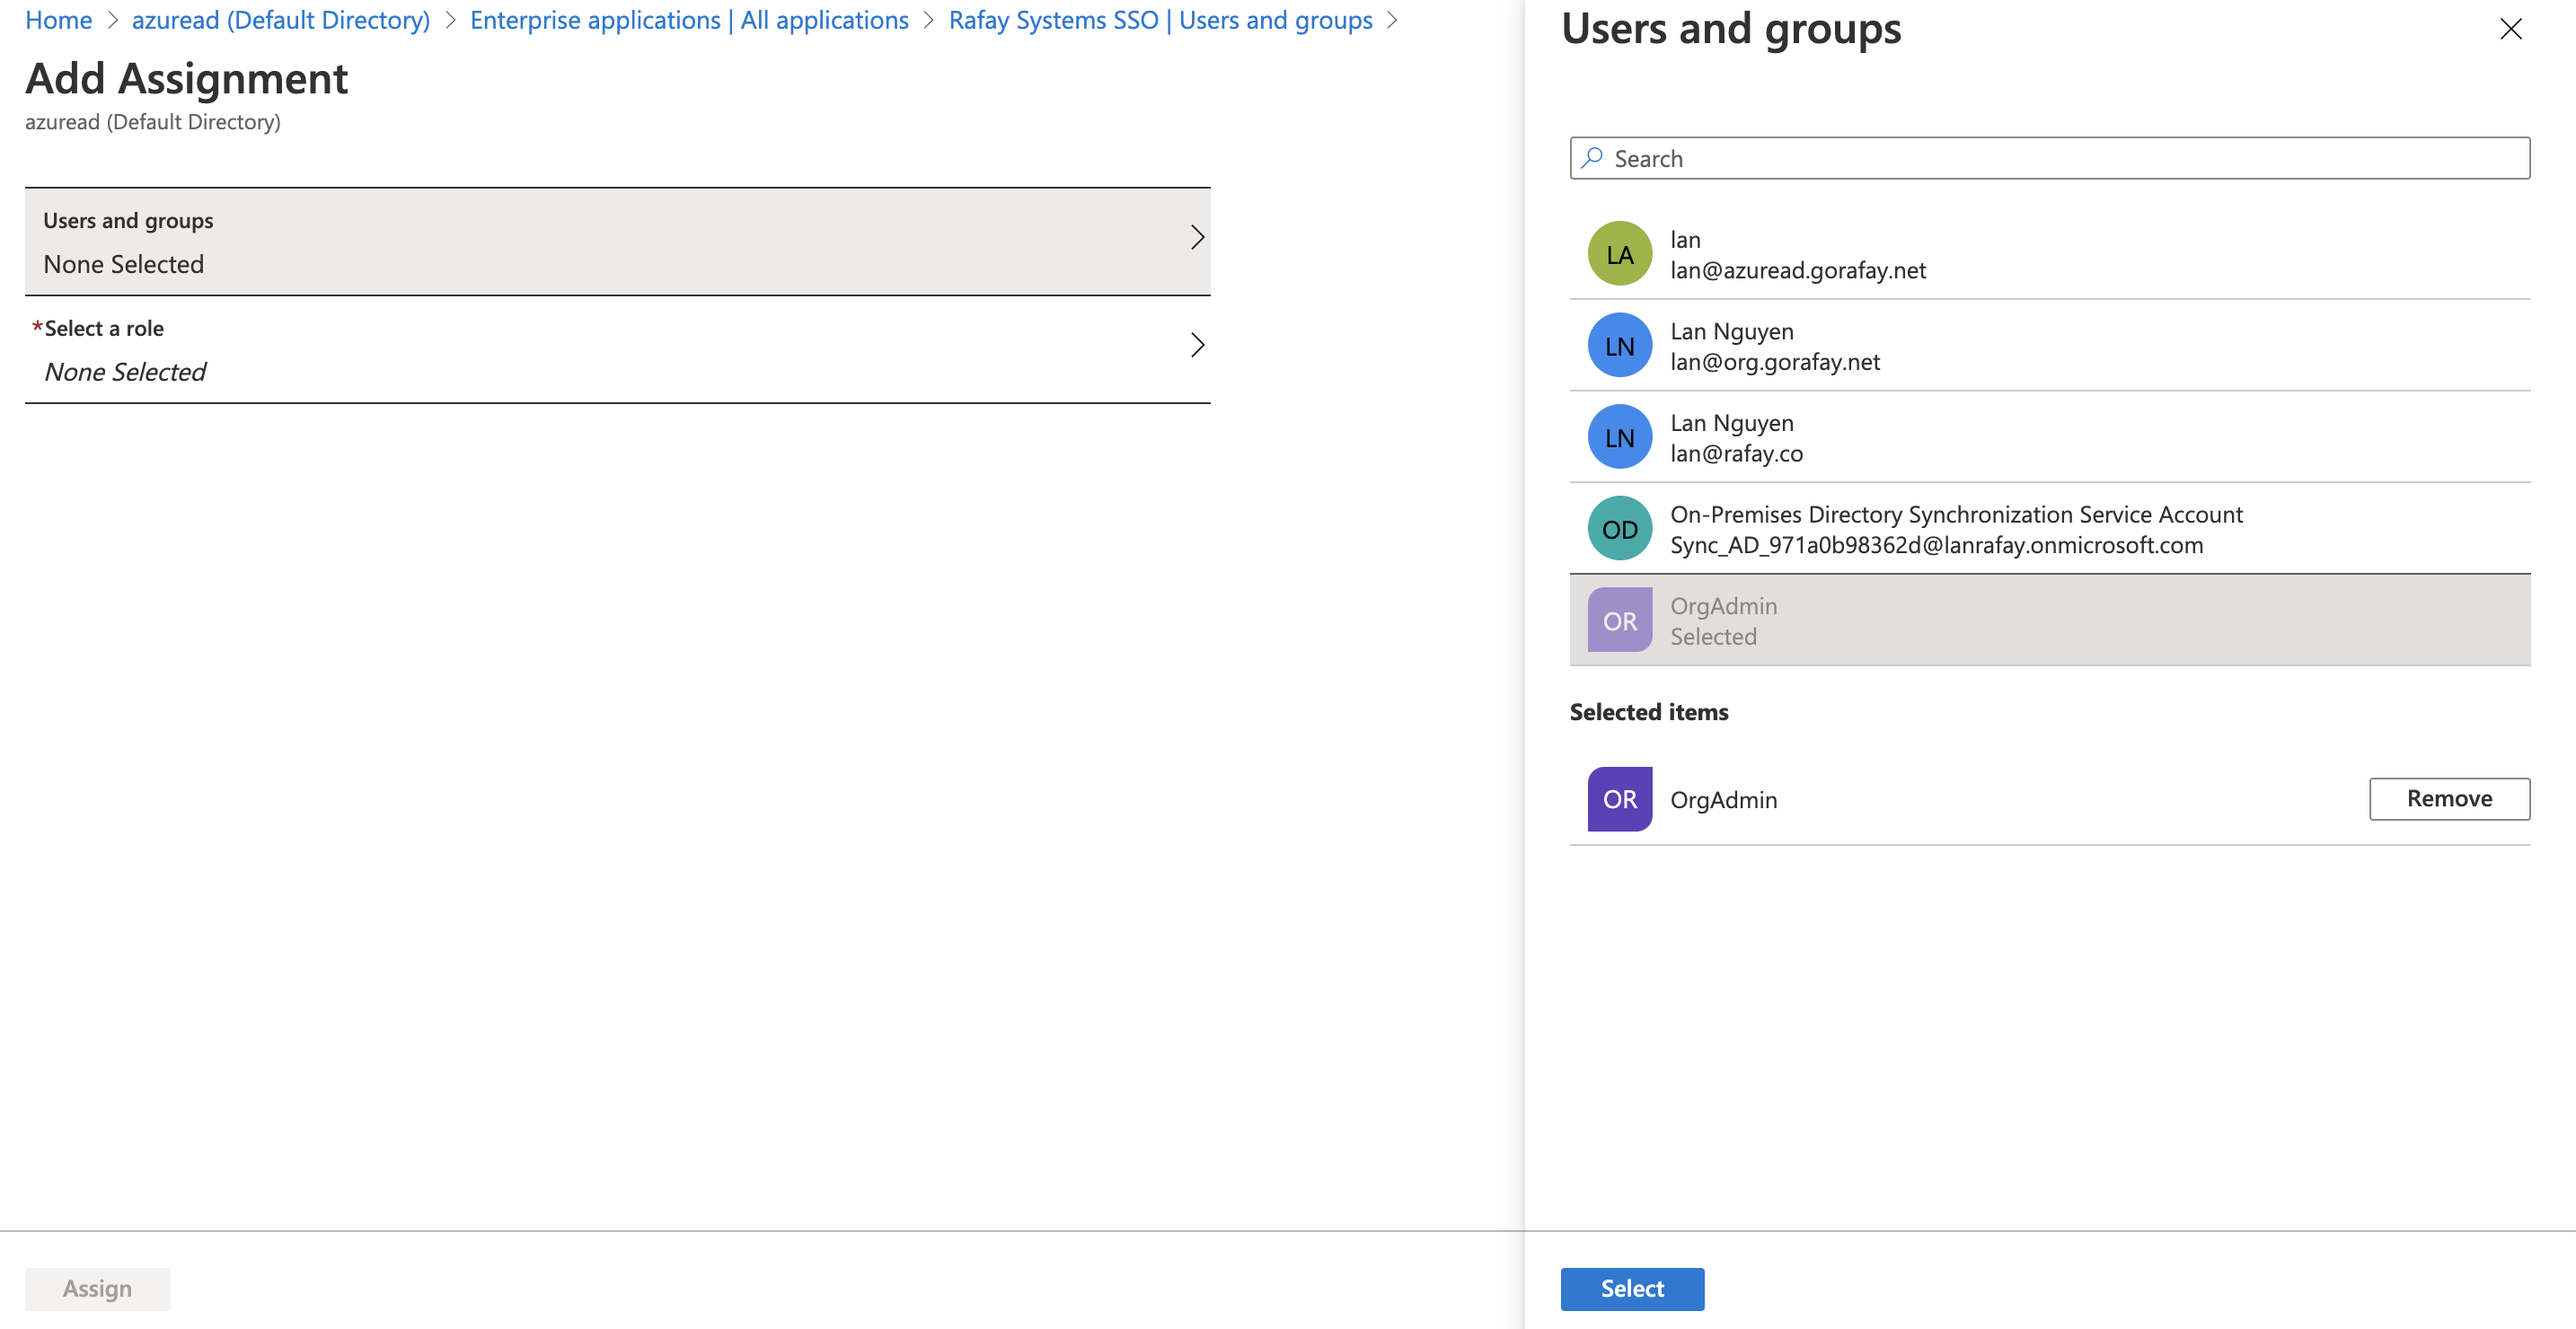
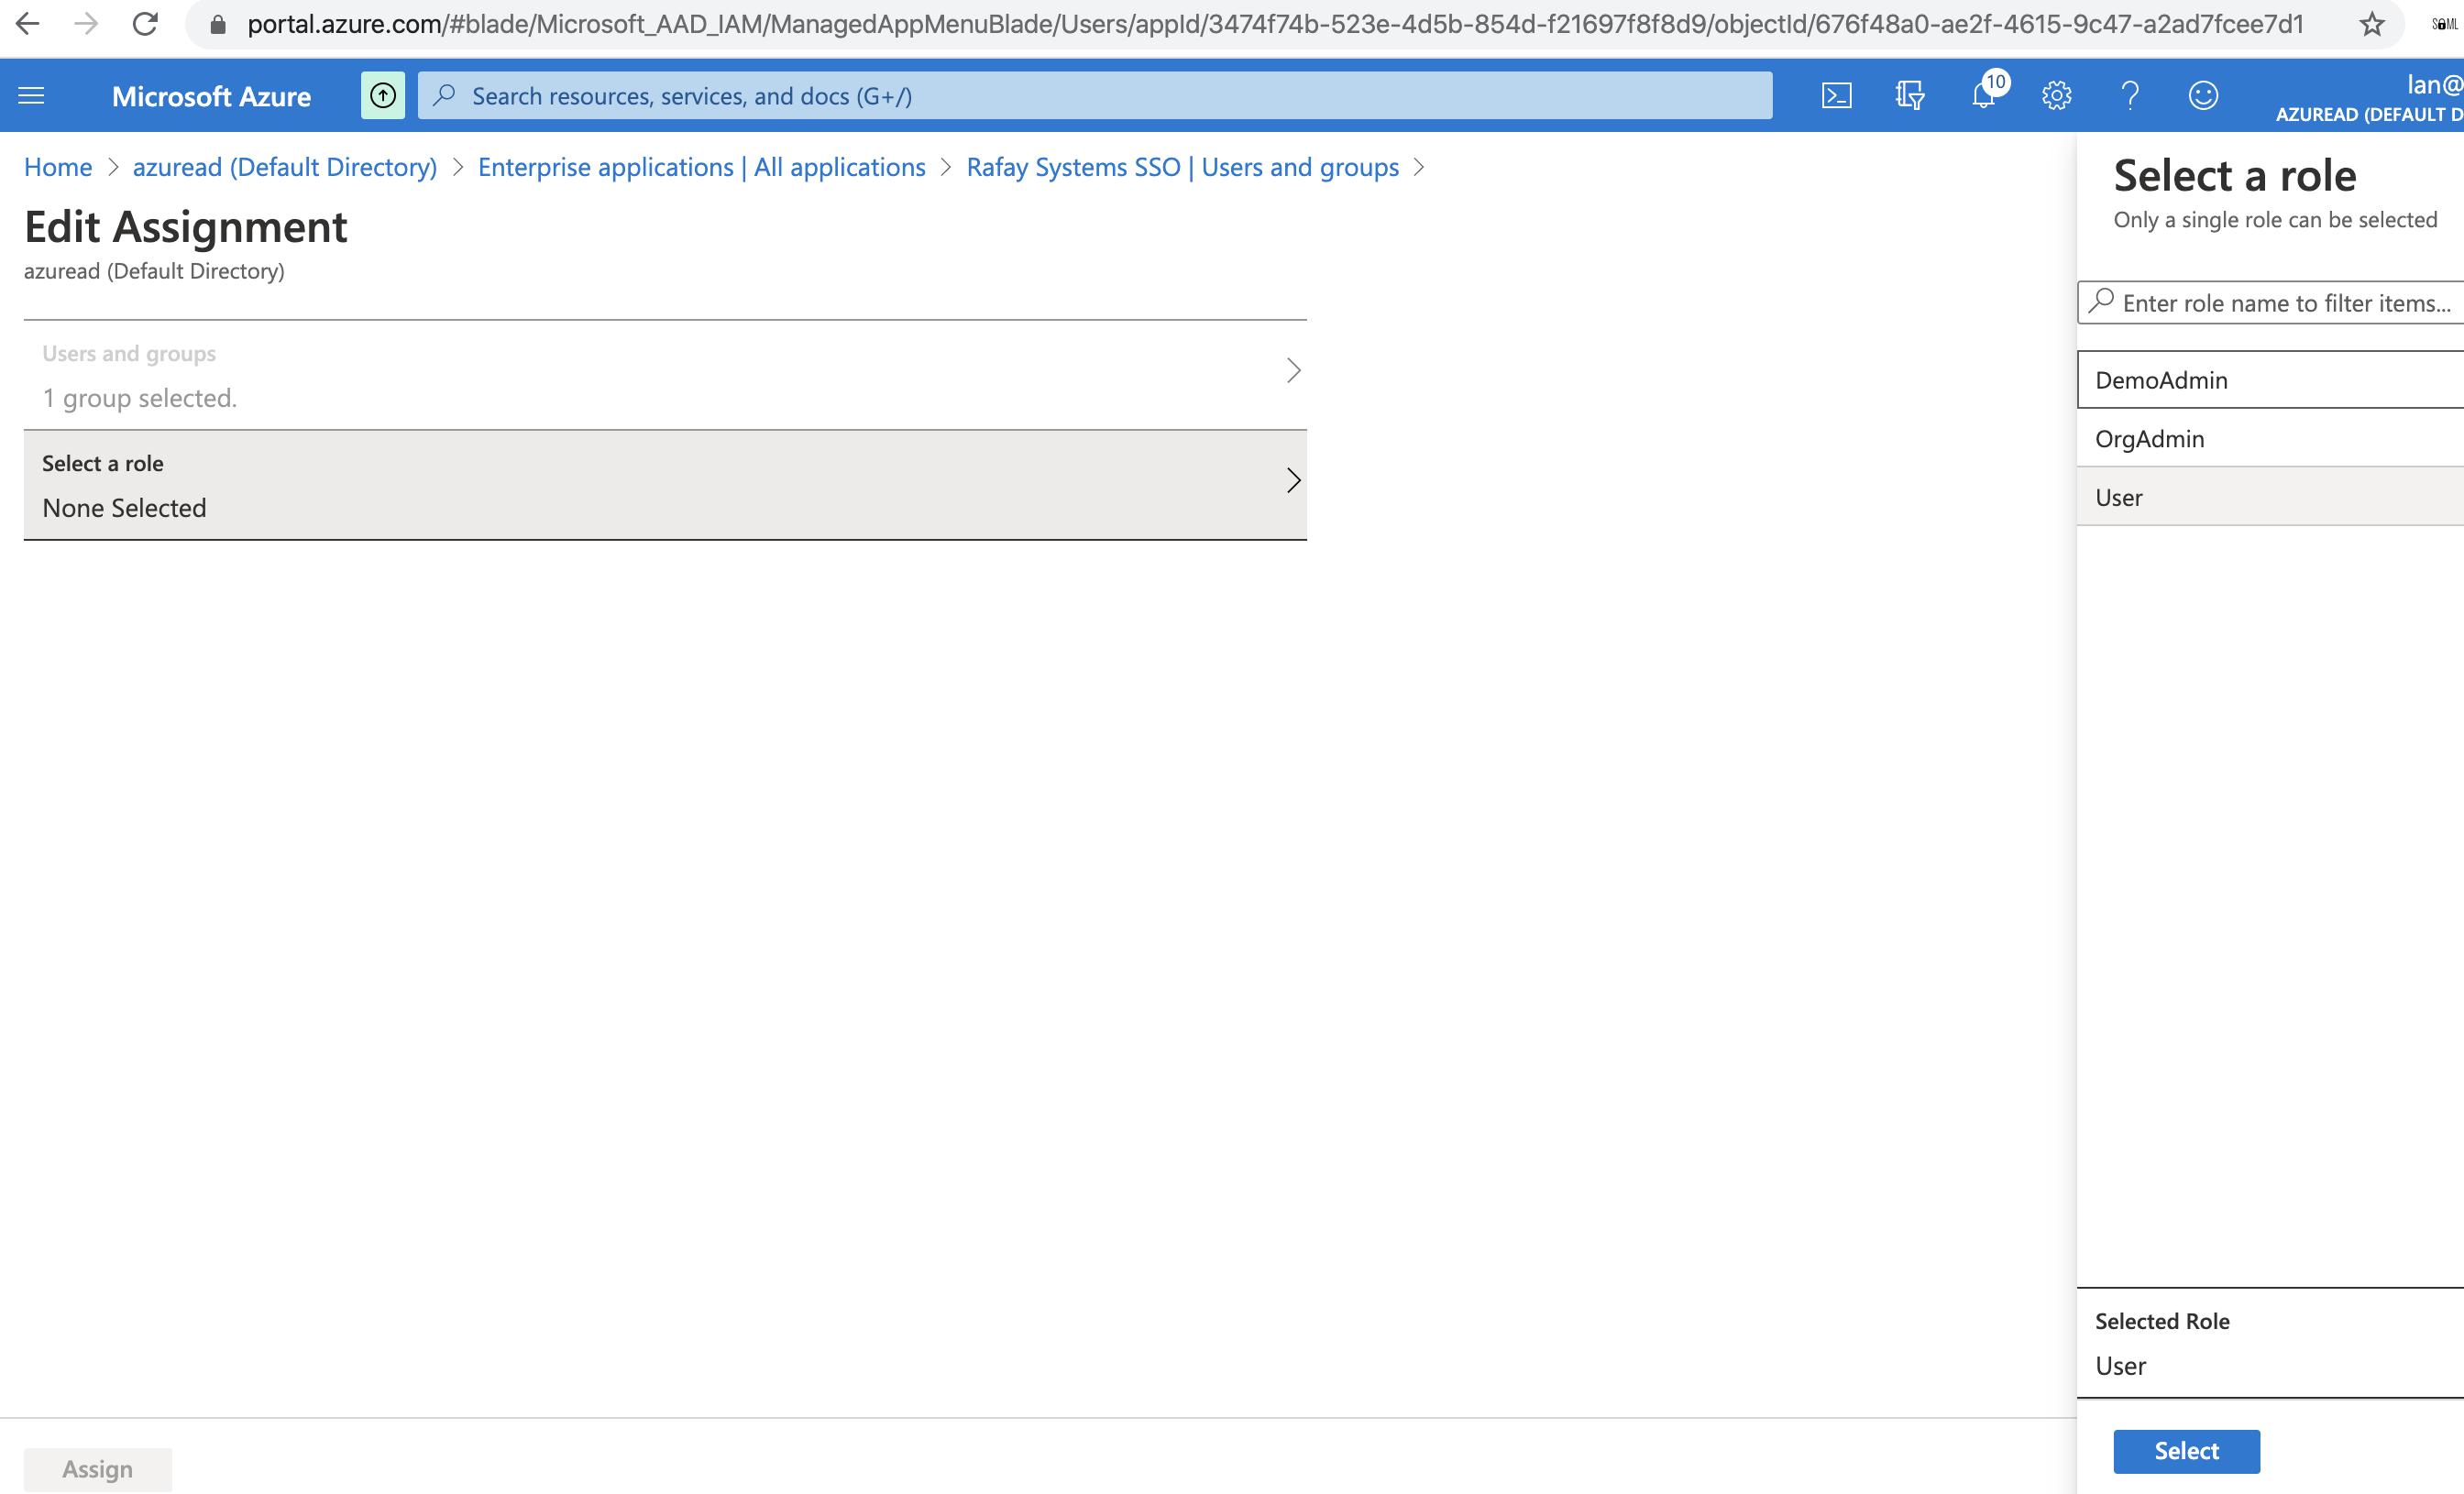
- Assign the User Role for the selected groups
Add Group Claims Using Active Directory Group Names:
- Go to Enterprise application > Rafay_App > Single sign-on
- Click Edit for "User Attributes & Claims"
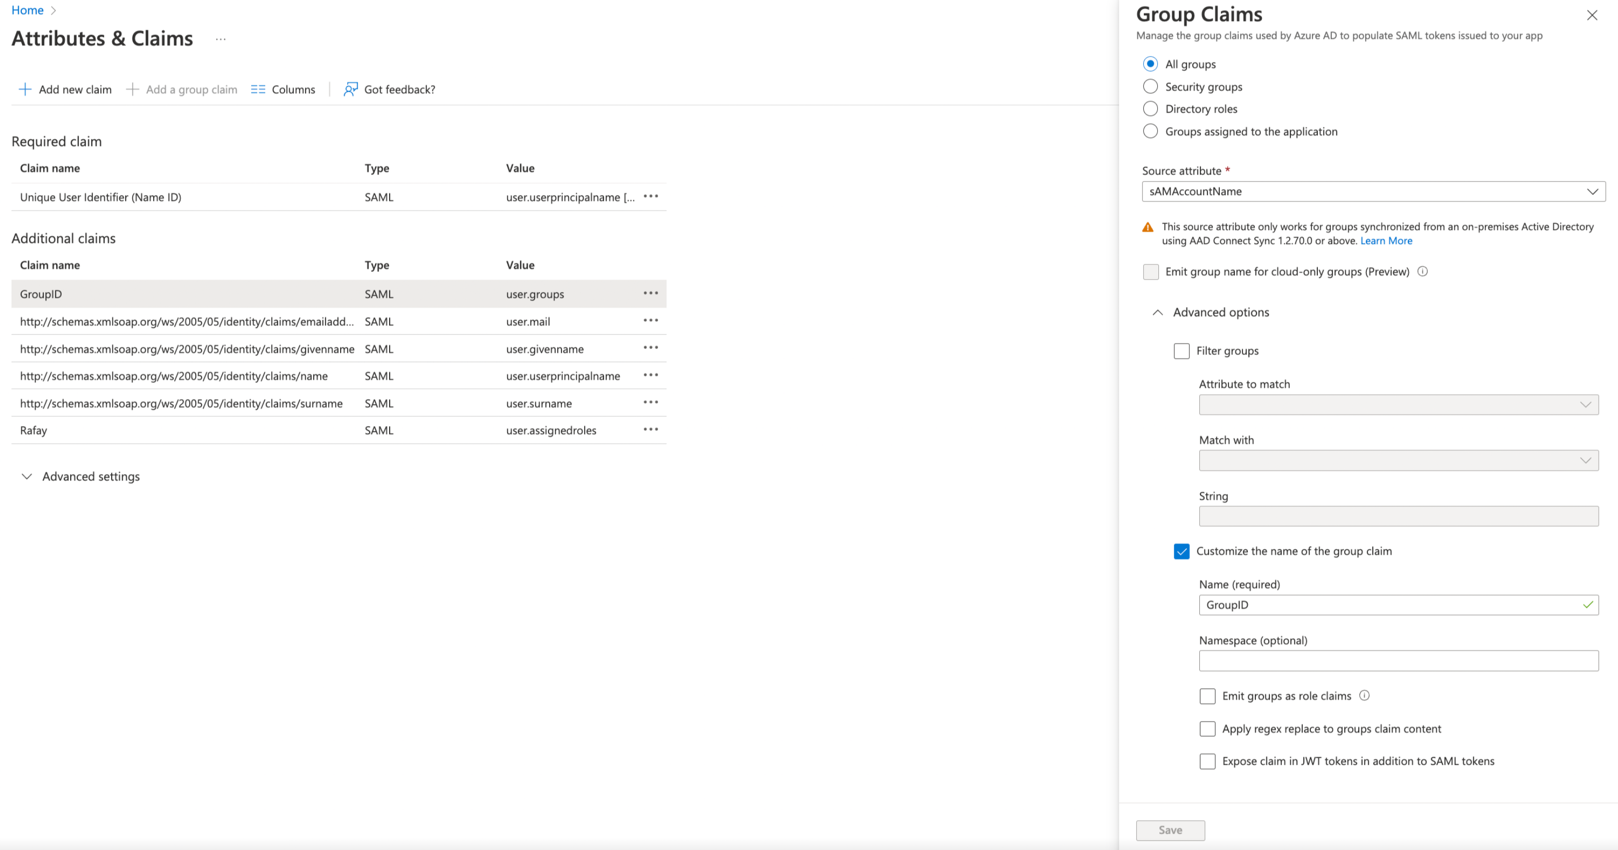
- Select "Add a group claim"
- Select the "Source attribute" as "sAMAccountName" from your Active Directory group name/memberships of the users to send in the group claim
- Provide the name for the "Name" to the same "Group" attribute name that configured in Step 1
- Save the settings
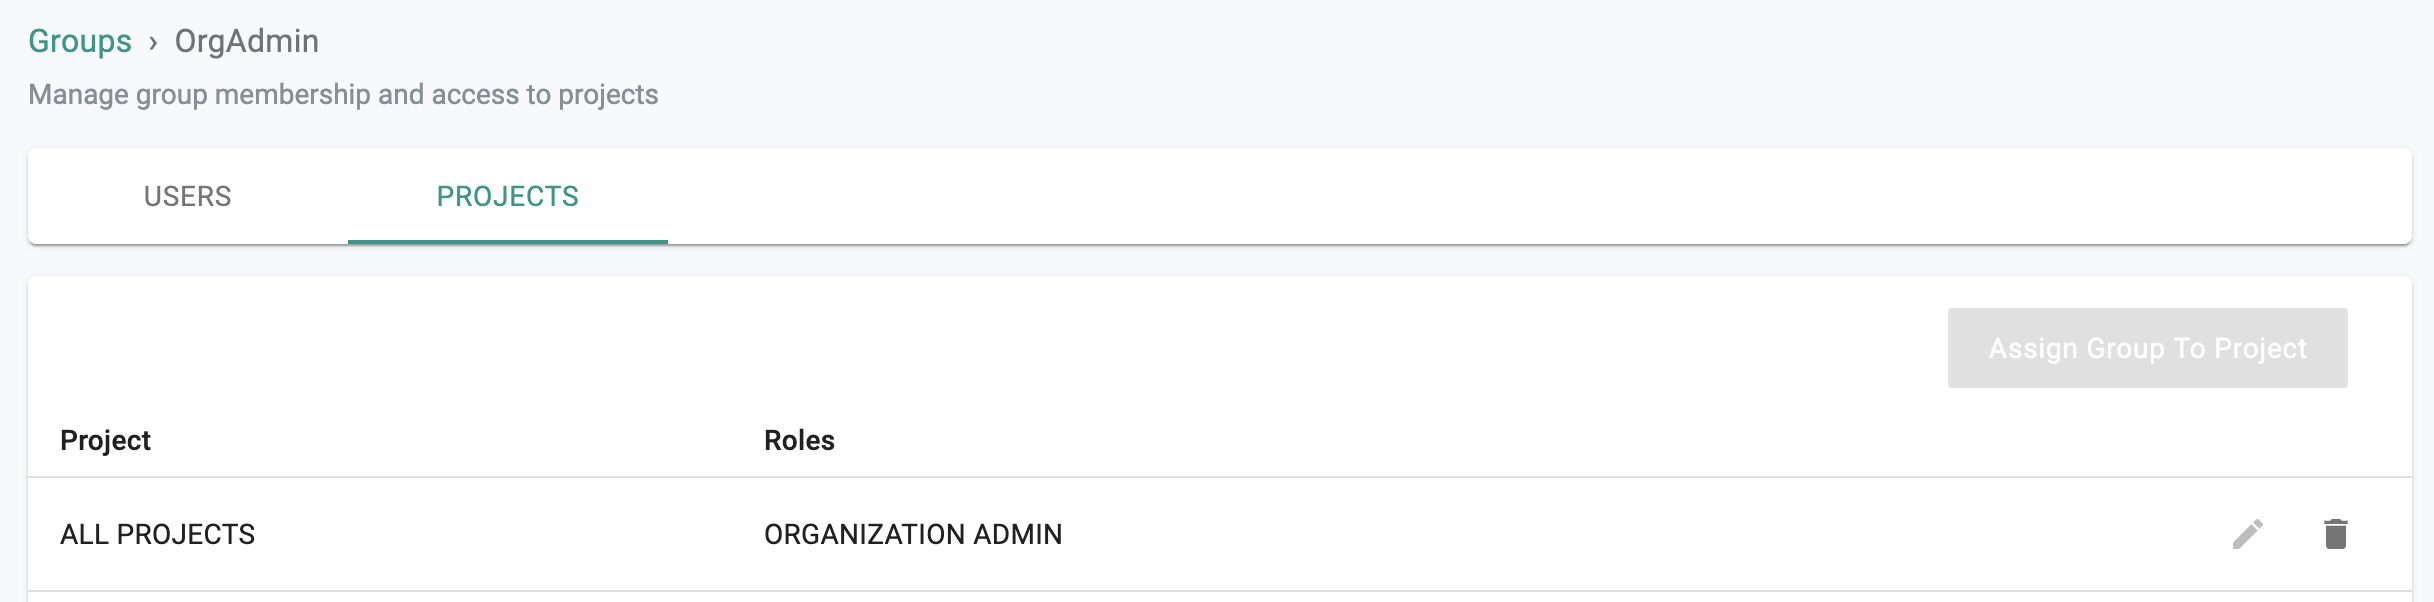
Groups Configuration In Web Console
Identical named groups with the Active Directory group names need to be created in your Org. Ensure that these groups are mapped to the appropriate Projects with the correct privileges. In the example below, the Group "OrgAdmin" is configured as an "Organization Admin" with access to all Projects.
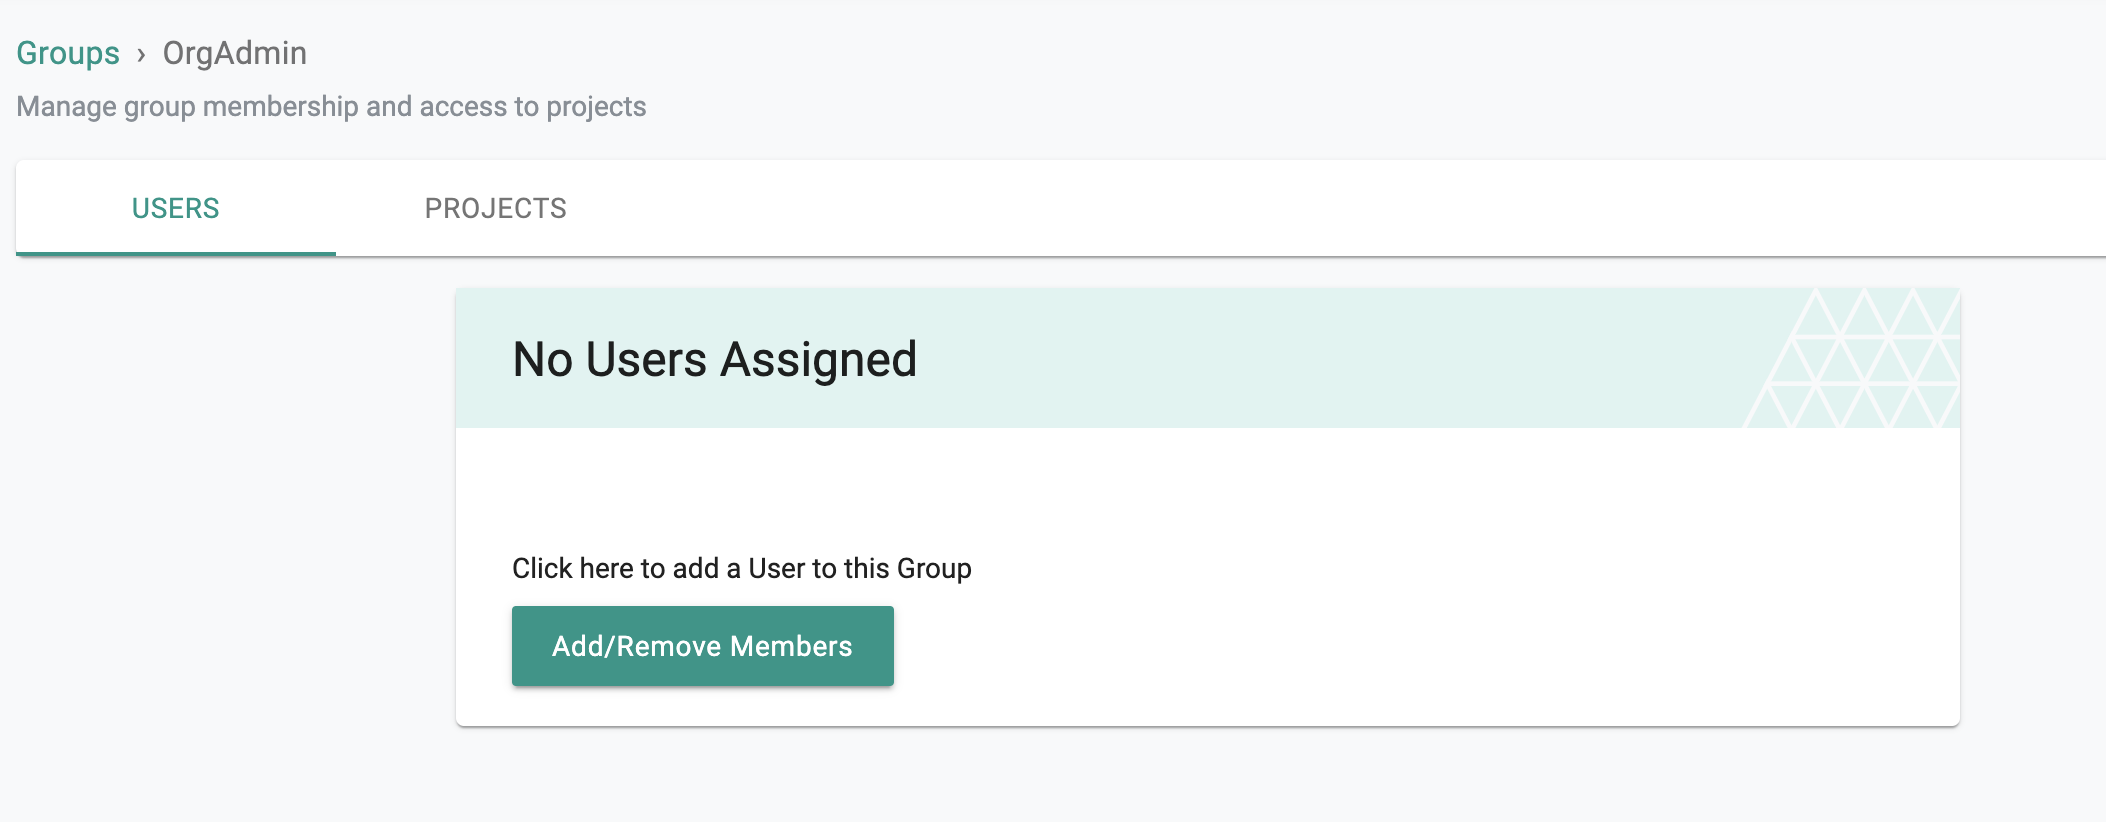
It is important to emphasize that because of SSO via AzureAD, user lifecycle management can be completely offloaded to the IdP. In the example below, note that there are no users managed in the "OrgAdmin" group because they are all managed in the attached AzureAD tenant.
Step 6.2: Configure appRoles to Use in place Group Claim for Users/Groups in Cloud Directory of AzureAD
Add appRoles to application from manifest:
Reference link: https://docs.microsoft.com/en-us/azure/active-directory/develop/howto-add-app-roles-in-azure-ad-apps
- Go to AzureAD Portal > App registrations > App > Manifest
- Edit the manifest by locating the appRoles setting and add additional appRoles to the Application
- Save the manifest
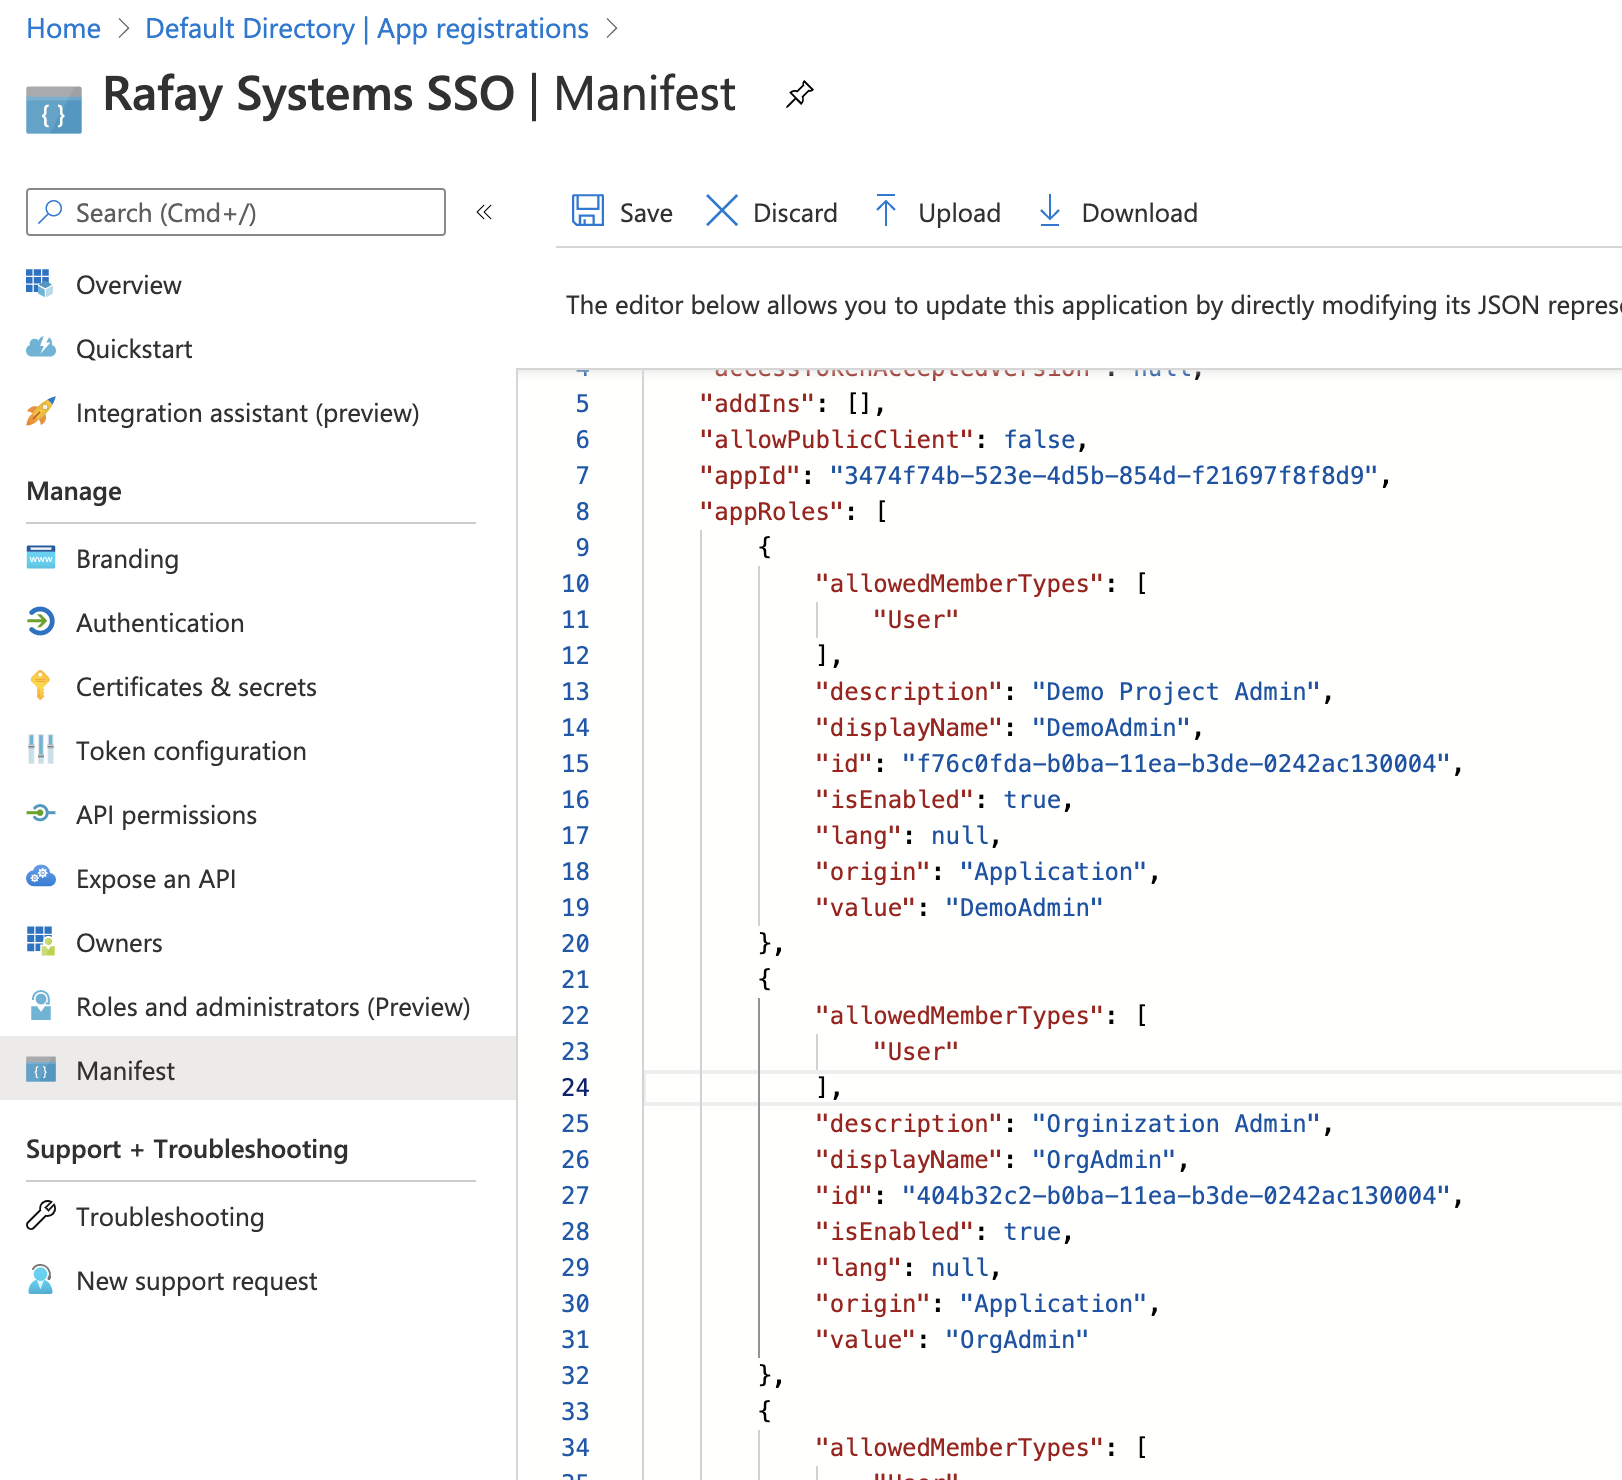
An example of the appRoles to add to App as below ("id" of each appRoles needs to be unique)
"appId": "3474f74b-523e-4d5b-854d-f21697f8f8d9",
    "appRoles": [
        {
            "allowedMemberTypes": [
                "User"
            ],
            "description": "Orginization Admin",
            "displayName": "OrgAdmin",
            "id": "404b32c2-b0ba-11ea-b3de-0242ac130004",
            "isEnabled": true,
            "lang": null,
            "origin": "Application",
            "value": "OrgAdmin"
        },
        {
            "allowedMemberTypes": [
                "User"
            ],
            "description": "Demo Project Admin",
            "displayName": "DemoAdmin",
            "id": "f76c0fda-b0ba-11ea-b3de-0242ac130004",
            "isEnabled": true,
            "lang": null,
            "origin": "Application",
            "value": "DemoAdmin"
        },
Groups Configuration In Web Console
Identical named groups with the appRoles values need to be created on the controller. Ensure that these groups are mapped to the appropriate Projects with the correct privileges. In the example below, the Group "OrgAdmin" is configured as an "Organization Admin" with access to all Projects.
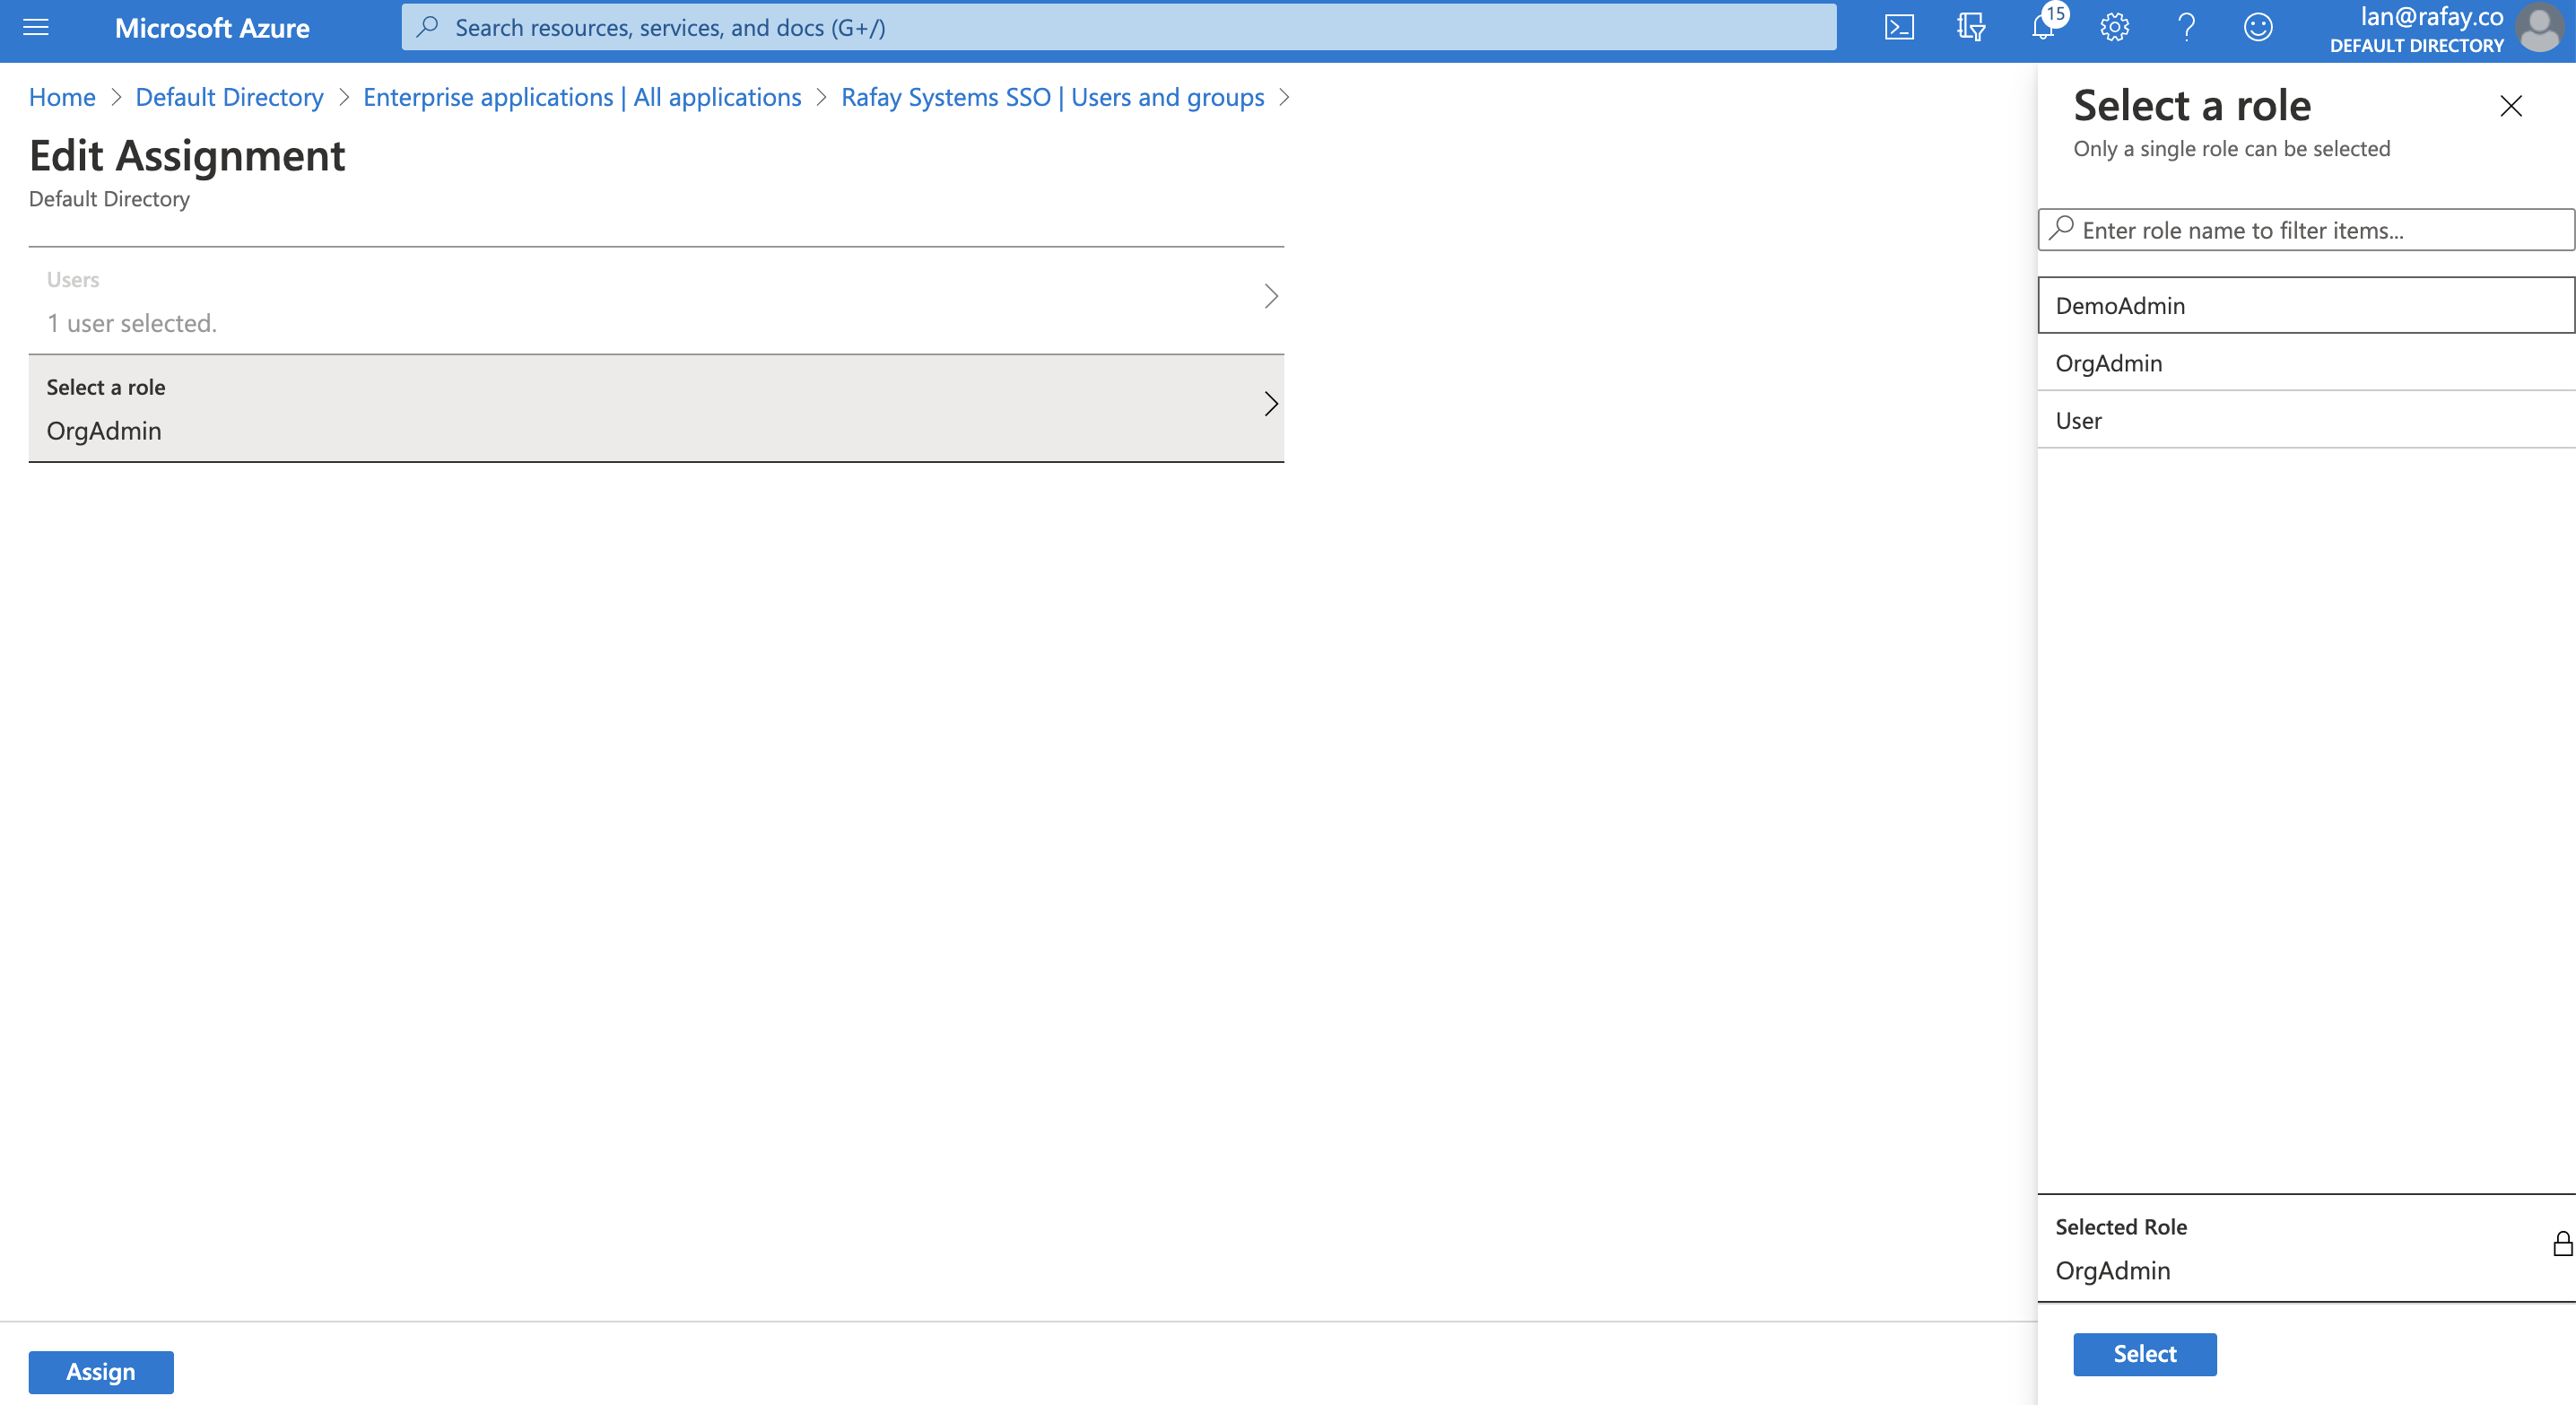
Assign AzureAD Cloud Directory Users and Groups to the App:
- Go to Enterprise application > App > Users and groups > Add user
- Select the Users and/or Groups from AzureAD Cloud Directory to allow access to App
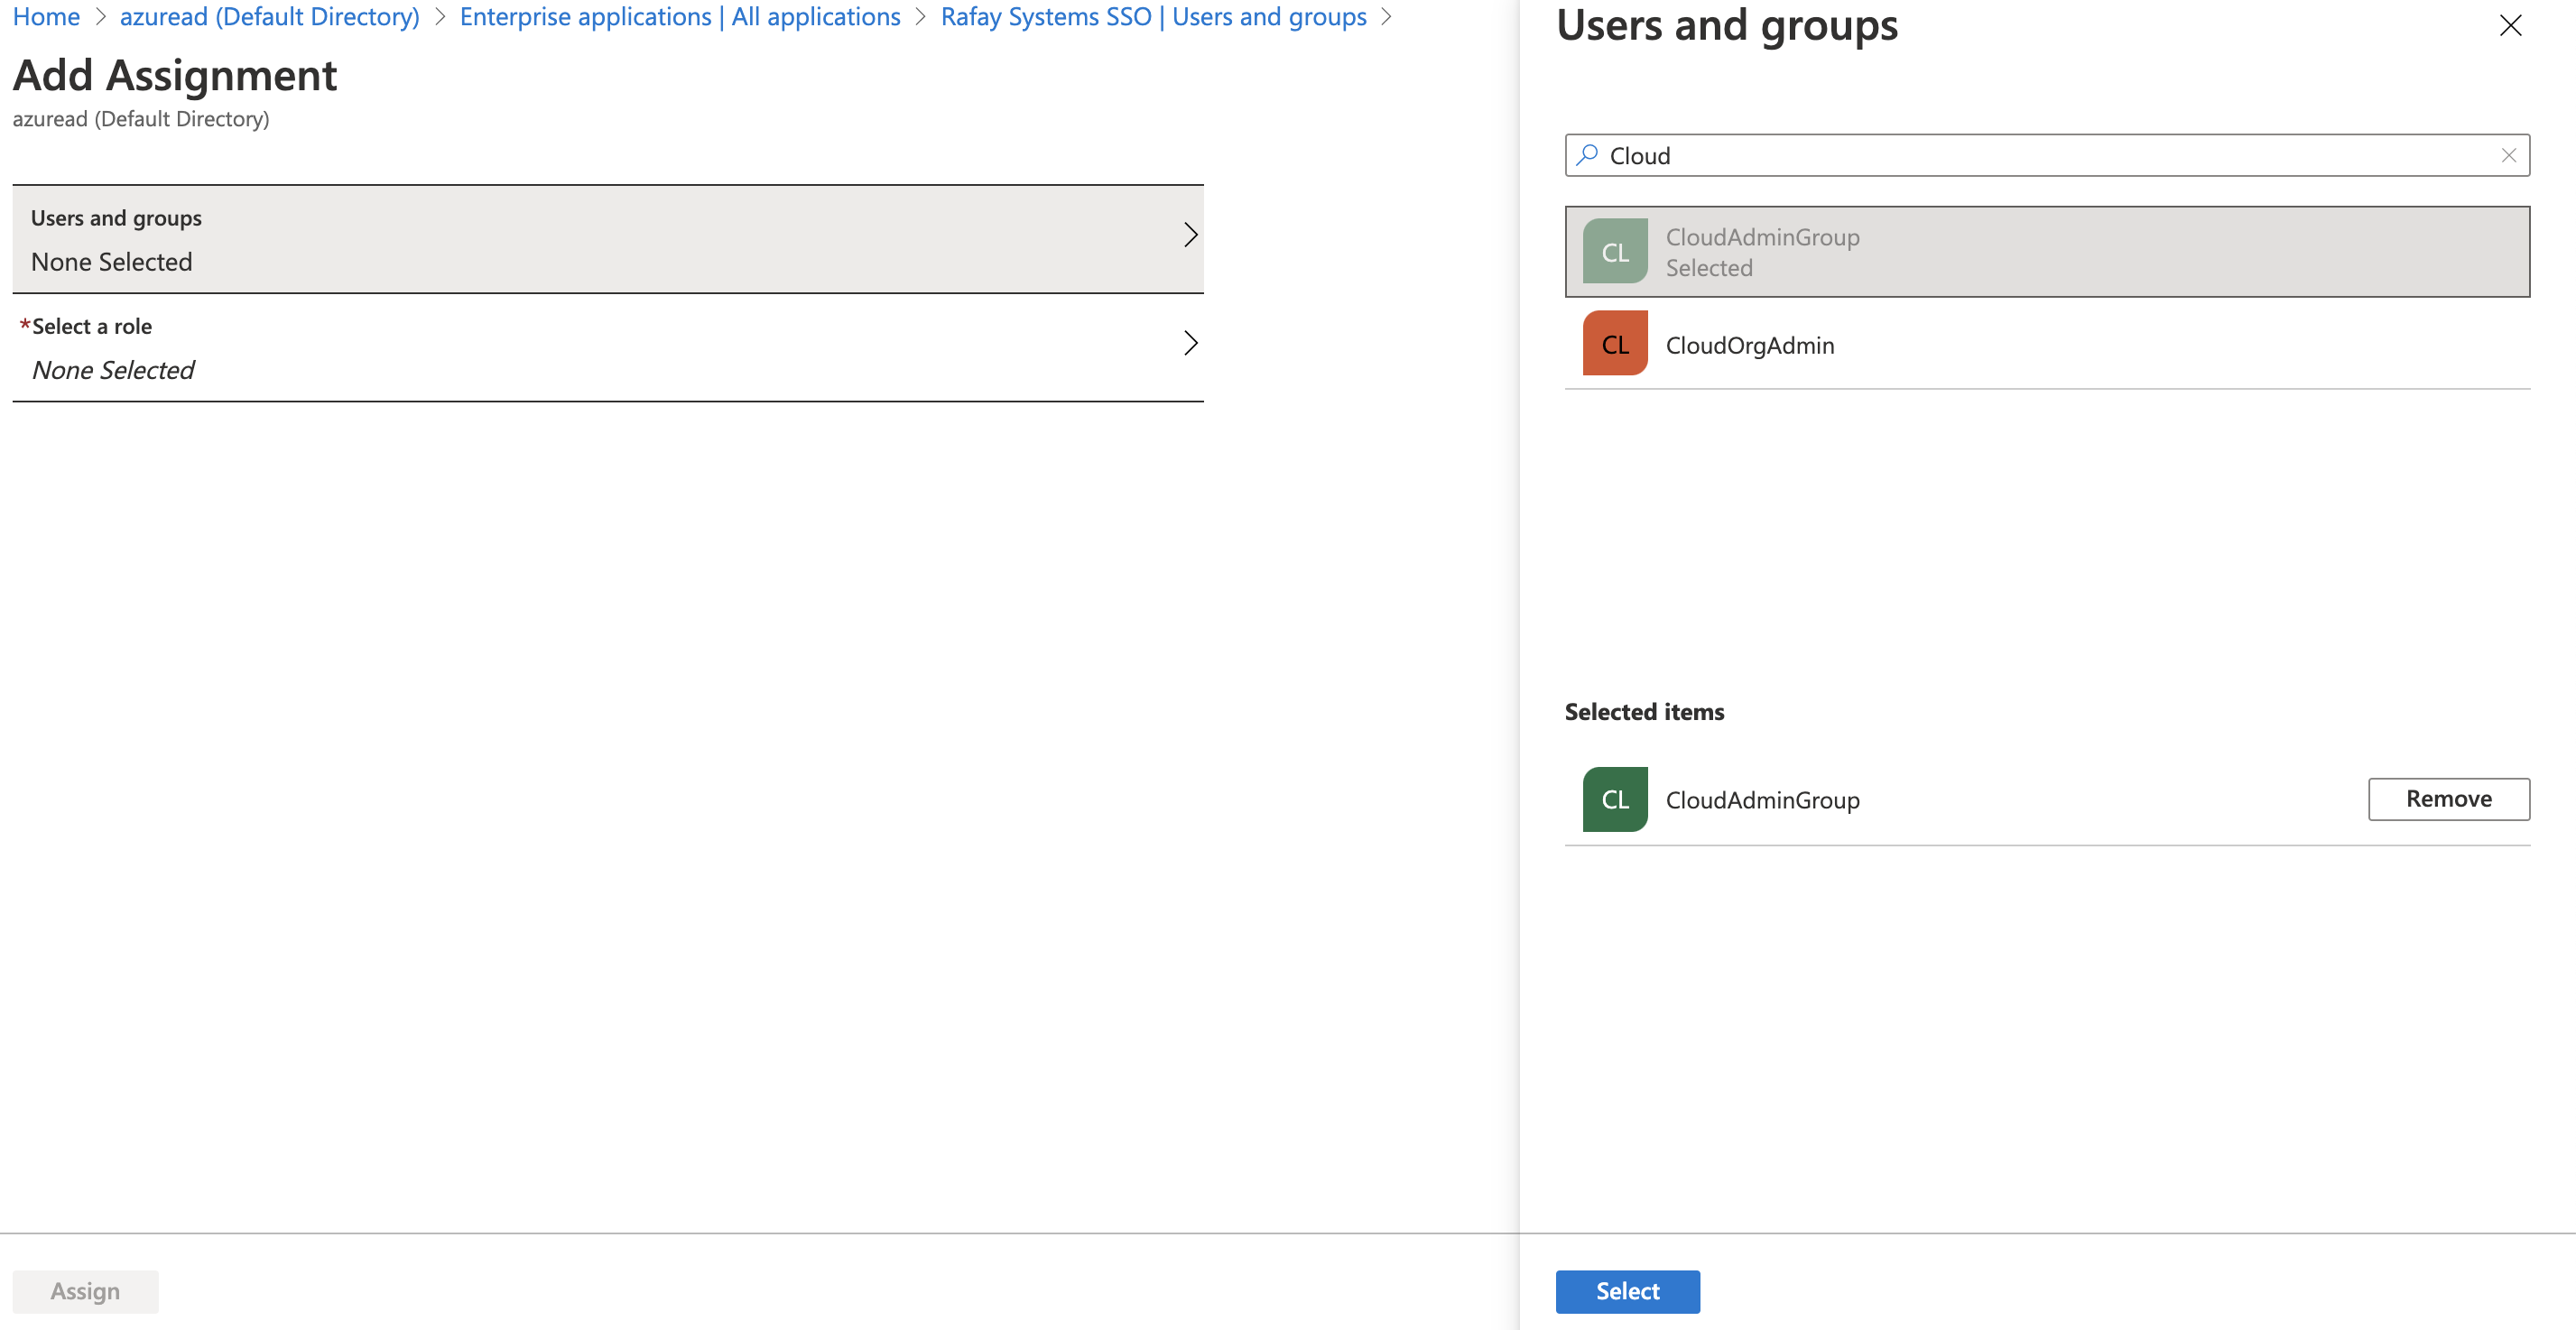
- Select the appRoles for the selected users/groups from the dropdown list. The new appRoles added in the above steps should display in the list
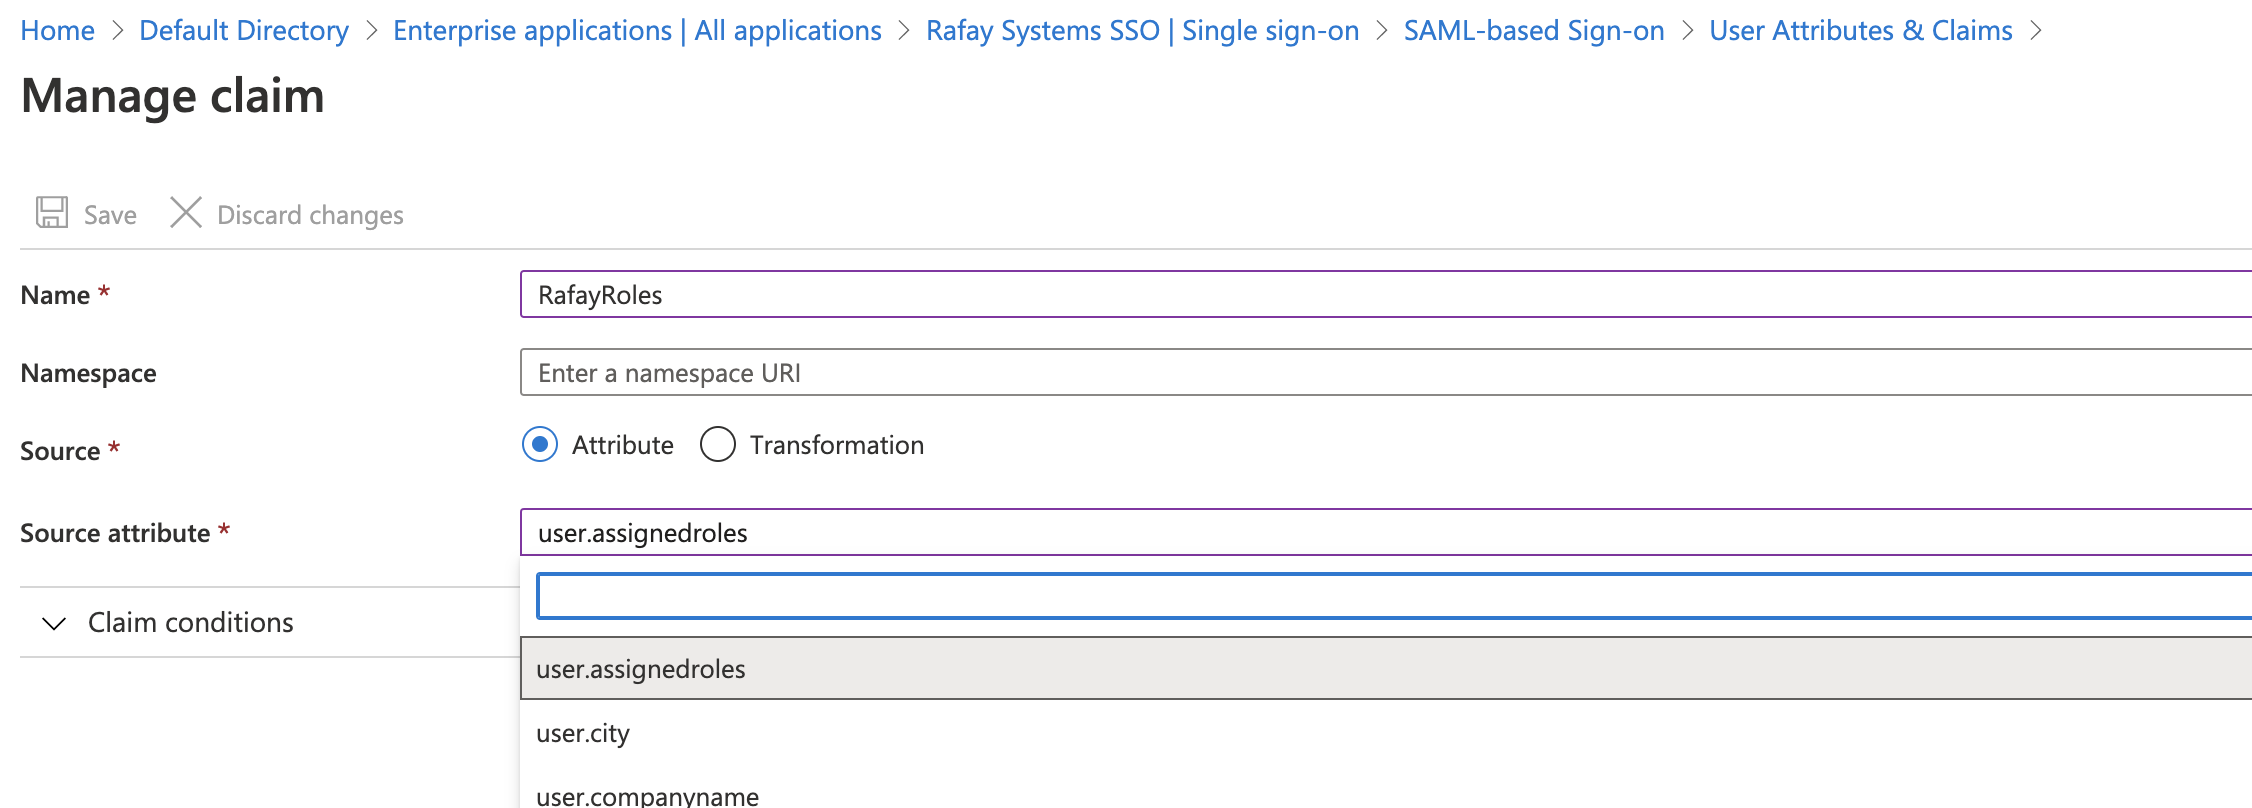
Add A Custom Claim Using the Assigned appRoles for Users/Groups to Web Console:
- Go to Enterprise application > App > Single sign-on
- Click Edit for "User Attributes & Claims"
- Select "Add new claim"
- Provide the name for the "Name" to the same "Group" attribute name that configured in Step 1
- Select the "Source attribute" as "user.assignedroles" to send the assigned appRoles in the above steps to Web Console to use as group information
- Save the settings
Step 7: Specify IdP Metadata
- Go back to AzureAD Portal > Enterprise application > App > Single sign-on configuration page.
- Copy the "App Federation Metadata Url" URL from the App > SAML Signing Certificate section
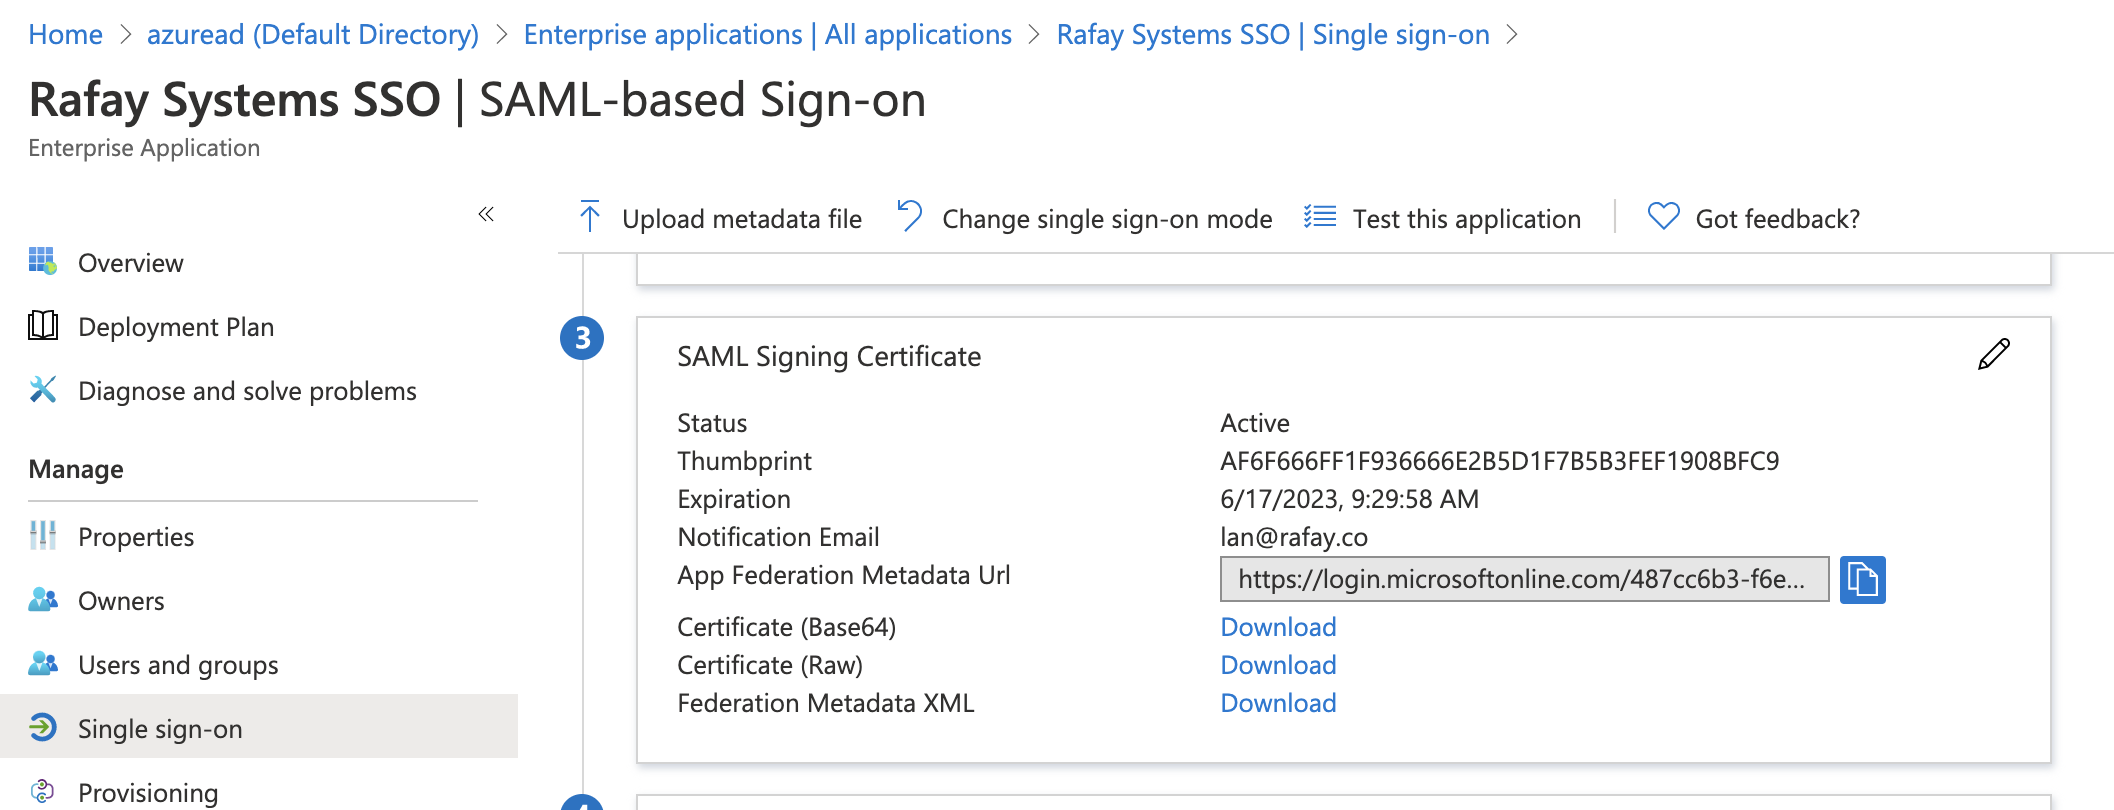
- Navigate back to the Web Console's IdP configuration wizard
- Paste the App Federation Metadata Url from AzureAD to the Identity Provider Metadata URL
- Complete IdP Registration
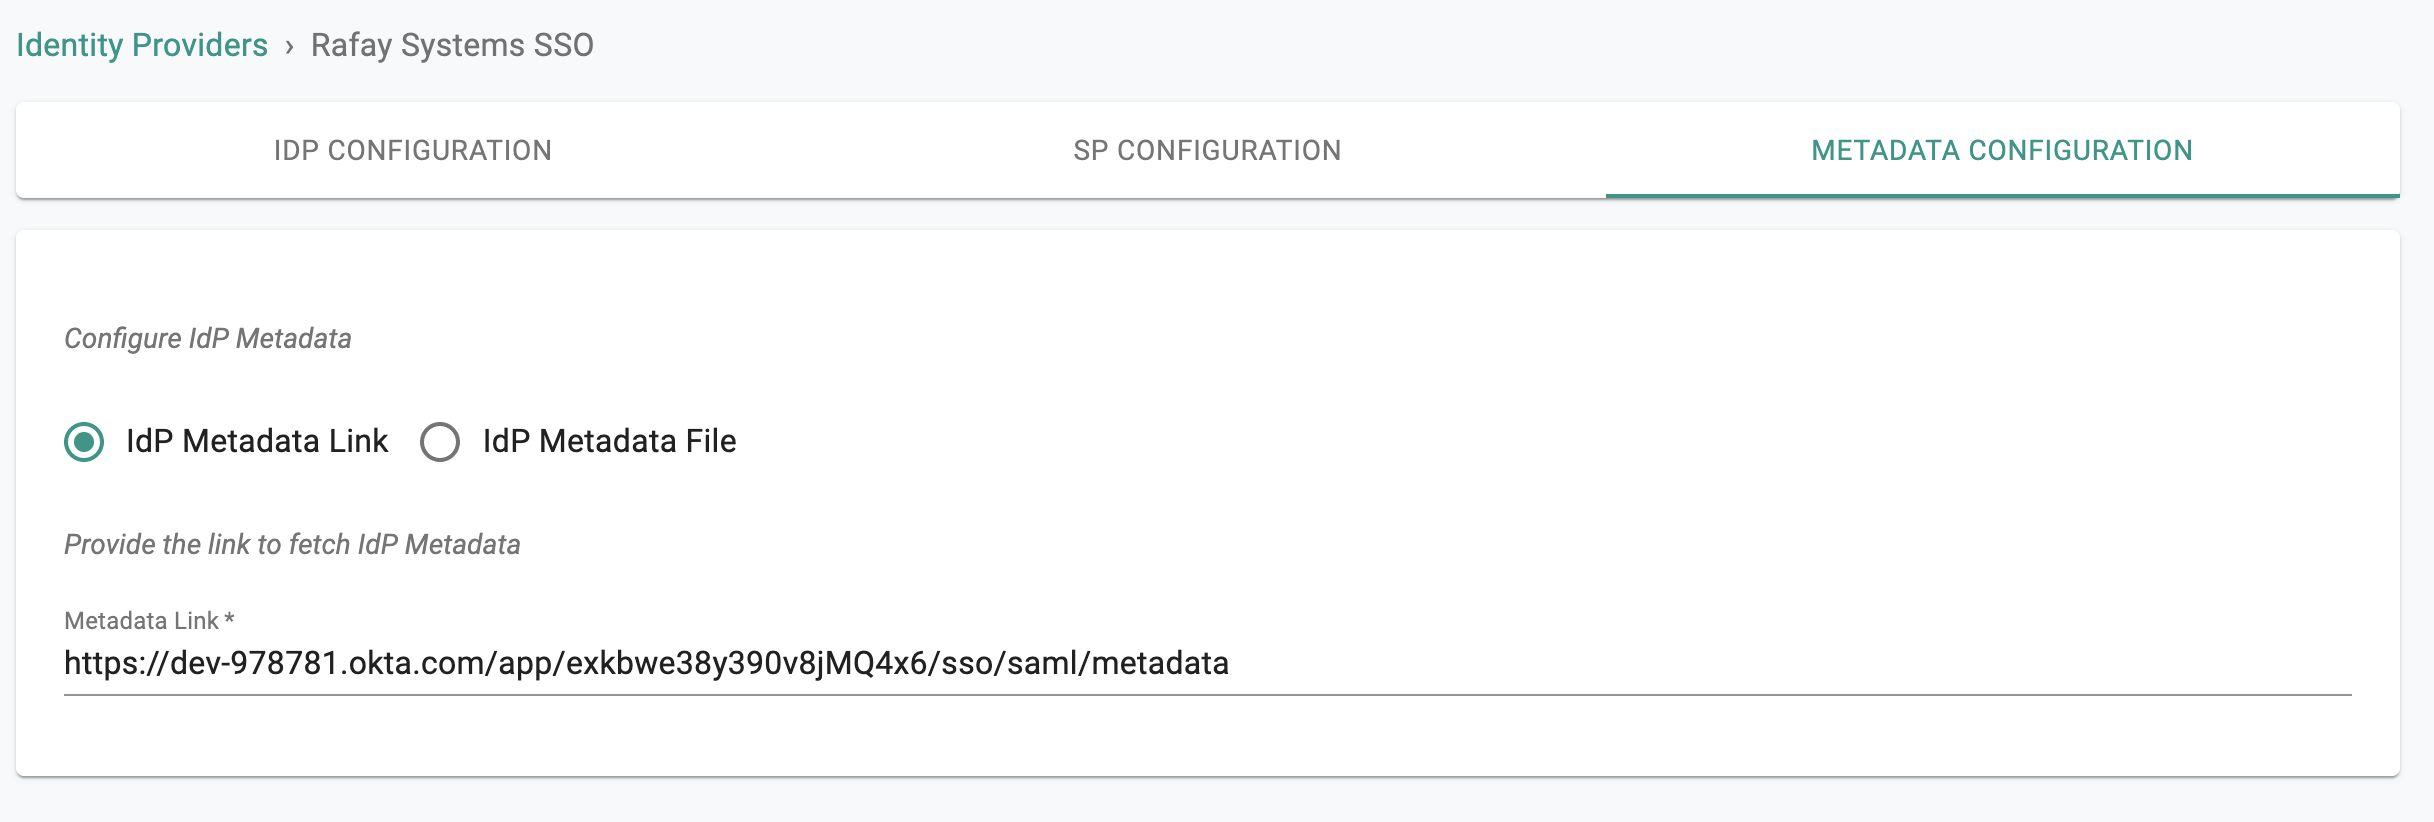
- Once this process is complete, you can view details about the IdP configuration on the Identity Provider page.
- You can also edit and update the configuration if required.