Part 1: Setup
What Will You Do
This is Part 1 of a multi-part, self-paced quick start exercise. In this part, you will configure a blueprint and deploy it to a cluster. Declarative specifications are also provided for this exercise.
Enable Network Visibility through Blueprints
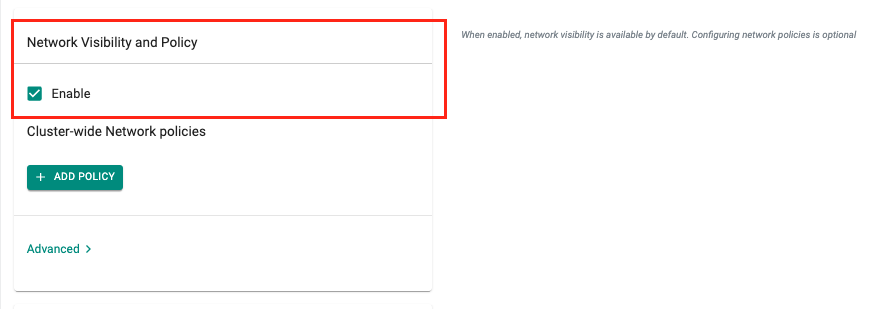
Visibility into Network Traffic Flows can be enabled by simply checking a box in the Blueprint configuration.
- Under Infrastructure, navigate to Blueprints
- Create a new custom blueprint, provide a name for the blueprint (e.g. demo-network-policy)
- Provide a version name (e.g. v1), navigate to the Network Visibility and Policy section and select Enable
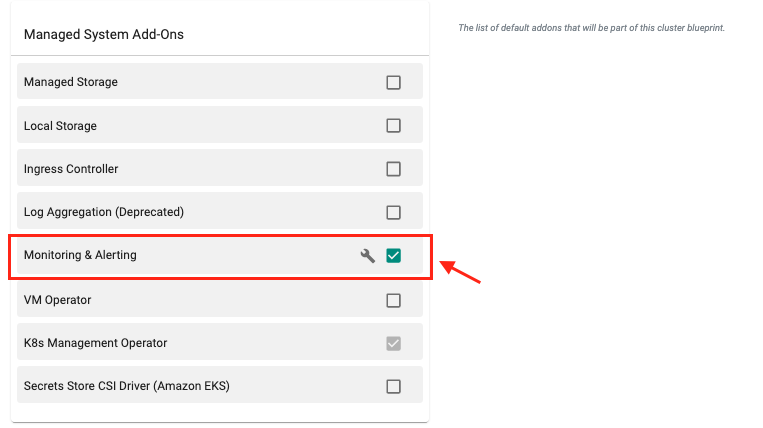
- Ensure that the Monitoring & Alerting managed system add-on is enabled
- Click Save Changes
Assign the Blueprint to the cluster
- Navigate to the Clusters page
- Click on the gear icon next to the cluster and select Update Blueprint
- Select the Blueprint and the version
- Click Save and Publish
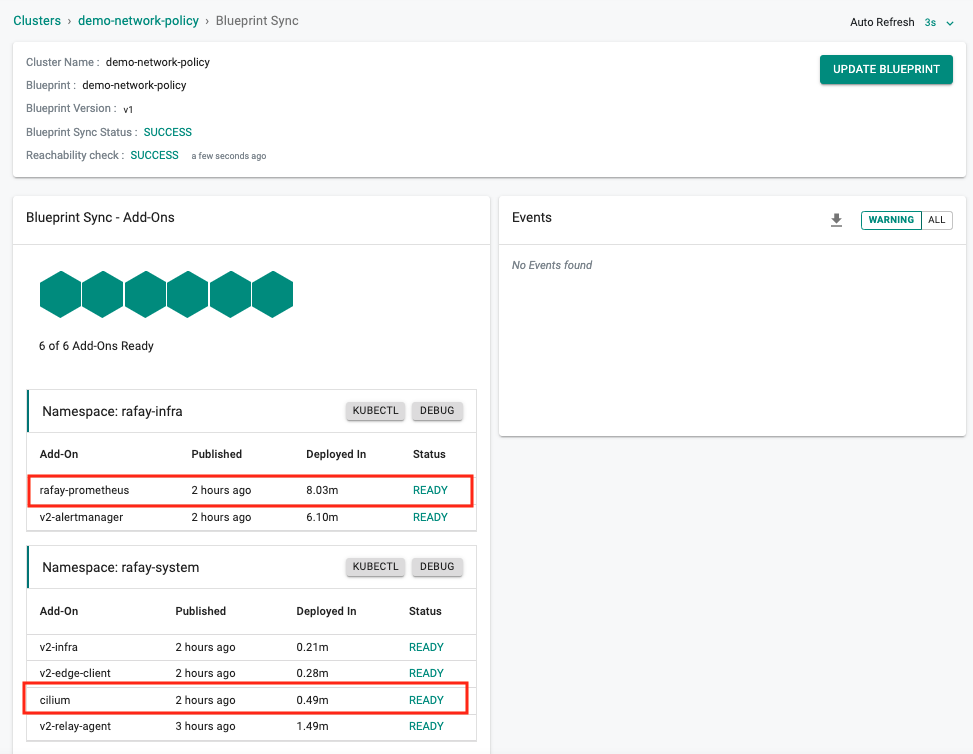
After the blueprint sync operation is complete, you can verify whether the necessary components are installed in the cluster.
Recap
At this point, you have the blueprint configured and deployed to the cluster.
Enable Network Visibility through Blueprints
You can alternatively enable Network Visibility by using the declarative blueprint spec YAML. For more information on automation via RCTL CLI, refer here
- Save the following blueprint spec called demo-network-policy-np. For example purposes, let's say this file is called blueprint.yaml.
This blueprint spec does the following:
- Enables network policy with the default installation profile for Cilium
- Enables the monitoring add-on which is needed for visualizing network traffic in the dashboard.
- Since blueprints support versioning, we are calling the version of this blueprint v1. This will be used when assigning the blueprint to a cluster.
Important
Ensure that you update the "project: defaultproject" with the name of the project in your Org
NOTE: In this example, we are creating a custom blueprint using a base of type default, which works for EKS clusters and MicroK8 clusters. If you are using any cluster type, please see the default blueprints page. For example, for AKS, default-aks should be used as the base.
apiVersion: infra.k8smgmt.io/v3
kind: Blueprint
metadata:
  name: demo-network-policy-bp
  project: defaultproject
spec:
  base:
    name: default
  defaultAddons:
    csiSecretStoreConfig:
      providers: {}
    enableIngress: false
    enableLogging: false
    enableMonitoring: true
    enableVM: false
  drift:
    enabled: false
  networkPolicy:
    profile:
      name: default
  opaPolicy: {}
  placement: {}
  type: custom
  version: v1
- Type the command below to create the new blueprint
rctl apply -f <blueprint spec filename>
For example, if the file is called blueprint.yaml you would do:
rctl apply -f blueprint.yaml
- Type the command below to verify creation of the blueprint
rctl get blueprint demo-network-policy-bp --v3 --output yaml
Note that the blueprint is created with monitoring enabled and network policy enabled using the default network policy installation profile. Note that the version name is v1.
Assign the Blueprint to Your Cluster
You can next assign the blueprint to the cluster using the RCTL command.
rctl update cluster <cluster_name> -b <blueprint_name> --blueprint-version <version_name>
For example, using the blueprint we just created above, it would be:
rctl update cluster <cluster_name> -b demo-network-policy-bp --blueprint-version v1
Type the command below to verify creation of the blueprint
rctl get cluster <cluster_name>
You should see demo-network-policy-bp assigned to it.
Recap
At this point, you have the blueprint configured and published to the cluster.