Part 3: Namespace Isolation
What Will You Do
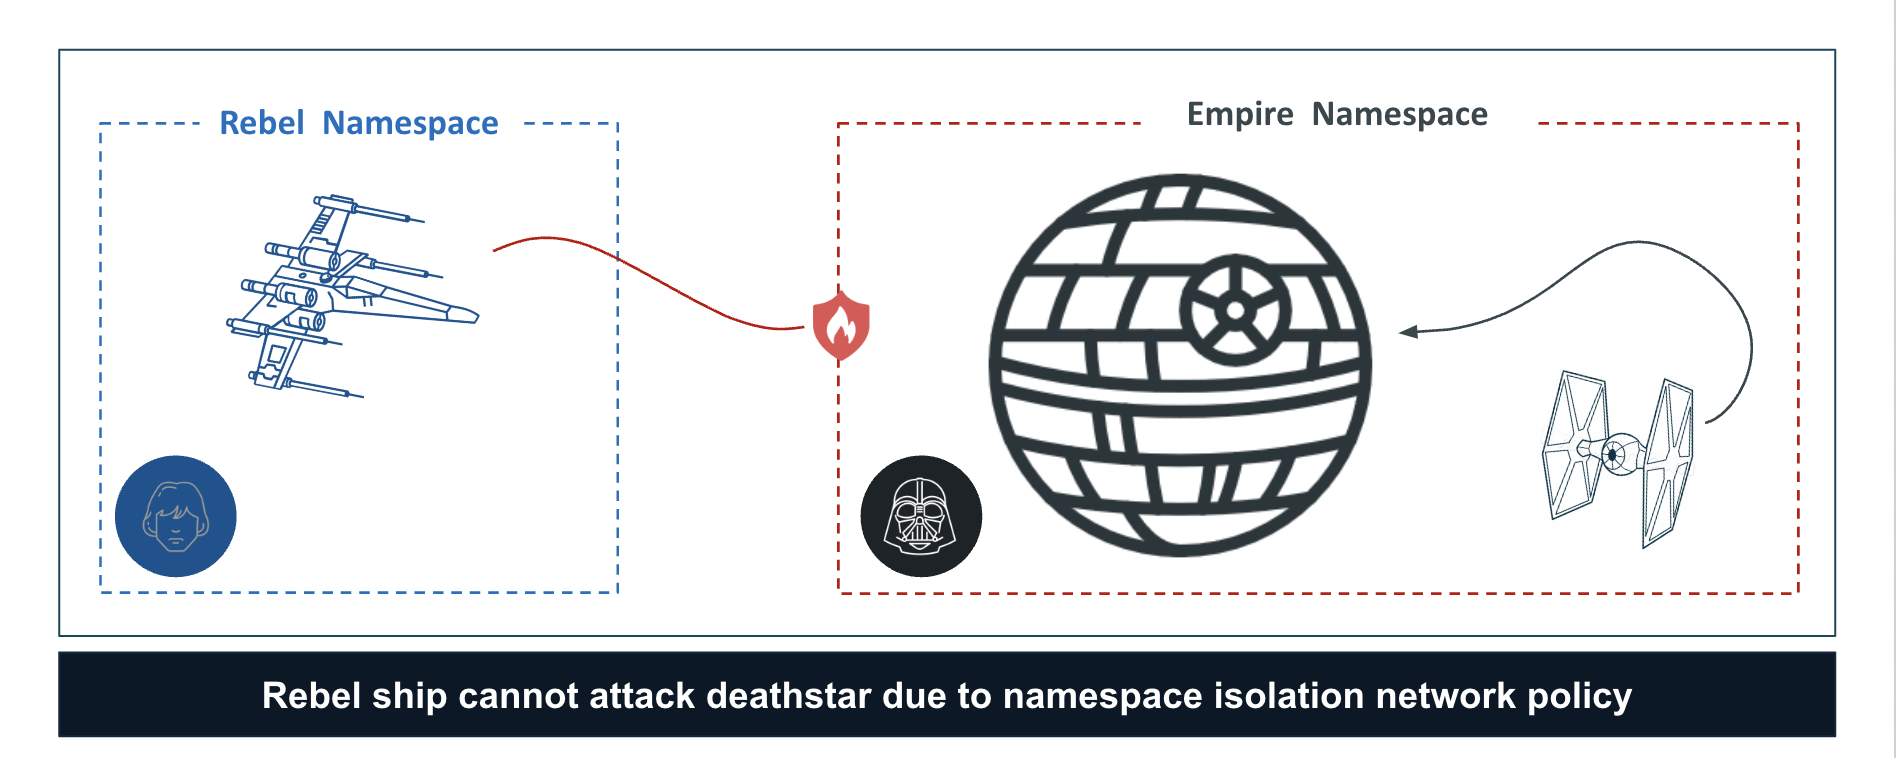
In this part of the self-paced exercise, you will configure a namespace policy to ensure that resources cannot communicate outside of that namespace. Namespace isolation through network policy is especially important from a security perspective when enabling a Soft Tenancy model in shared cluster scenarios.
In this scenario, we want to limit any attacks between the empire and rebels namespaces, effectively not have them talk with each other. In order to facilitate this, we will create a namespace network policy scoped to the empire namespace. This will restrict traffic to only be allowed within the empire namespace and will also make sure that any traffic from another namespace, say for example an attack from the xwing in the diagram below, will not be allowed. We will then see how we can visualize the allowed and blocked traffic flows, including seeing the change in flows via replay.
Create a namespace rule
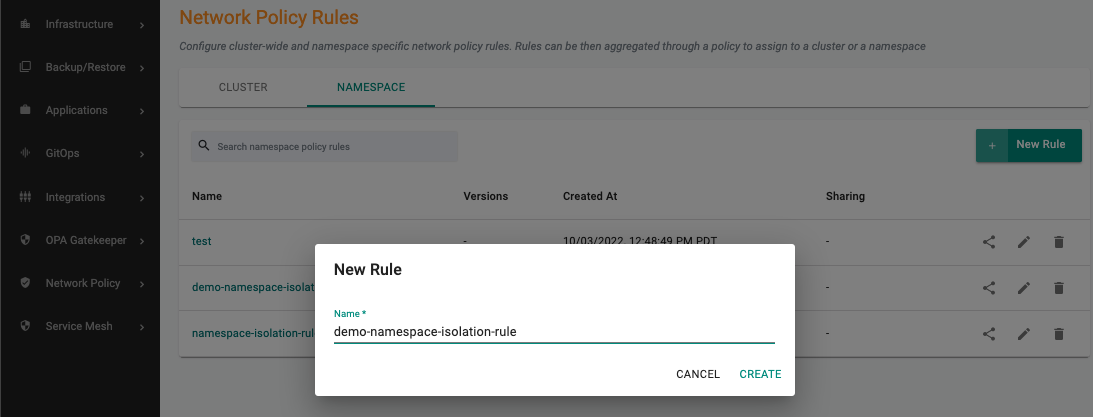
In this exercise, we will configure a namespace isolation rule for empire namespace
- Under Network Policy section, Click Rules
- Select the Namespace tab
- Create a new namespace rule, specify the name (e.g. demo-namespace-isolation-rule)
- Provide the version name (e.g. v1)
- Save the below YAML to a file called rule.yaml for example.
- Next, upload the rule.yaml in the artifact sync section.
- Click Save Changes
Namespace Rule YAML
Save the following Cilium network policy to a YAML file. Let's call this file rule.yaml.
apiVersion: cilium.io/v2
kind: CiliumNetworkPolicy
metadata:
  name: namespace-isolation-policy
spec:
  endpointSelector:
    matchLabels:
      "k8s:io.kubernetes.pod.namespace": empire
  ingress:
  - fromEndpoints:
    - matchLabels:
        "k8s:io.kubernetes.pod.namespace": empire
  egress:
    - toEndpoints:
      - matchLabels:
          "k8s:io.kubernetes.pod.namespace": empire
    - toEndpoints:
      - matchLabels:
          "k8s:io.kubernetes.pod.namespace": kube-system
          "k8s:k8s-app": kube-dns
      toPorts:
        - ports:
          - port: "53"
            protocol: ANY
The following rules limits ingress and egress traffic from the empire namespace while allowing traffic to kube-system for DNS.
Create a namespace network policy
A namespace-wide policy is a bundle of network security rules that can be applied to one or more namespaces.
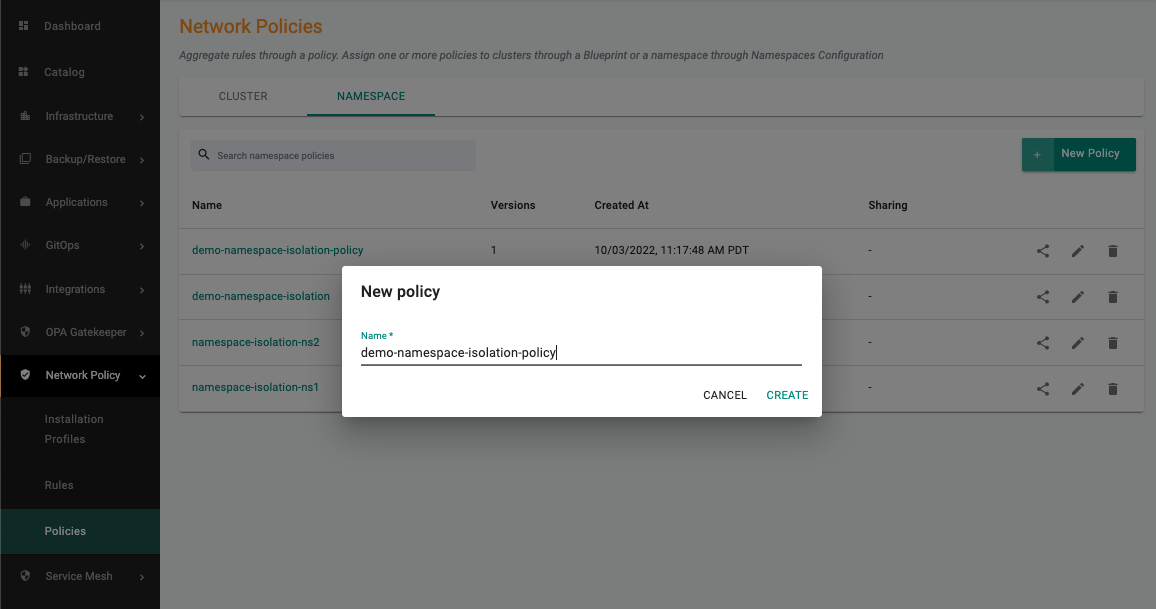
- Under Network Policy section, Click Policies
- Select the Namespace tab
- Create a new namespace policy, specify the name (e.g. demo-namespace-isolation-policy)
- Provide the version name (e.g. v1)
- Add Rules, select the namespace network policy rule and the version created previously
- Click Save Changes
Attach the namespace network policy to a namespace
- Navigate to the Namespaces page
- Select the empire namespace
- Select the Configuration tab
- Select Network Policies, add the namespace network policy and the corresponding version via the dropdown
- Click Save and Go to Placement
- Select the cluster
- Click Save & Go to Publish
- Click Republish
Visualize Blocked Traffic Flows
- Click Home
- Select Dashboards (option available next to Home)
- Select Network Policy
- Select the Project, Cluster
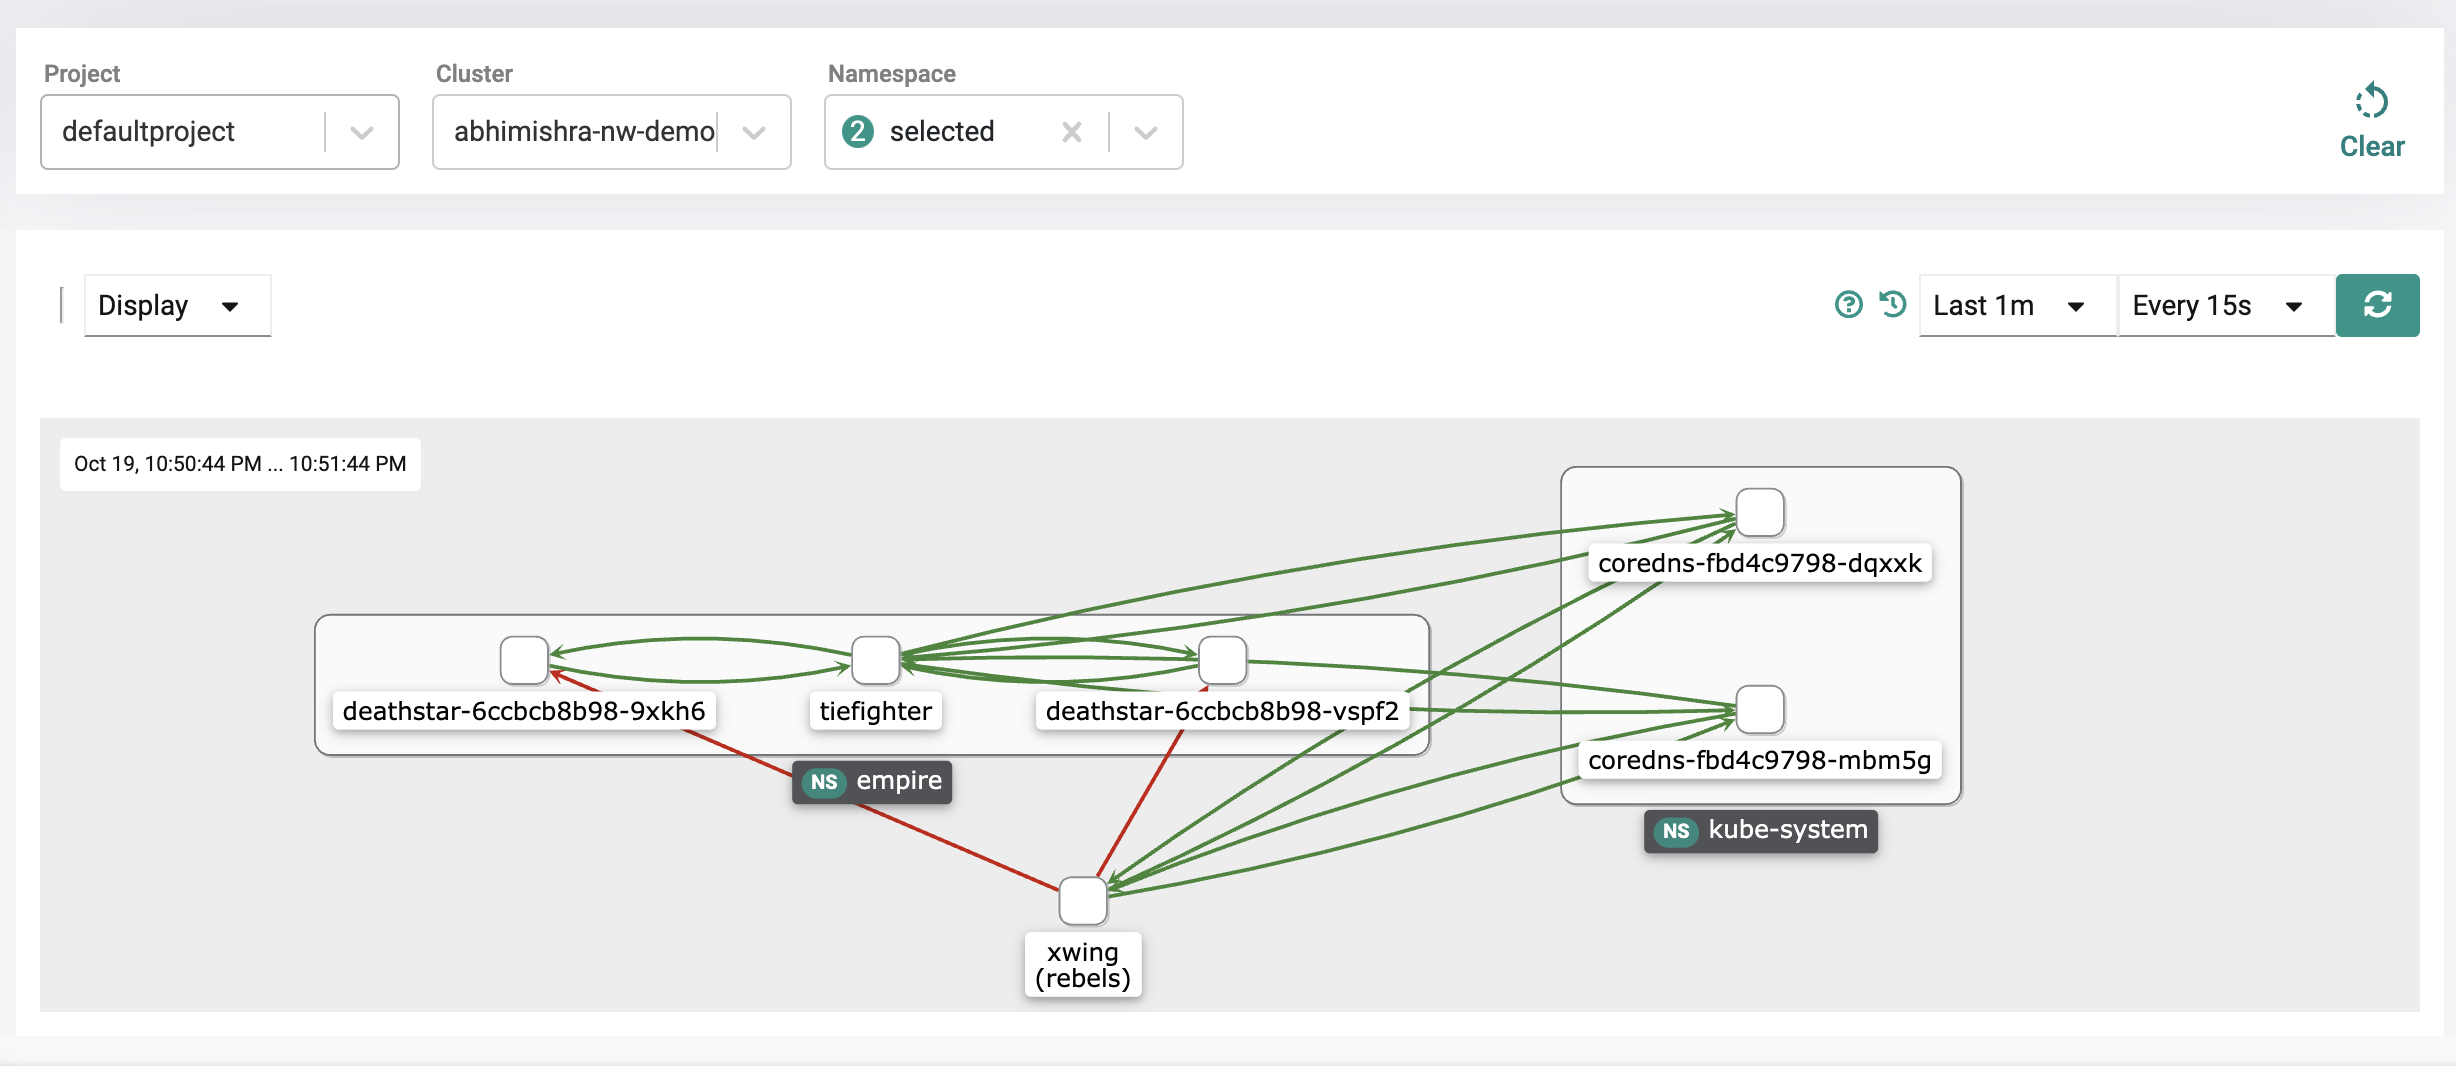
- Select the empire and rebels namespaces from the namespace drop down
You can now see inter-namespace traffic being blocked as a result of the namespace isolation policy configured for empire namespace which is blocking traffic from the xwing in the rebels namespace.
Replay Changes in Traffic Flows
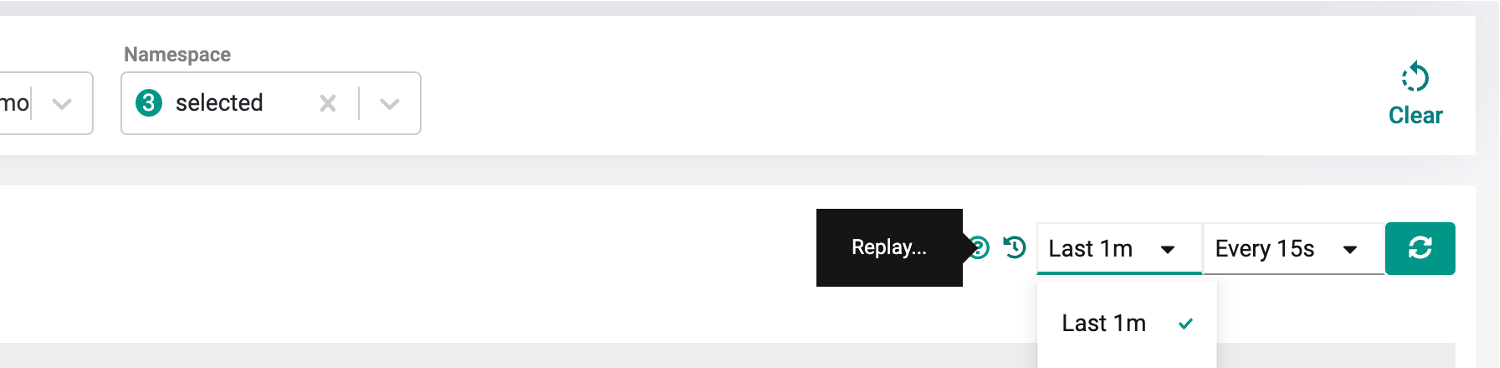
- On the dashboard, click the replay icon which is located next to the time interval drop down.
- On the left, you will see a dropdown option to signify a replay length, which indicates how long the replay should play for. Select 5 minutes.
- Select fast as the replay speed.
- Click the play button.
You will notice the traffic flows are all green for a period of time until the flows from the xwing to the deathstar start to turn orange and then red. This indicates the network policy taking effect as it acts like a shield blocking the xwing from pinging the deathstar as the network policy enforced on the empire namespace blocks traffic coming from other namespaces.

Recap
Congratulations! At this point, you have successfully created a namespace isolation policy hardening security posture in shared cluster scenarios.
Create a namespace rule
You can alternatively create a namespace network policy rule by using the declarative spec YAML. For more information on automation via RCTL CLI, refer here
- Save the below to a YAML file. For example purposes, let's call this file namespacenetworkpolicyrule.yaml
Important
Ensure that you update the "project: defaultproject" with the name of the project in your Org and make sure to point to the correct rule.yaml file in the artifact section where the rule.yaml contains the Cilium network policy rules you defined in the previous step.
apiVersion: security.k8smgmt.io/v3
kind: NamespaceNetworkPolicyRule
metadata:
  name: demo-namespace-isolation-rule
  project: defaultproject
spec:
  artifact:
    artifact:
      paths:
      - name: file://rule.yaml
    options: {}
    type: Yaml
  version: v1
- Run the below command to create a Namespace Network Policy Rule using the spec yaml file
rctl apply -f <path-to-filename>.yaml
For example, if the file was called namespacenetworkpolicyrule.yaml, then you would do
rctl apply -f namespacenetworkpolicyrule.yaml
- Type the command below to verify creation of the namespace network policy rule
rctl get namespacenetworkpolicyrule demo-namespace-isolation-rule
Namespace Rule YAML
apiVersion: cilium.io/v2
kind: CiliumNetworkPolicy
metadata:
  name: namespace-isolation-policy
spec:
  endpointSelector:
    matchLabels:
      "k8s:io.kubernetes.pod.namespace": empire
  ingress:
  - fromEndpoints:
    - matchLabels:
        "k8s:io.kubernetes.pod.namespace": empire
  egress:
    - toEndpoints:
      - matchLabels:
          "k8s:io.kubernetes.pod.namespace": empire
    - toEndpoints:
      - matchLabels:
          "k8s:io.kubernetes.pod.namespace": kube-system
          "k8s:k8s-app": kube-dns
      toPorts:
        - ports:
          - port: "53"
            protocol: ANY
The following rules limits ingress and egress traffic from the empire namespace while allowing traffic to kube-system for DNS.
Create a namespace network policy
You can alternatively create a namespace policy by using the declarative spec YAML. For more information on automation via RCTL CLI, refer here
Important
Ensure that you update the "project: defaultproject" with the name of the project in your Org
-
First save the YAML below to a file. For example purposes, let's call this file namespacenetworkpolicy.yaml.
apiVersion: security.k8smgmt.io/v3 kind: NamespaceNetworkPolicy metadata: name: demo-namespace-isolation-policy project: defaultproject spec: rules: - name: namespace-isolation-rule version: v1 version: v1- Run the below command to create a Namespace Network Policy using the spec yaml file
rctl apply -f <path to namespace policy>.yamlFor example if the file was called namespacenetworkpolicy.yaml,
rctl apply -f namespacenetworkpolicy.yaml- Type the command below to verify creation of the namespace network policy
rctl get namespacenetworkpolicy demo-namespace-isolation-policy
Attach the namespace network policy to the empire namespace
- Run the below command to get the current output yaml for a namespace. Save the output to a yaml file. For example purposes, let's call this file namespace.yaml
rctl get namespace empire --output yaml --v3- In the file you just saved, change the network policy section to have it enabled with your namespace network policy, similar to the example below. Make sure your cluster and project labels are set correctly.
- Update the namespace config to use the latest using the file you just updatedapiVersion: infra.k8smgmt.io/v3 kind: Namespace metadata: name: empire project: defaultproject spec: limitRange: container: {} pod: {} namespaceMeshPolicyParams: {} networkPolicyParams: networkPolicyEnabled: true policies: - name: demo-namespace-isolation-policy version: v1 placement: labels: - key: rafay.dev/clusterName value: demo-nw-policy resourceQuotas: {} status: conditionStatus: 2 conditionType: NamespaceReady lastUpdated: nanos: 494902040 seconds: 1683061542 reason: namespace is readyFor example, if the name of the namespace file is namespace.yaml you should dorctl apply -f <name of namespace file>rctl apply -f namespace.yamlrctl get namespace empire-ns --output yaml --v3 ```- After 10 seconds, verify the namespace network policy is attached to the namespace by doing the followingVisualize Blocked Traffic Flows
- Click Home
- Select Dashboards (option available next to Home)
- Select Network Policy
- Select the Project, Cluster
- Select the empire and rebels namespaces from the namespace drop down
You can now see inter-namespace traffic being blocked as a result of the namespace isolation policy configured for empire namespace which is blocking traffic from the xwing in the rebels namespace.
Replay Changes in Traffic Flows
- On the dashboard, click the replay icon which is located next to the time interval drop down.
- On the left, you will see a dropdown option to signify a replay length, which indicates how long the replay should play for. Select 5 minutes.
- Select fast as the replay speed.
- Click the play button.
You will notice the traffic flows are all green for a period of time until the flows from the xwing to the deathstar start to turn orange and then red. This indicates the network policy taking effect as it acts like a shield blocking the xwing from pinging the deathstar as the network policy enforced on the empire namespace blocks traffic coming from other namespaces.
Recap
Congratulations! At this point, you have successfully created a namespace isolation policy hardening security posture in shared cluster scenarios.