Provisioning
Cloud Credentials
The controller needs to be configured with vSphere Credentials and Gateway setup in order to programmatically create and configure required VMware infrastructure on vCenter in your account. These credentials securely managed as part of a cloud credential in the Controller.
The creation of a cloud credential is a "One Time" task. It can then be used to create clusters in the future when required. Refer vSphere Credentials for additional instructions on how to configure this.
Important
To guarantee complete isolation across Projects (e.g. BUs, teams, environments etc.,), cloud credentials are associated with a specific project. These can be shared with other projects if necessary.
Prerequisites
Assure to have the below pre-requisites to deploy a Kubernetes cluster in VMware environment:
- vSphere version 6.7u3 or above
- An vSphere Standard or higher
Self Service Wizard
The wizard prompts the user to provide critical cluster configuration details organized into logical sections:
- General
- vCenter Settings
- Network Settings
- Control Plane
- Worker Nodes
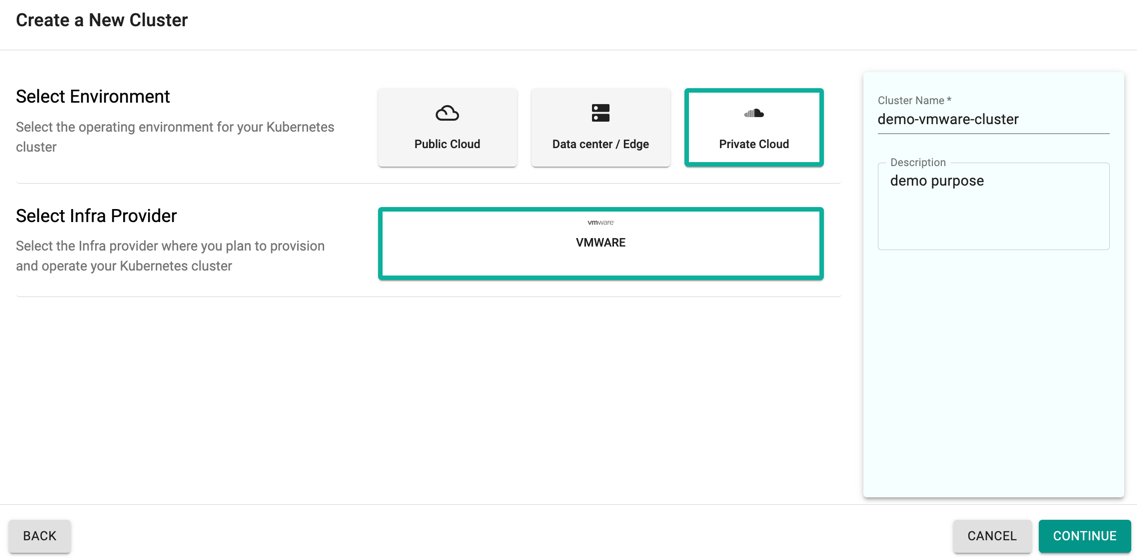
Create Cluster
- Click Clusters on the left panel and the Clusters page appears
- Click New Cluster
- Select Create a New Cluster and click Continue
- Select the Environment Private Cloud
- Select the Infra Provider VMWARE
- Provide a cluster name and click Continue
General (Mandatory)
General section is mandatory to create a cluster
- Select the Cloud Credential from the drop-down created with vSphere credentials
- Select a Blueprint and version. Customized blueprint can also be selected from the drop-down if required

vCenter Settings (Mandatory)
This section allows to customize the vCenter Settings
- Select Custom Data Center or enter the Data Center name, used for connecting with the gateway via vCenter
- Select Custom or enter the Data Store name
- Select Custom or enter the Resource pool name selected in the vCenter. Refer to VMware Schema for more information on how to enter the resource pool name, especially in an environment with similar resource pool names.
- Ensure to have the VM Templates in the vCenter. Enter the required VM Template depending on the Kubernetes version used. Refer to VMware Schema for more information
Refer Gateway to know more about the above fields
- Optionally, select Custom for VM Folder or enter the folder name created in the vCenter where the VM must be deployed and Vcenter CaTIs Thumbprint
- Enter the IP address used for Control Plane Endpoint
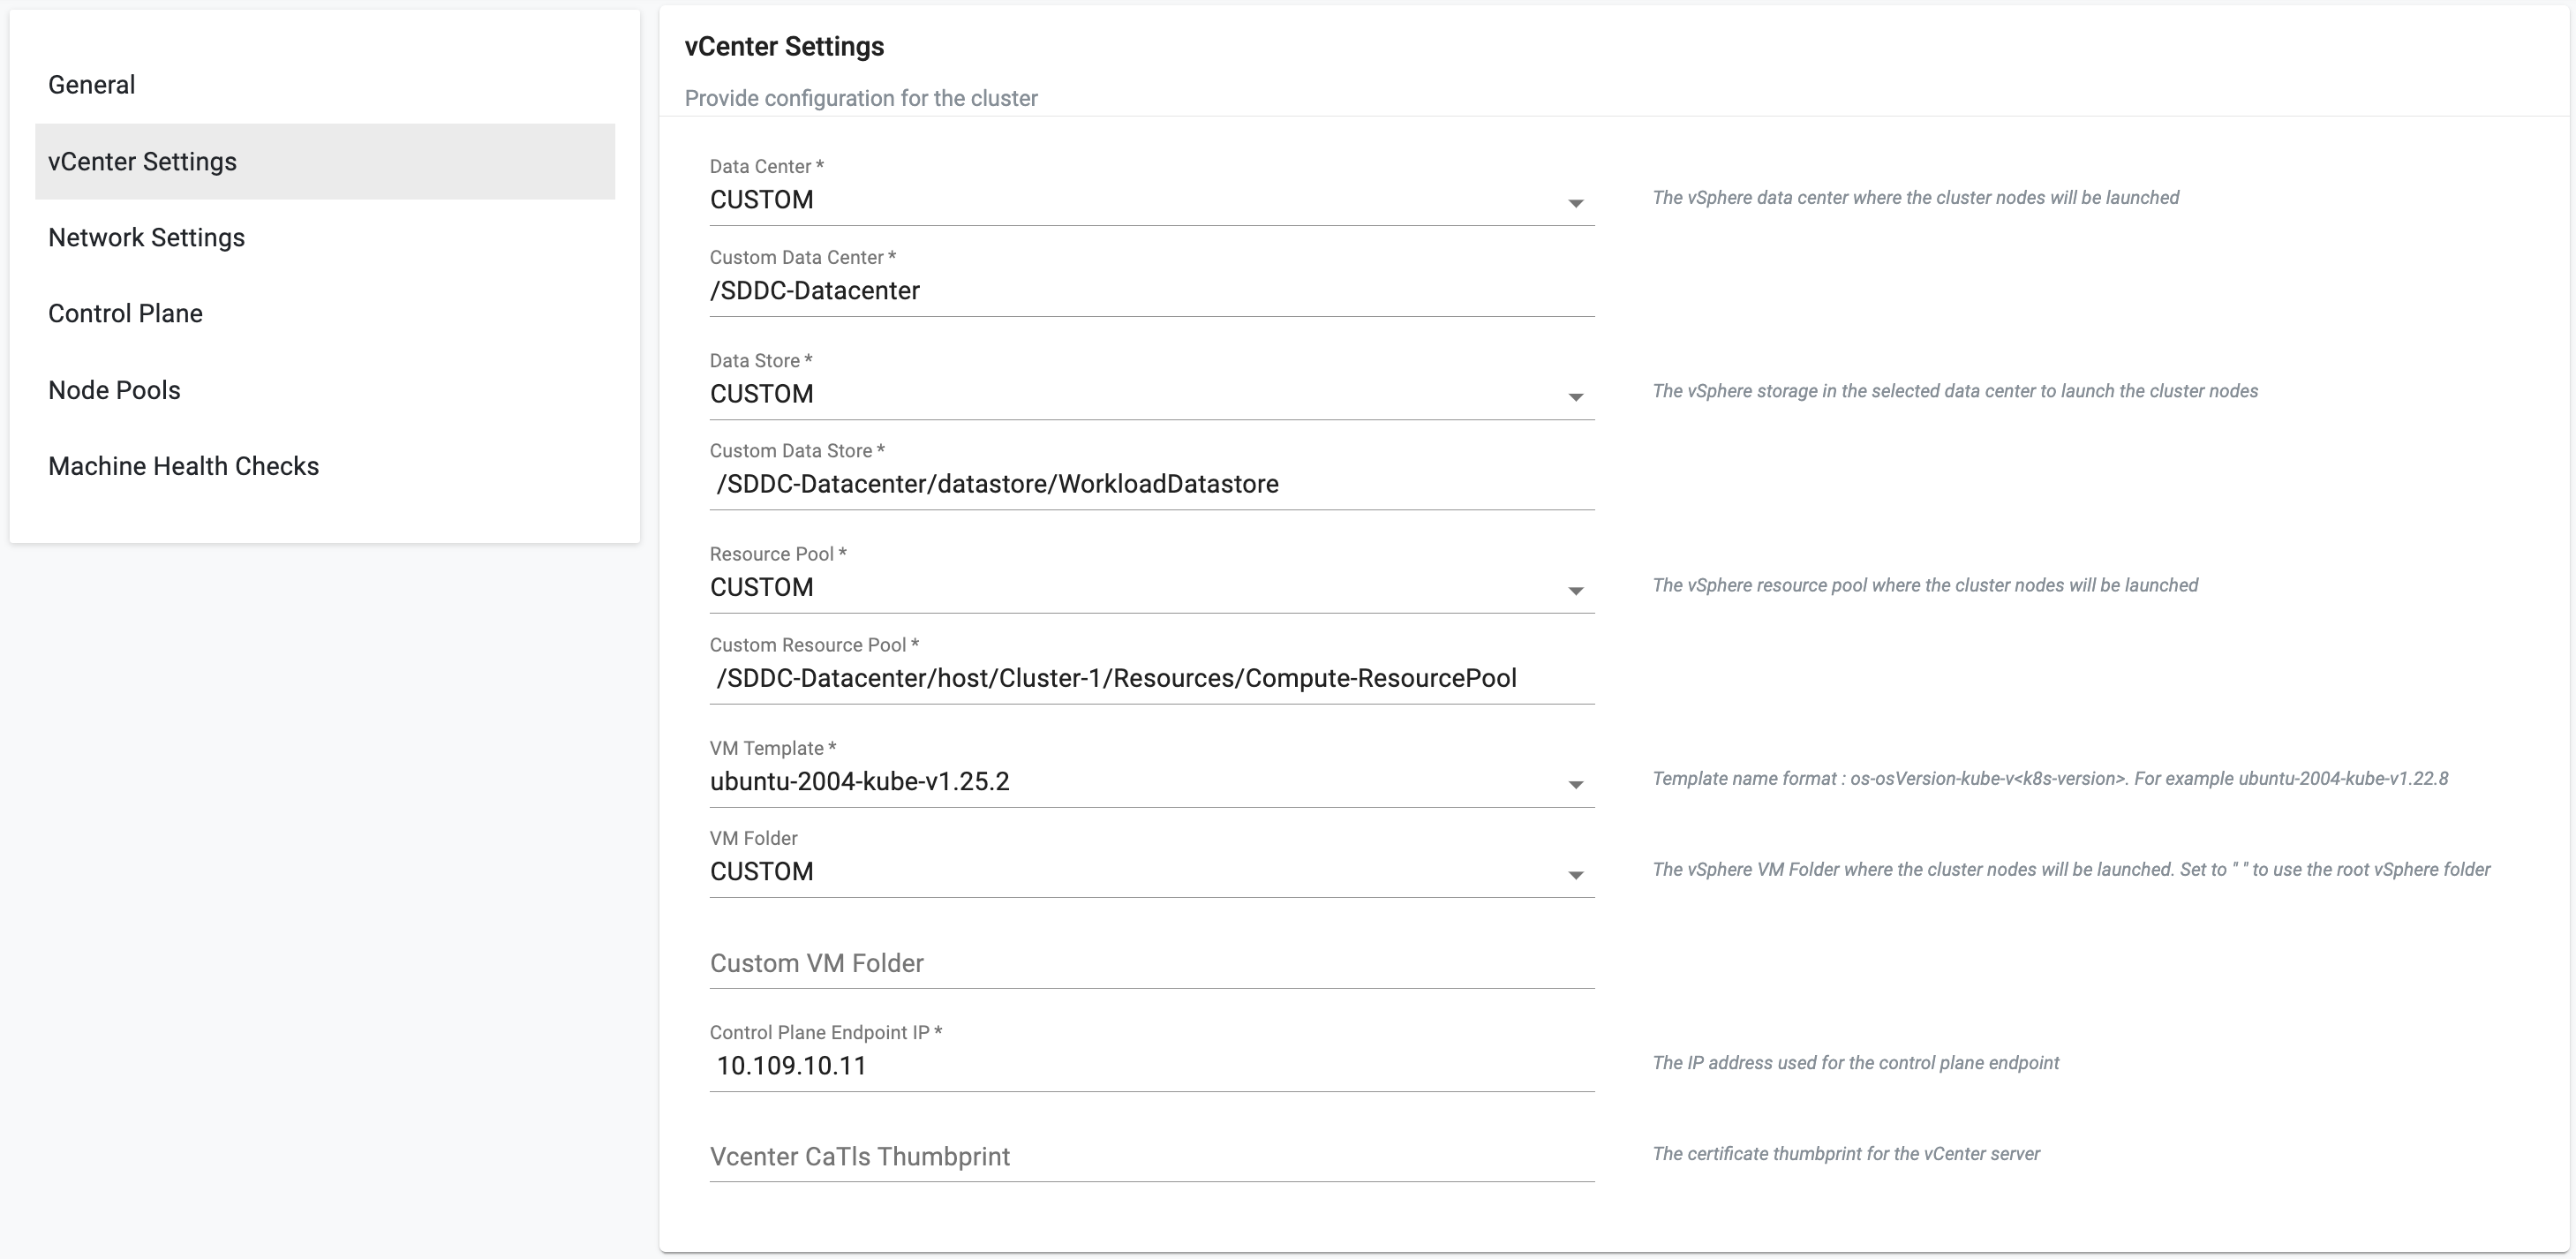
Important
The control plane IP address is unique and must not be assigned to any other nodes/VMs. Hence, consider removing this address from your DHCP pool to avoid IP conflict when entered manually during the cluster configuration
Network Settings
- Select the Network Settings CNI Name as calico and the version
- Select Custom or enter the Network Name configured in the VMware Console. Refer Gateway for more details
- Enter the CIDR Blocks
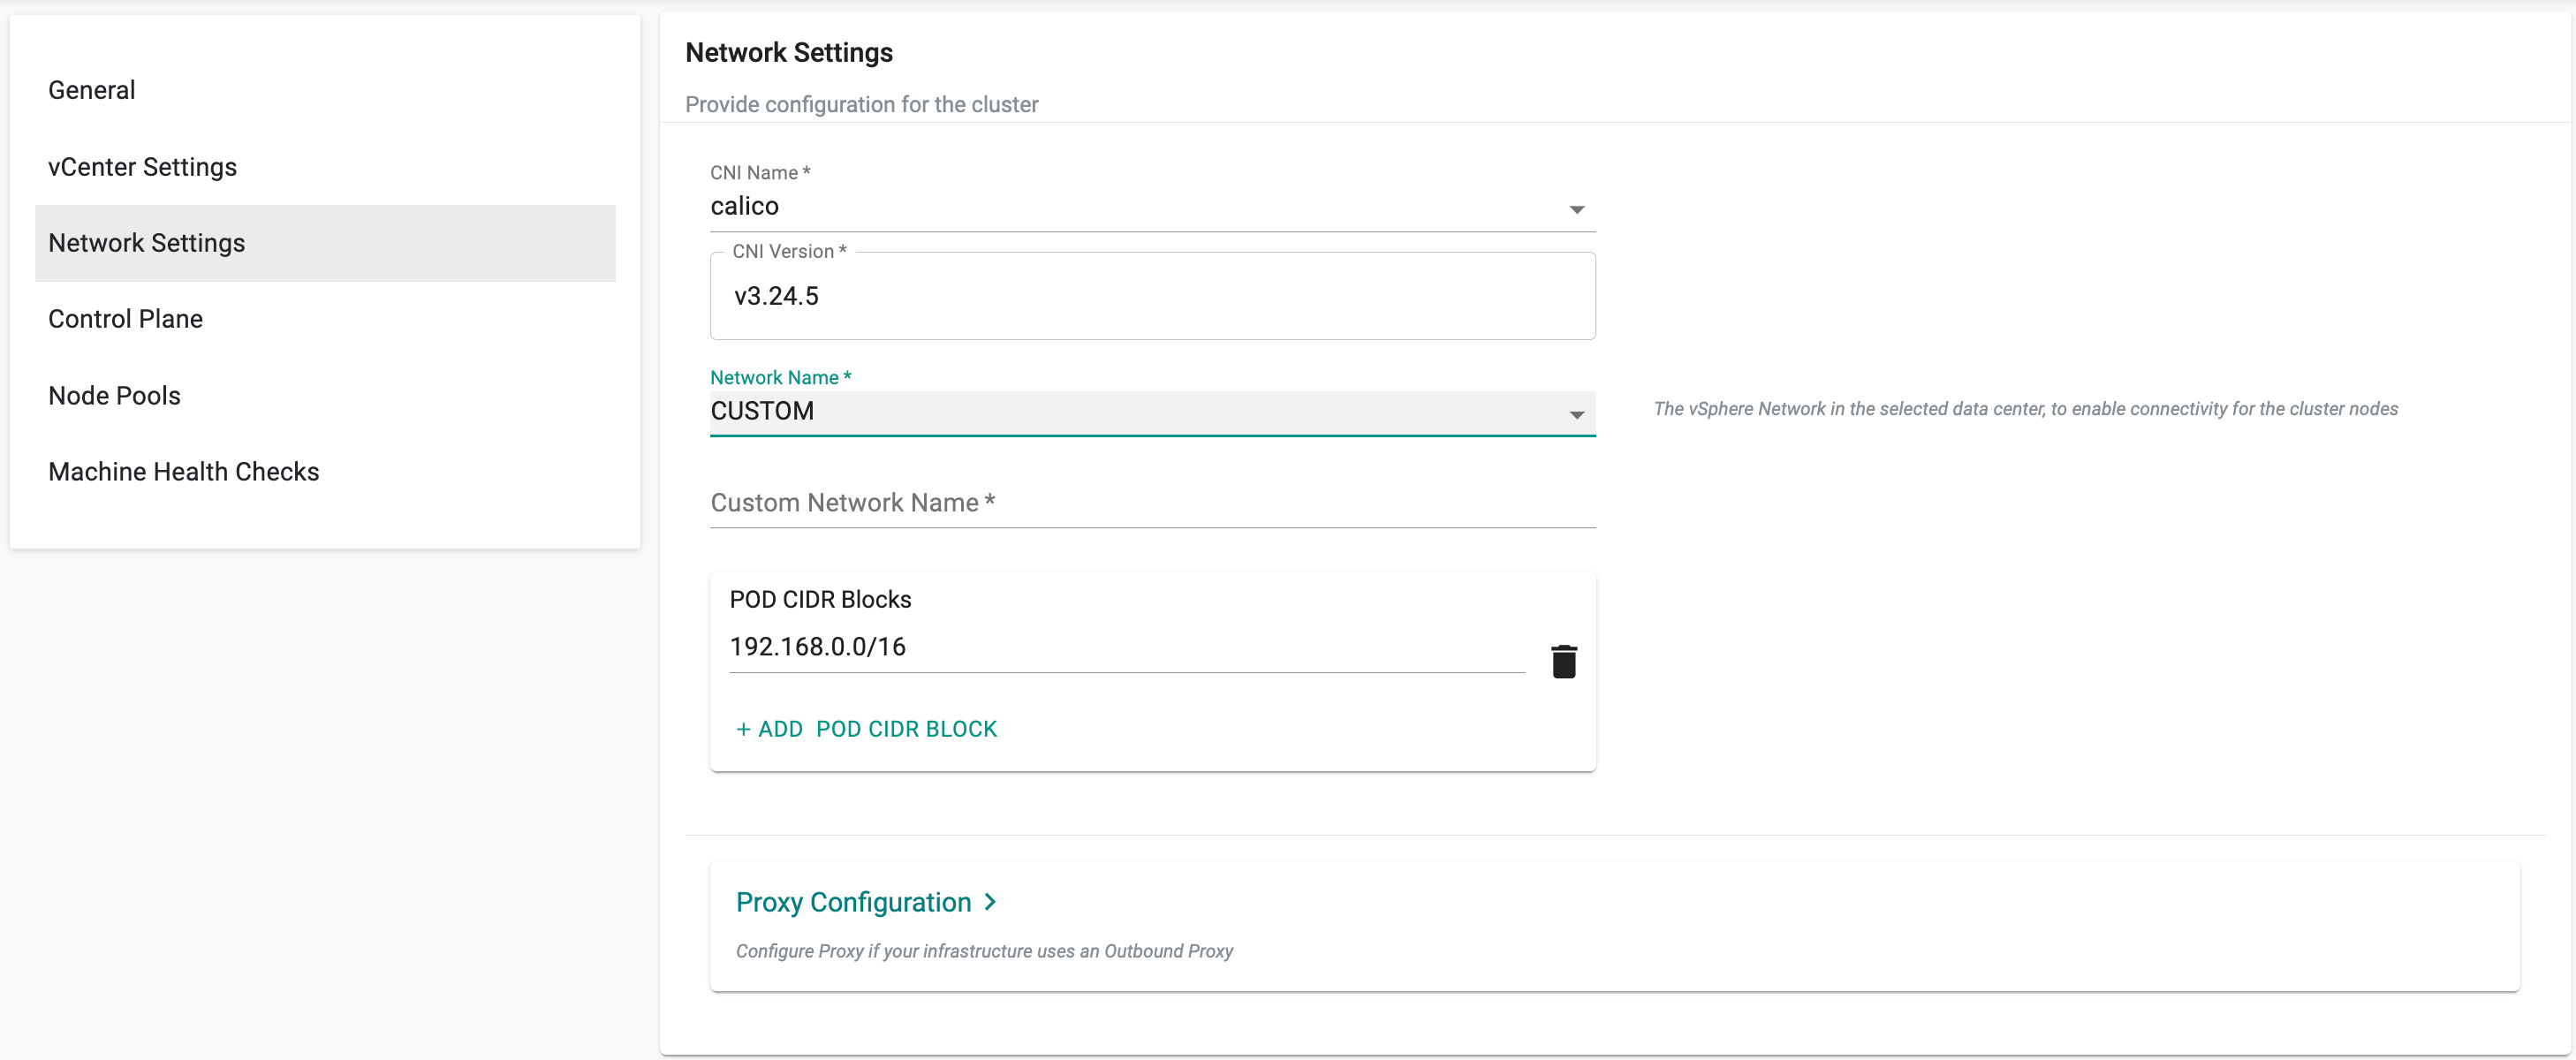
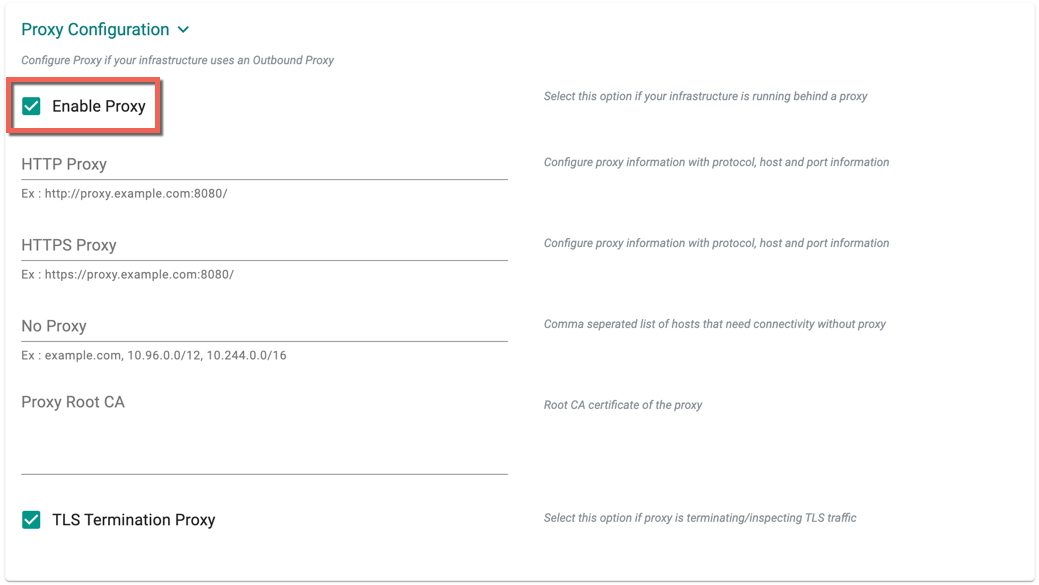
Proxy Configuration
Optionally, provide the Proxy Configuration details
- Select Enable Proxy if the cluster is behind a forward proxy.
- Configure the http proxy with the proxy information (ex: http://proxy.example.com:8080)
- Configure the https proxy with the proxy information (ex: http://proxy.example.com:8080)
- Configure No Proxy with Comma separated list of hosts that need connectivity without proxy. Provide the network segment range selected for provisioning clusters in the vCenter (ex: 10.108.10.0/24)
- Configure the Root CA certificate of the proxy if proxy is terminating non MTLS traffic
- Enable TLS Termination Proxy if proxy is terminating non MTLS traffic and it is not possible to provide the Root CA certificate of the proxy.
Control Plane Settings
- Enter the number of machines to deploy as part of Control Plane
- Provide the CPU, Memory, and Storage to customize the control plane node size
- Select the required K8s version
- Optionally, provide the Ssh Authorized Keys

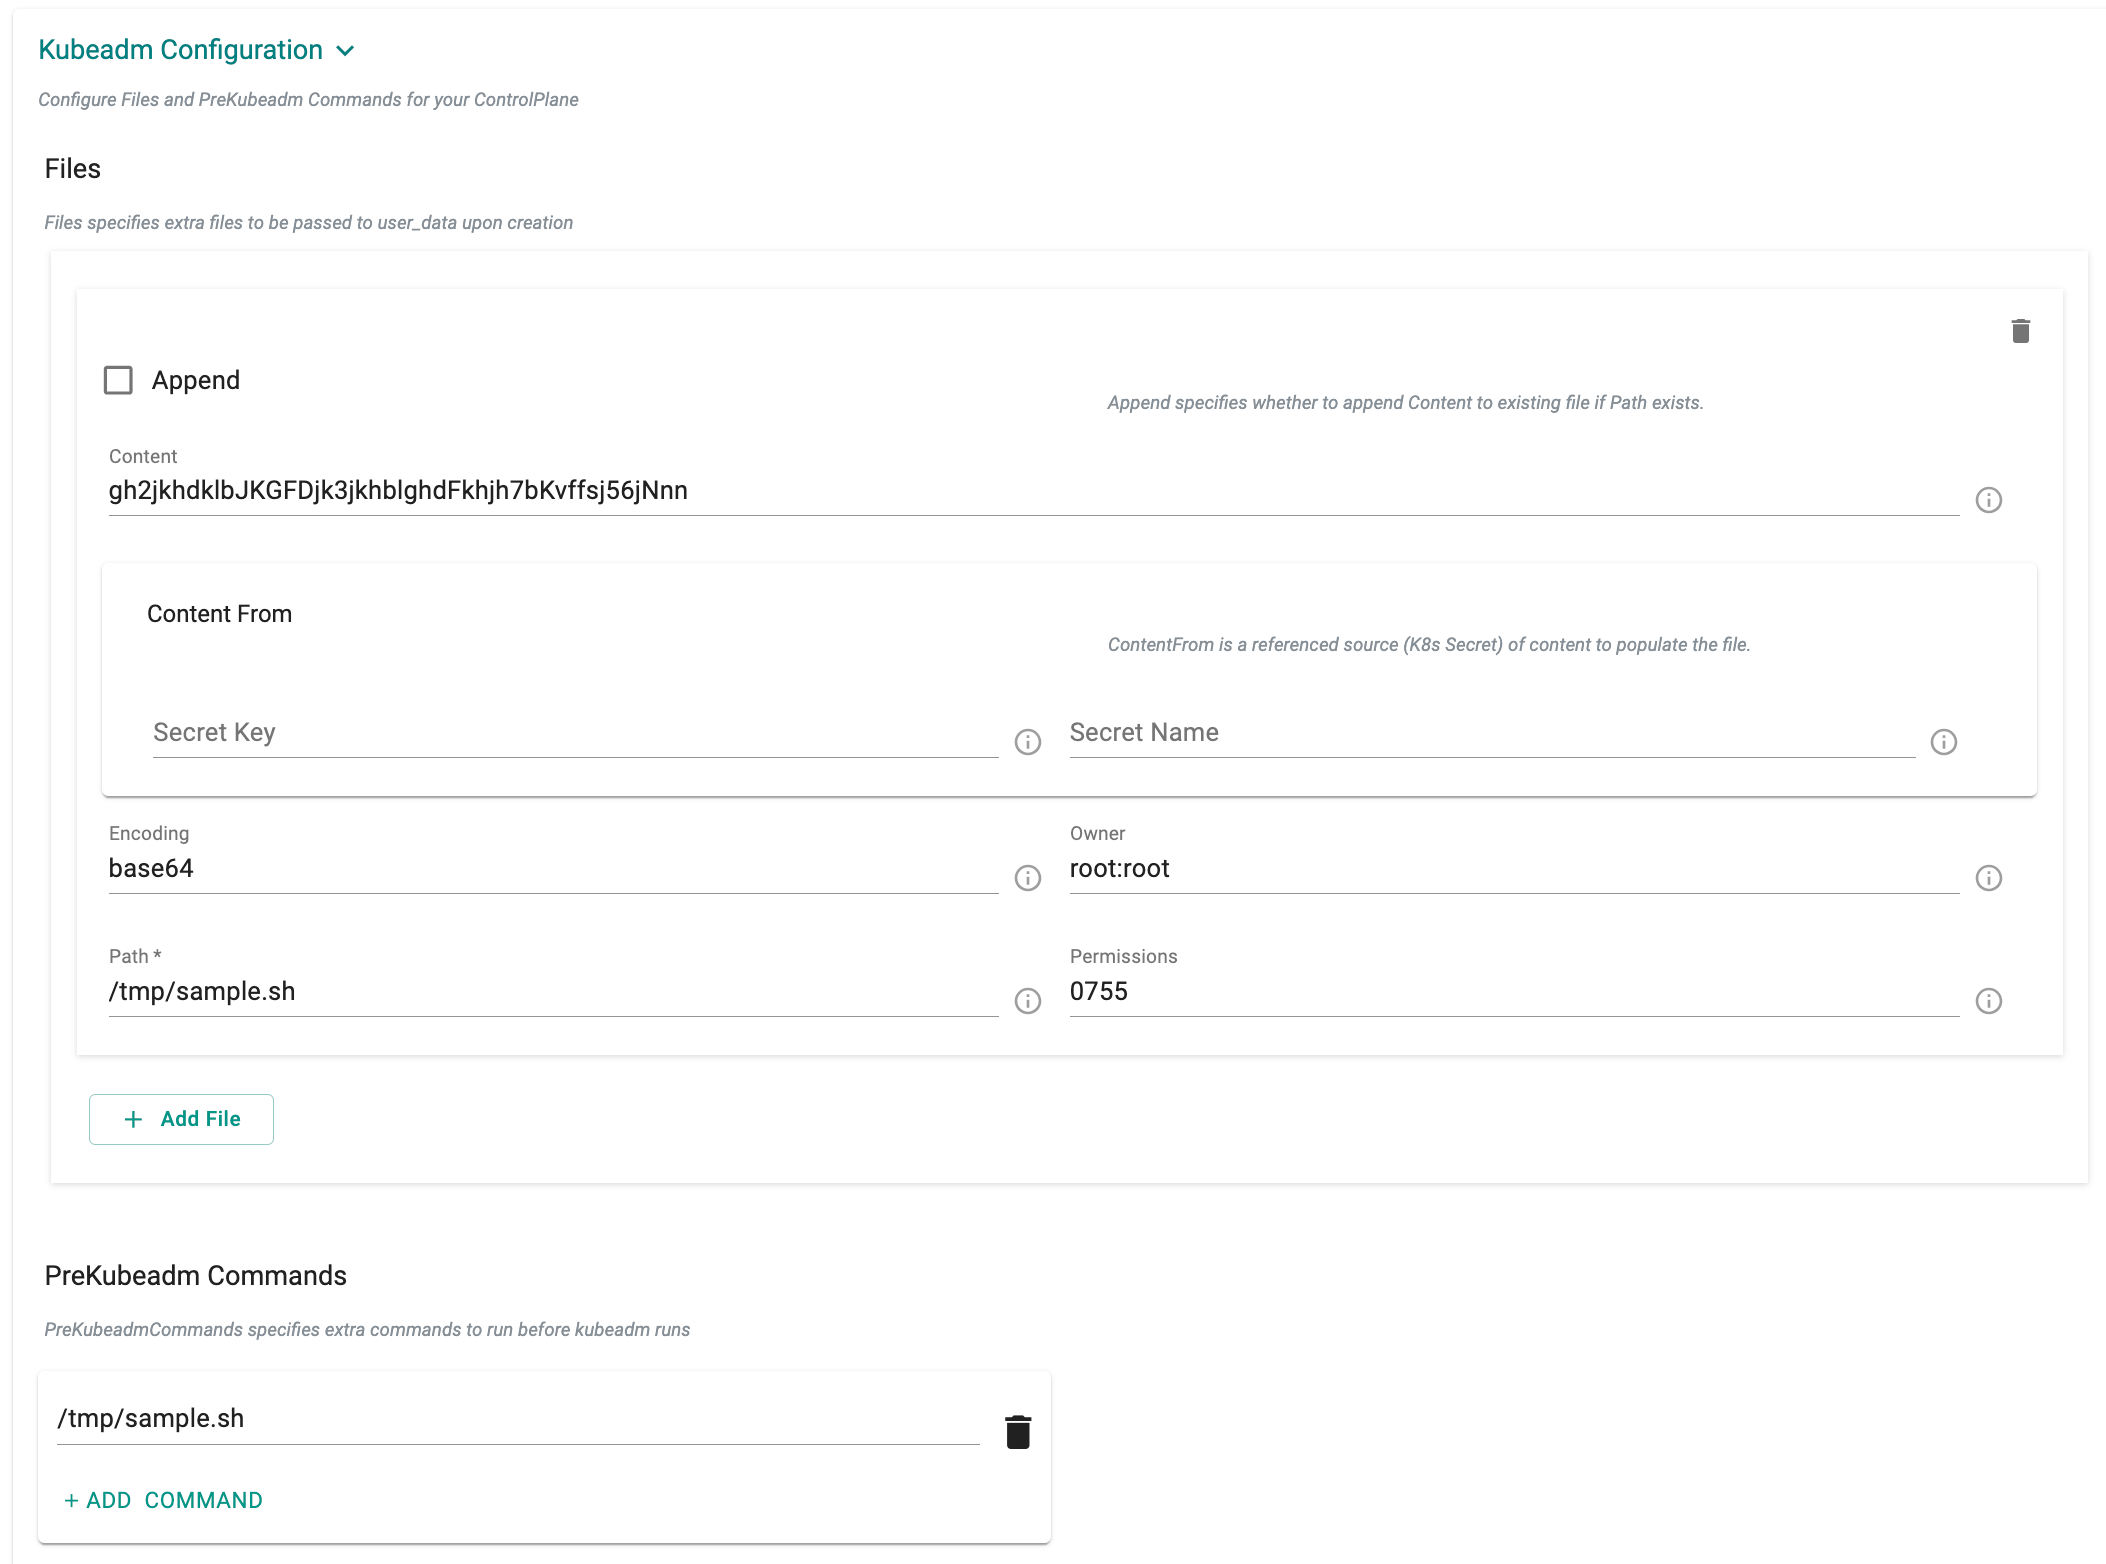
Kubeadm Configuration
-
kubeadm Configuration enable the users to run a series of pre-flight checks to validate the system state at cluster level. The Kubeadm Config object supports customizing the content of the config-data.
-
Appending the content file specifies additional files to be created on the machine, either with inline content or by referencing a secret. The following examples illustrate how to specify these options
-
Users can add a list of PreKubeadm commands to be executed before Kubeadm configuration joins the control plane
The examples below demonstrate how to define these options
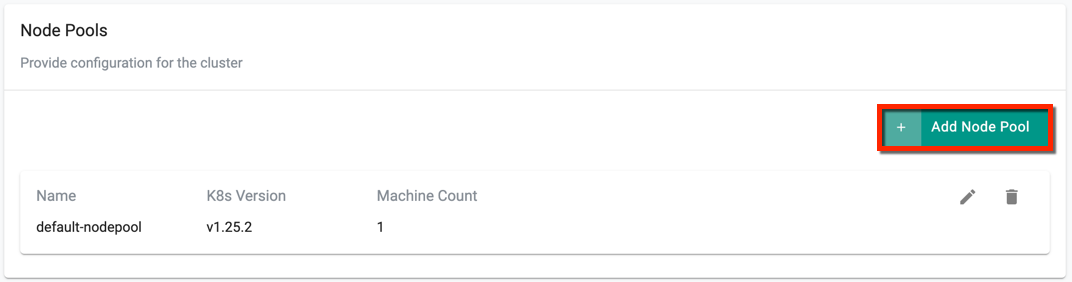
Node Pools Settings
A node pool is created by default when creating a cluster. It is mandatory to have one node pool for a cluster.
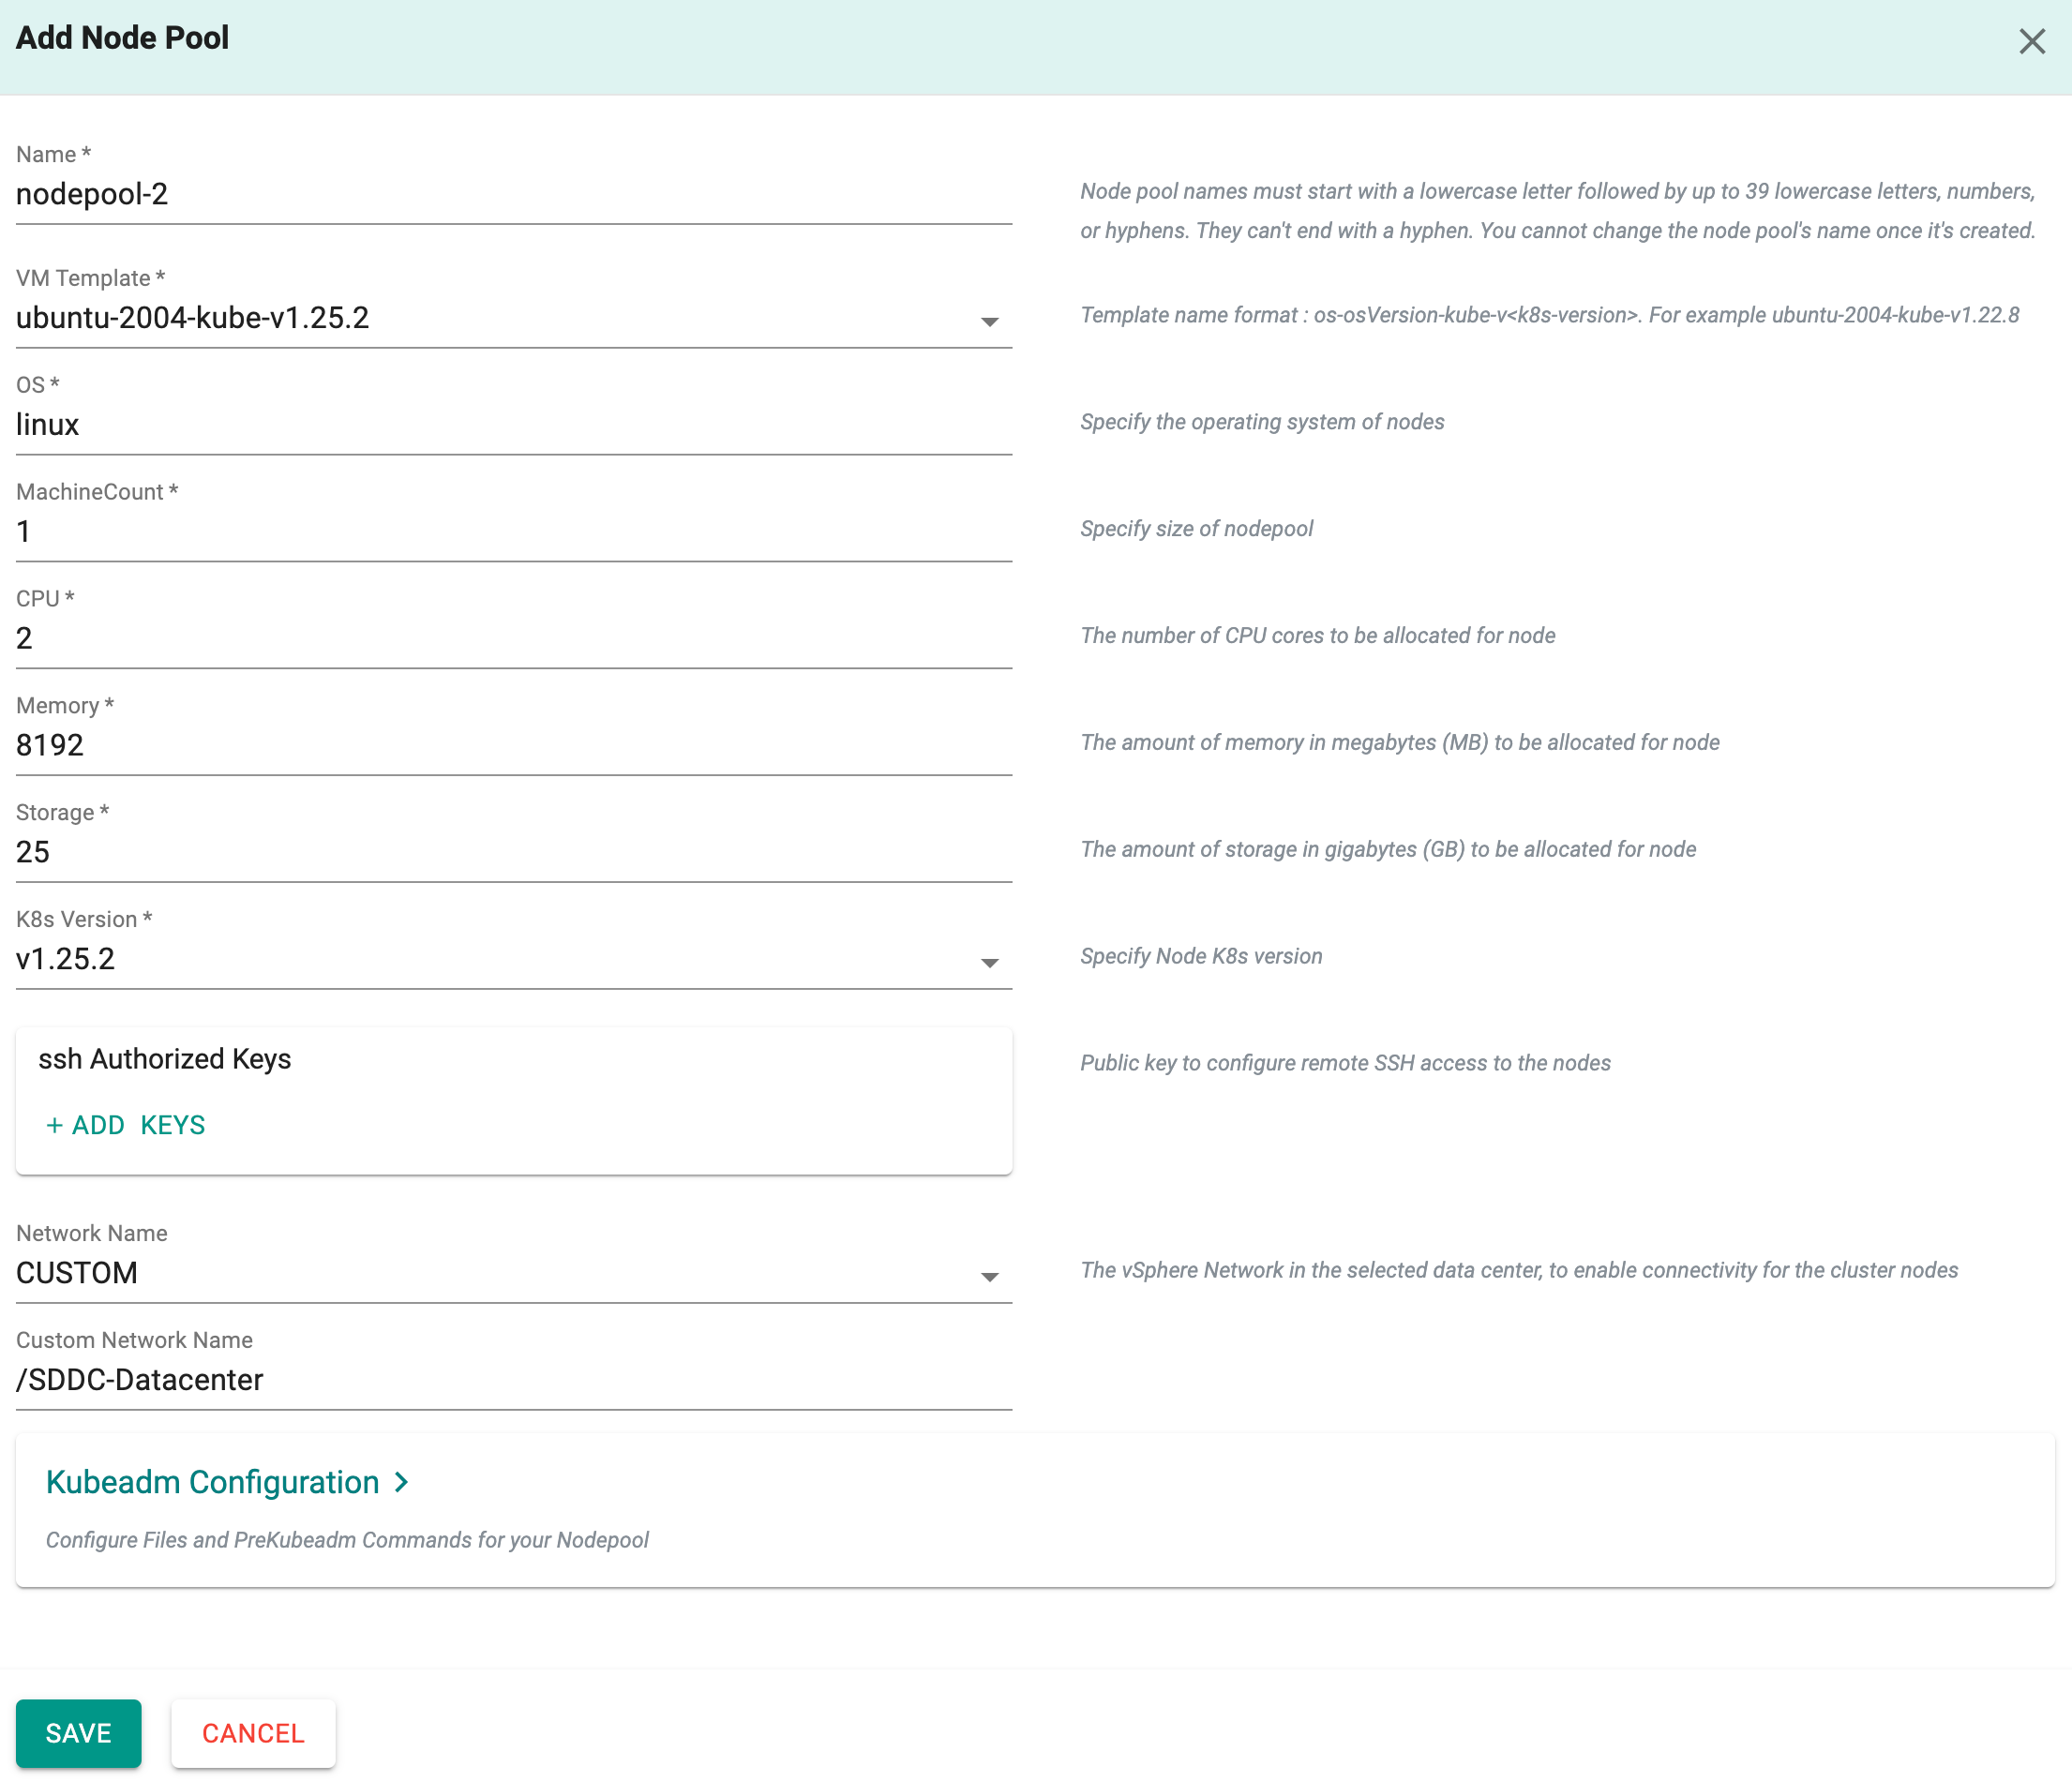
- To add more node pools, click Add Node Pool
- Enter a name and provide the required details
- If required, users can add Node level Kubeadm configuration
- click Save
Machine Health Checks
MachineHealthCheck proactively identifies and automates the remediation of unhealthy machines in a cluster, minimizing downtime and enhancing overall reliability by replacing malfunctioning nodes. For more information, refer here.
Provide the required details for Machine Health Check and perform the below steps
- Click Save Changes and proceed to cluster provisioning
- The cluster is ready for provision. Click Provision

Important
The node pool name should be limited to a maximum of 63 characters. The node name format follows this pattern:
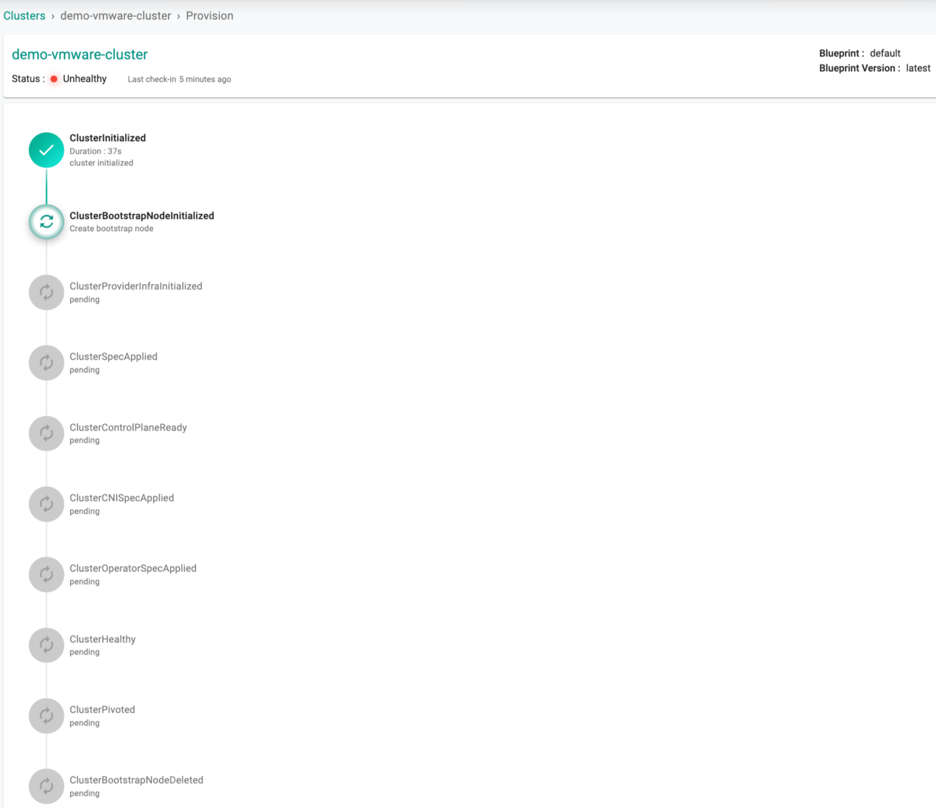
Provision In-progress
Once the user clicks on Provision, the system begins to go through a list of conditions for a successful provisioning as shown below
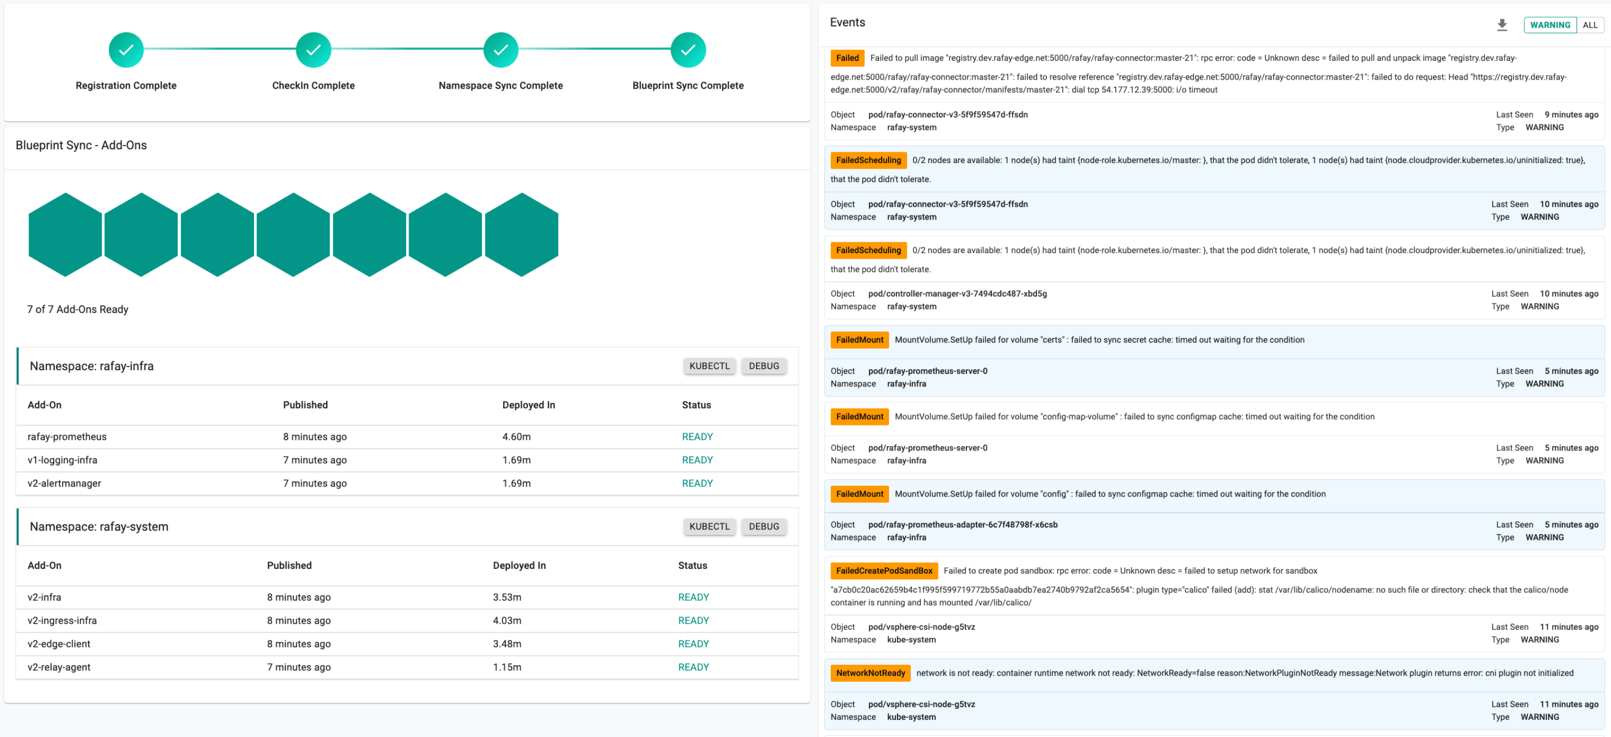
Successful Provisioning
Once all the steps are complete, the cluster is successfully provisioned as per the specified configuration. Users can now view and manage the VMware Cluster in the specified Project in the Controller. On successfully provisioning, the user can view the dashboards
Download Config
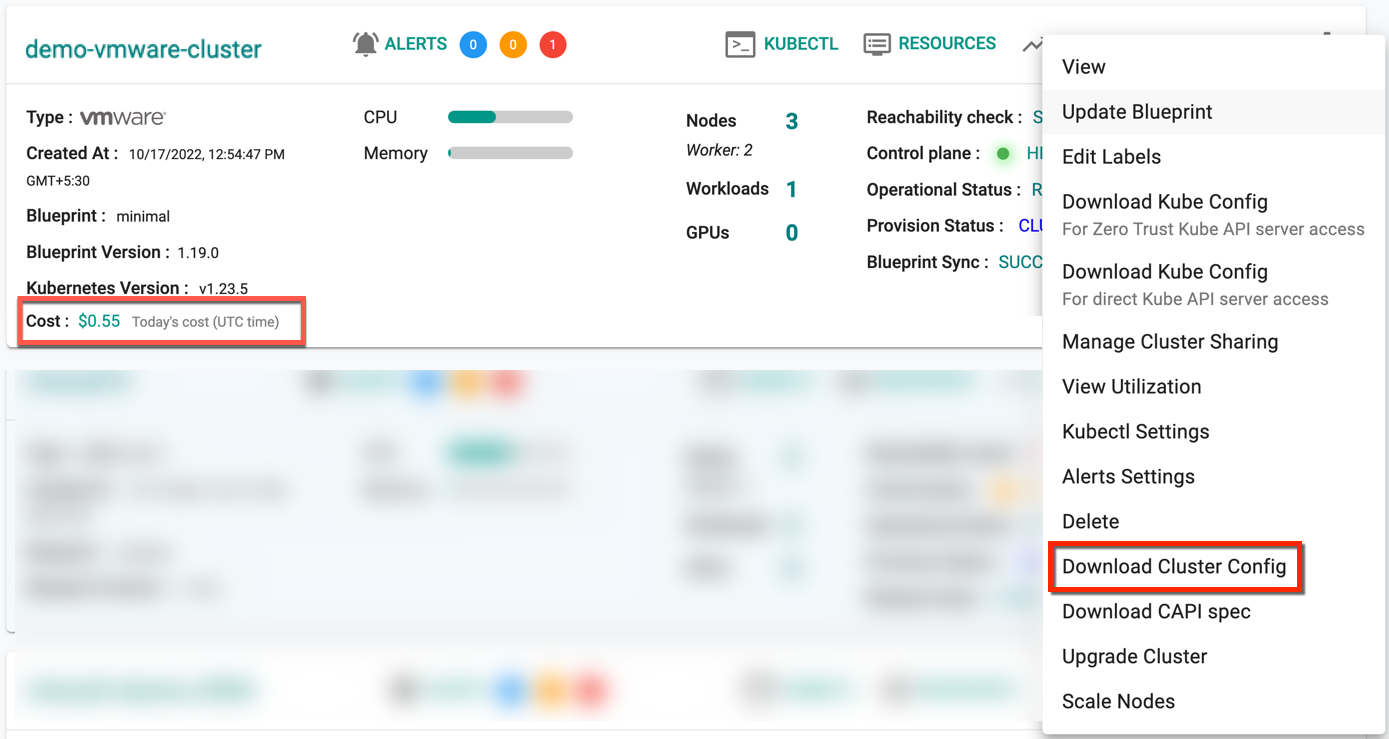
Administrators can download the VMware Cluster's configuration either from the console or using the RCTL CLI.
To view the cost details of this cluster, click on the available cost link. This will navigate you to the Cost Explorer page, where you can access detailed cost information for this specific cluster.
Delete Cluster
Click the Delete option to delete the cluster as shown below. To force delete the cluster resources from the controller, provide the cluster name to delete, click Confirm and Yes
Cluster Deletion UX Enhancement - Coming Soon
To deprovision a provisioned VMware cluster, perform the below steps:
- Click on Settings icon on the far right of the cluster and select Delete
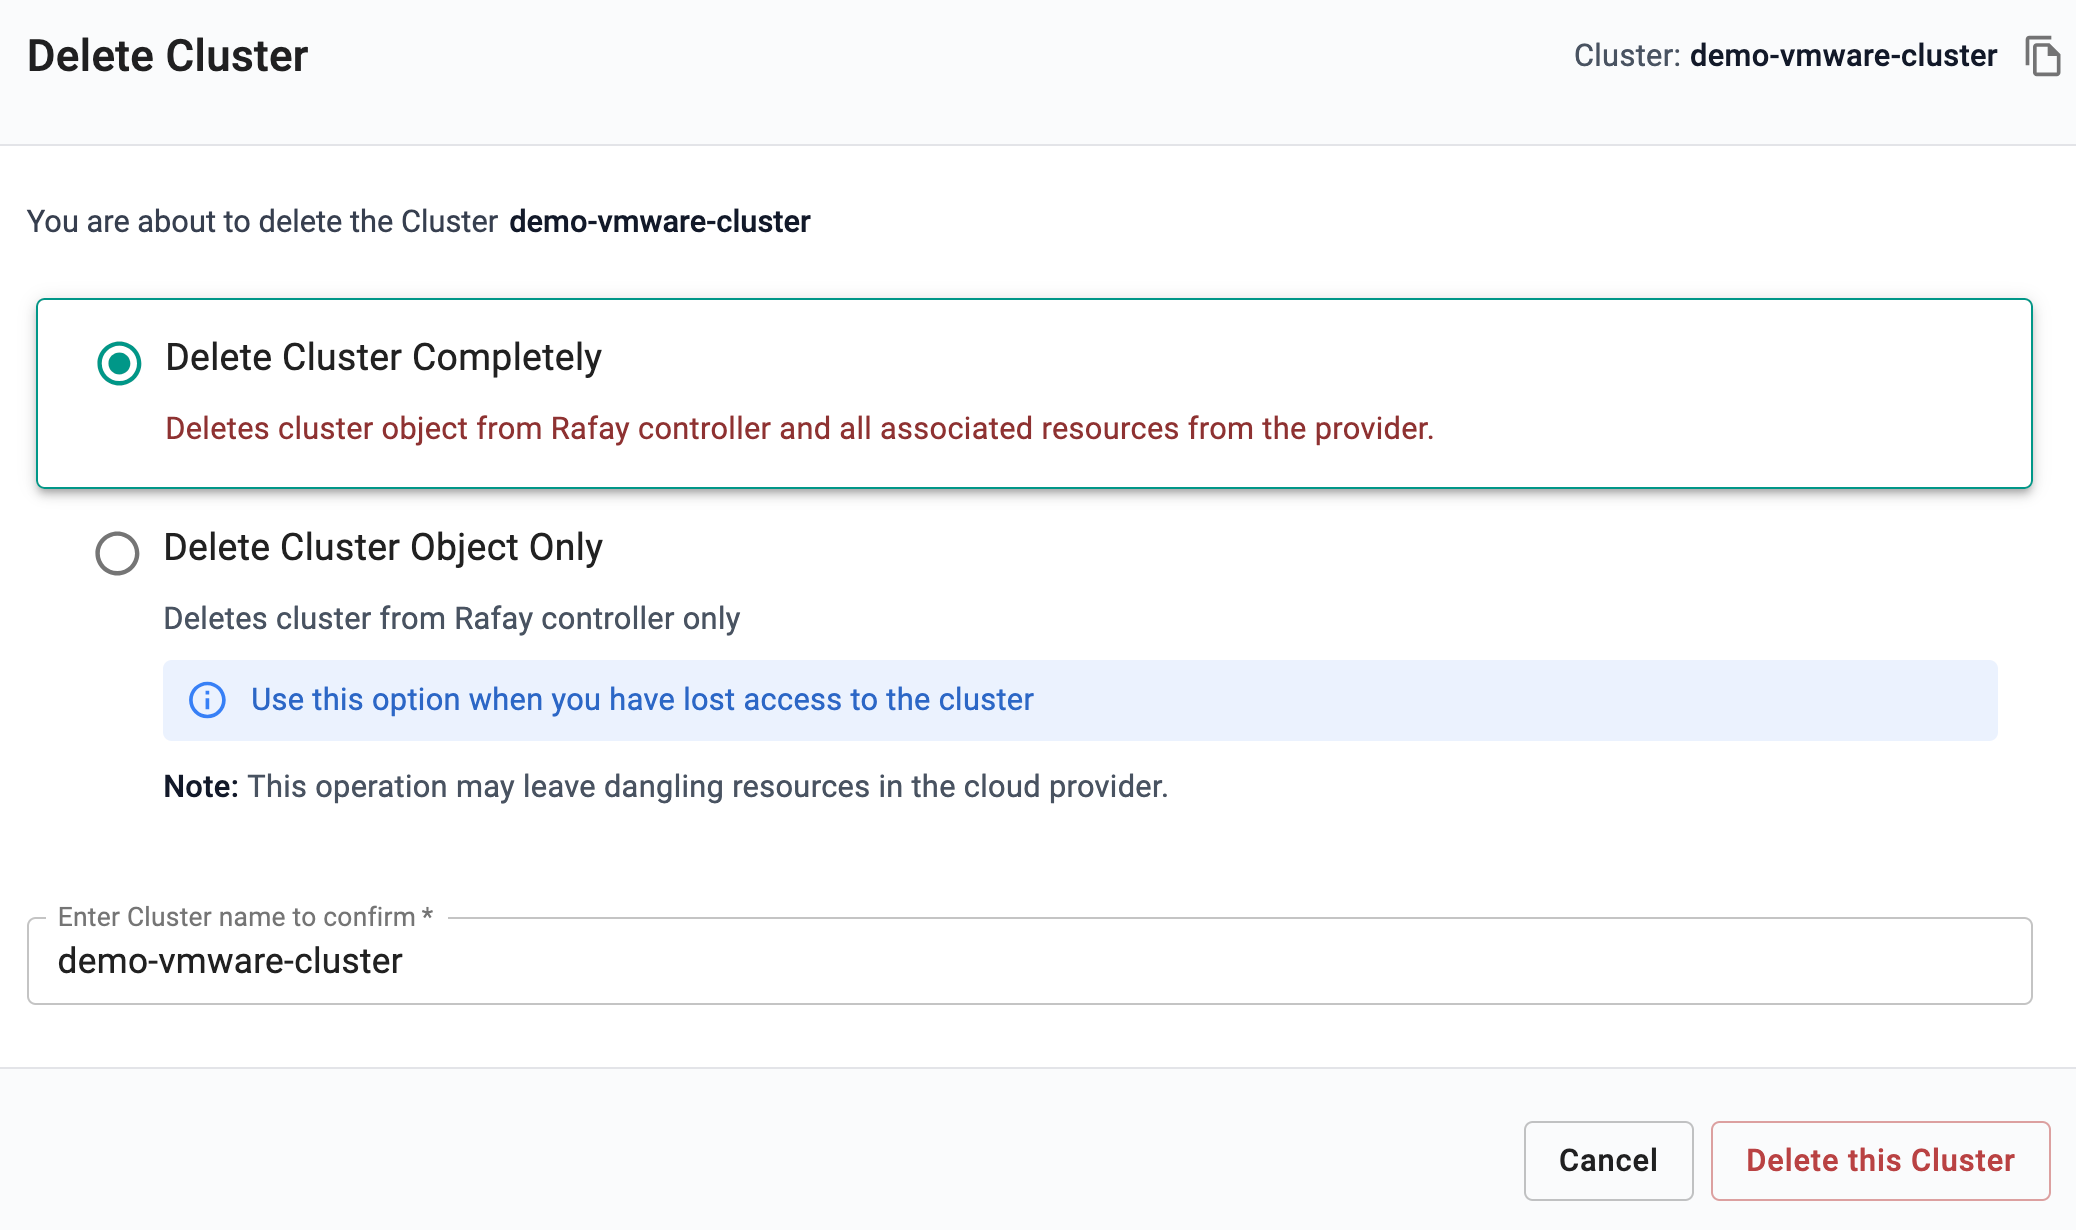
- Select Delete Cluster Completely to delete cluster object from Rafay controller and all associated resources from the provider
- Select Delete Cluster Object Only to delete cluster from Rafay controller only
- Select/enter the cluster name and click Delete this Cluster
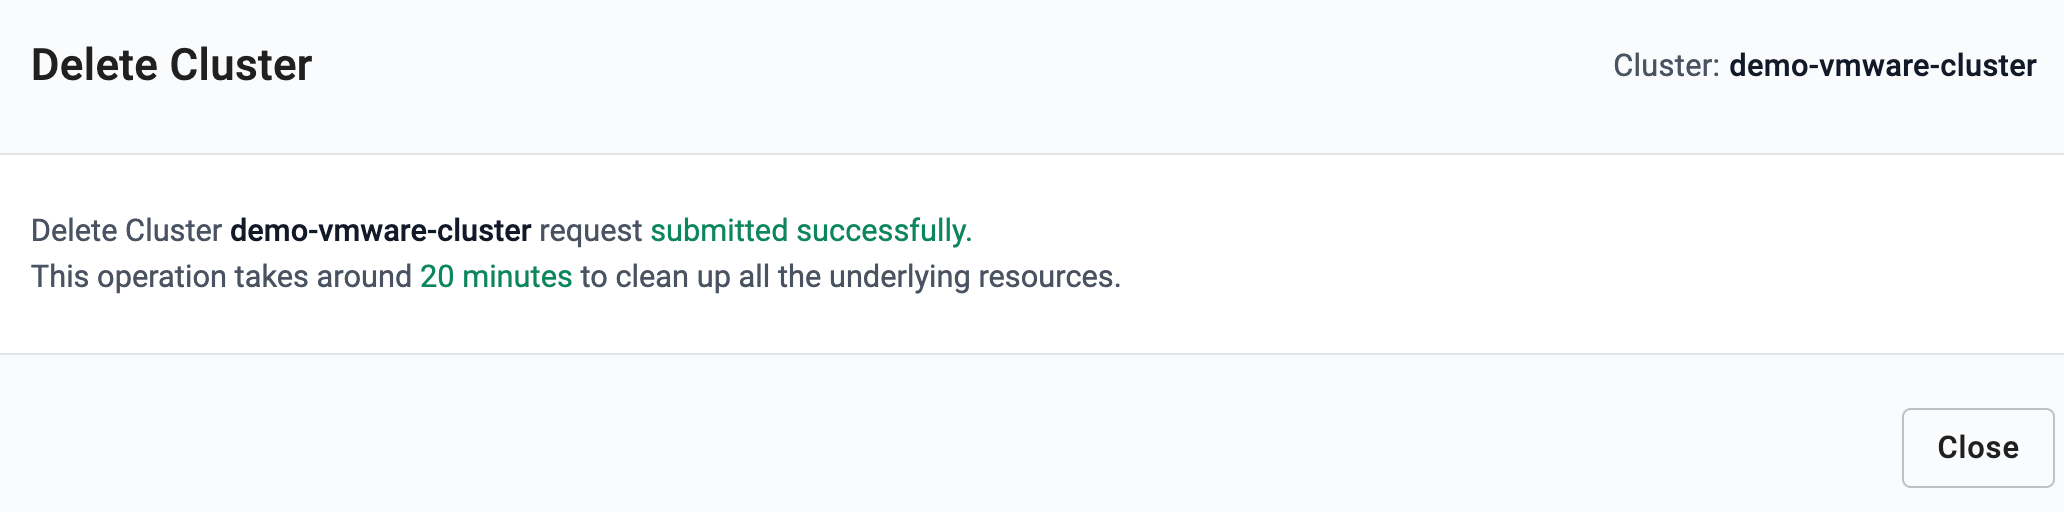
Once the delete request is submitted, the message below will be displayed, and the deletion process might take up to 20 minutes.
Failed Provisioning
Cluster provisioning can fail if the user had misconfigured the cluster configuration or gateway is unhealthy or gateway is not able to reach to controller.
Refer Troubleshooting to know more about the failed scenarios