Get Started with Token Factory and NVIDIA Dynamo
Overview
This guide walks you through deploying a token-metered AI model endpoint using Rafay Token Factory with NVIDIA Dynamo as the inference engine. You will create a model deployment with NVIDIA Dynamo and validate tenant access via the integrated playground.
Note: NVIDIA Dynamo support is available from release v3.1-39 onwards. Before creating a Dynamo model deployment, the Dynamo platform Helm chart must be installed on the compute cluster: ```bash helm fetch https://helm.ngc.nvidia.com/nvidia/ai-dynamo/charts/dynamo-platform-1.2.1.tgz
helm install dynamo-platform \ dynamo-platform-1.2.1.tgz \ --namespace dynamo-system \ --create-namespace \ --set global.nats.install=true
```
Assumptions
This guide assumes you have already completed the Token Factory basics, including creating a model, endpoint, compute cluster, and provider. If you have not done this yet, refer to the Get Started with Token Factory guide before proceeding.
This guide picks up from where the basics guide leaves off and focuses specifically on creating a model deployment using NVIDIA Dynamo as the inference engine.
The following are assumed to be in place:
- A Rafay Platform account with Token Factory enabled
- A compute cluster with NVIDIA GPUs registered in your Rafay org
- The NVIDIA Dynamo platform Helm chart installed on the compute cluster (see prerequisite callout above)
- A model registered in Token Factory
- A compute endpoint registered in Token Factory
- Partner admin access to the Rafay Operations Console
- At least one tenant organization created in your Rafay org
What You Will Do
| Step | Action |
|---|---|
| 1 | Create a model deployment with NVIDIA Dynamo |
| 2 | Configure the Dynamo inference engine and workers |
| 3 | Set rate limits and pricing |
| 4 | Validate the deployment |
| 5 | Access the model as a tenant user via the playground |
Step 1 — Create a Model Deployment
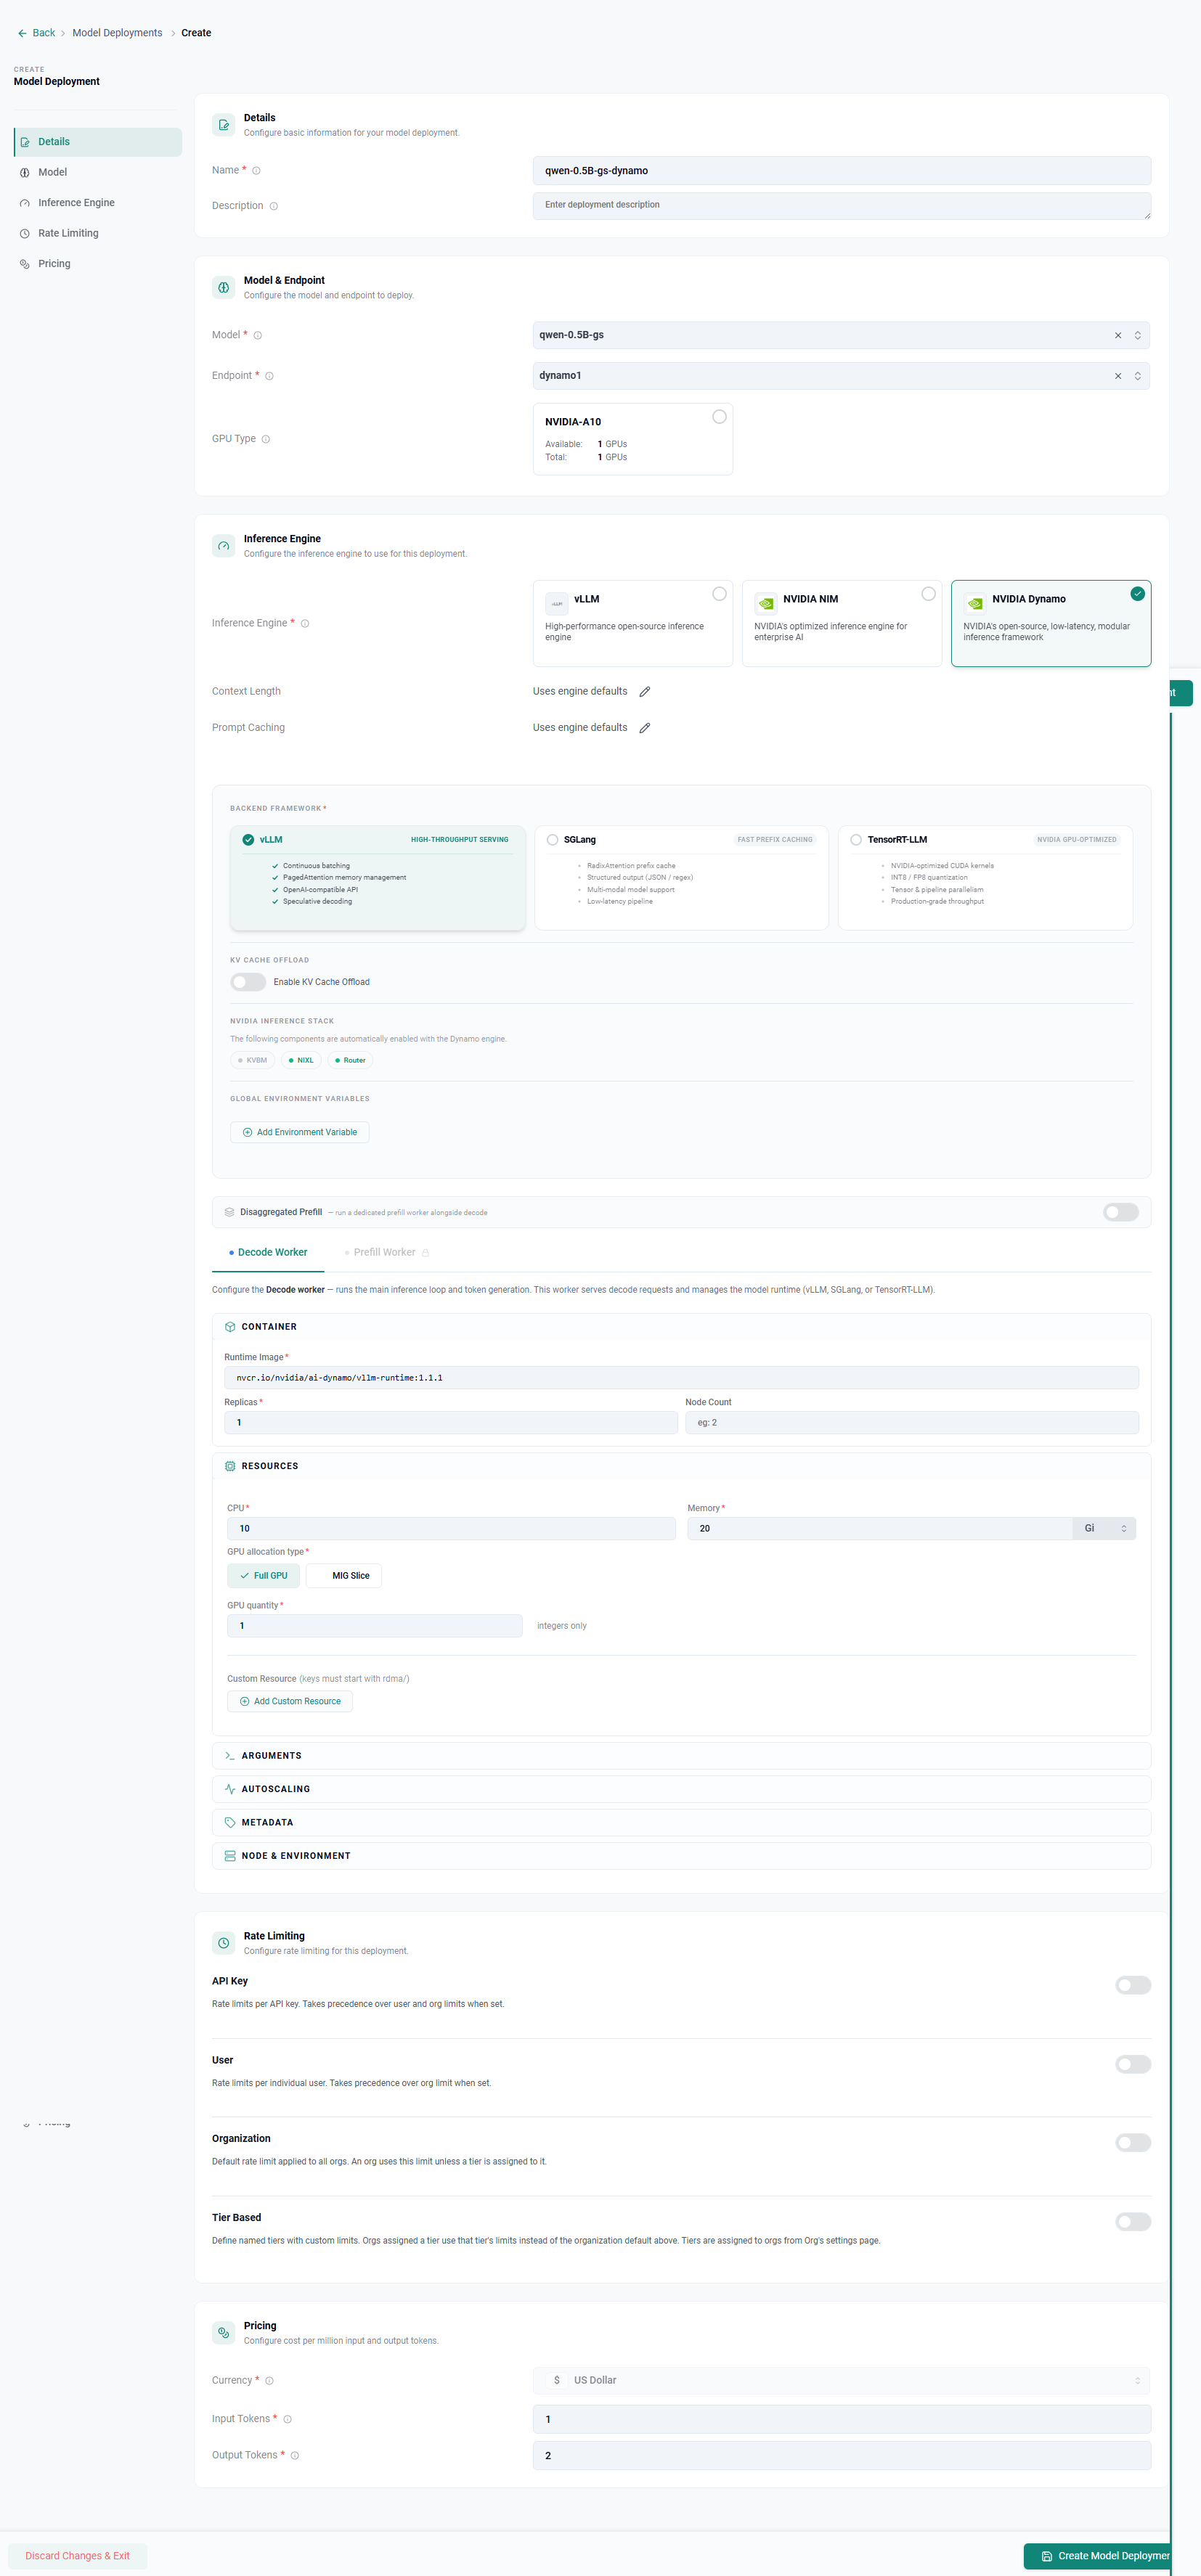
Navigate to Token Factory → Model Deployments and click New Model Deployment.
Populate the fields below:
Details
| Field | What to enter |
|---|---|
| Name | A unique name for this deployment (e.g. qwen-0.5B-gs-dynamo) |
| Description | Optional — useful for recording configuration notes |
Model & Endpoint
| Field | What to enter |
|---|---|
| Model | Select an existing model |
| Endpoint | Select an existing endpoint |
In this example, we will be using the qwen-0.5B-instruct model.
Inference Engine
In the Inference Engine section, select NVIDIA Dynamo.
Backend Framework
Select the backend framework that matches your model and performance requirements:
| Option | Best for |
|---|---|
| vLLM | High-throughput serving with continuous batching |
| SGLang | Fast prefix caching and low-latency pipelines |
| TensorRT-LLM | Maximum GPU-optimized throughput on NVIDIA hardware |
In this example, we will be using vLLM.
KV Cache Offload
Leave Enable KV Cache Offload disabled unless your cluster has NVLink-connected host memory configured for KV offload.
In this example, we will leave KV Cache Offload disabled.
Disaggregated Prefill
In this example, we will leave the Disaggregated Prefill disabled.
Enable the Disaggregated Prefill toggle to separate prefill and decode workers. When enabled, a Prefill Worker configuration section appears alongside the Decode Worker section.
Enable disaggregated prefill when:
- Your model is large (≥ 30B parameters)
- Your workload has long input prompts relative to output length
- You want to maximize cluster GPU utilization
Leave it disabled for smaller models or when running on a single node.
Configure the Decode Worker
The decode worker runs the main inference loop and token generation. Configure it under the Decode Worker section.
Container
Enter the NVIDIA NGC container image for your selected backend:
| Backend | Runtime Image |
|---|---|
| TensorRT-LLM | nvcr.io/nvidia/ai-dynamo/tensorrtllm-runtime:1.1.1 |
| vLLM | nvcr.io/nvidia/ai-dynamo/vllm-runtime:1.1.1 |
| SGLang | nvcr.io/nvidia/ai-dynamo/sglang-runtime:1.1.1 |
| Field | What to enter |
|---|---|
| Runtime Image | The NGC image from the Backend Framework section above |
| Replicas | Number of decode worker pods |
| Node Count | Number of nodes per decode worker pod (typically 1) |
Resources
| Field | What to enter |
|---|---|
| CPU | CPU request for the decode worker (e.g. 8) |
| Memory | Memory request (e.g. 64Gi) |
| GPU Allocation Type | Select Full GPU (use MIG Slice only for MIG-partitioned clusters) |
| GPU Quantity | Number of GPUs per decode worker |
Set Pricing
Navigate to the Pricing section.
| Field | What to enter |
|---|---|
| Currency | Select your billing currency (e.g. US Dollar) |
| Input Tokens | Cost per million input tokens |
| Output Tokens | Cost per million output tokens |
Click Create Model Deployment. Rafay will schedule the Dynamo workers on the selected compute endpoint.
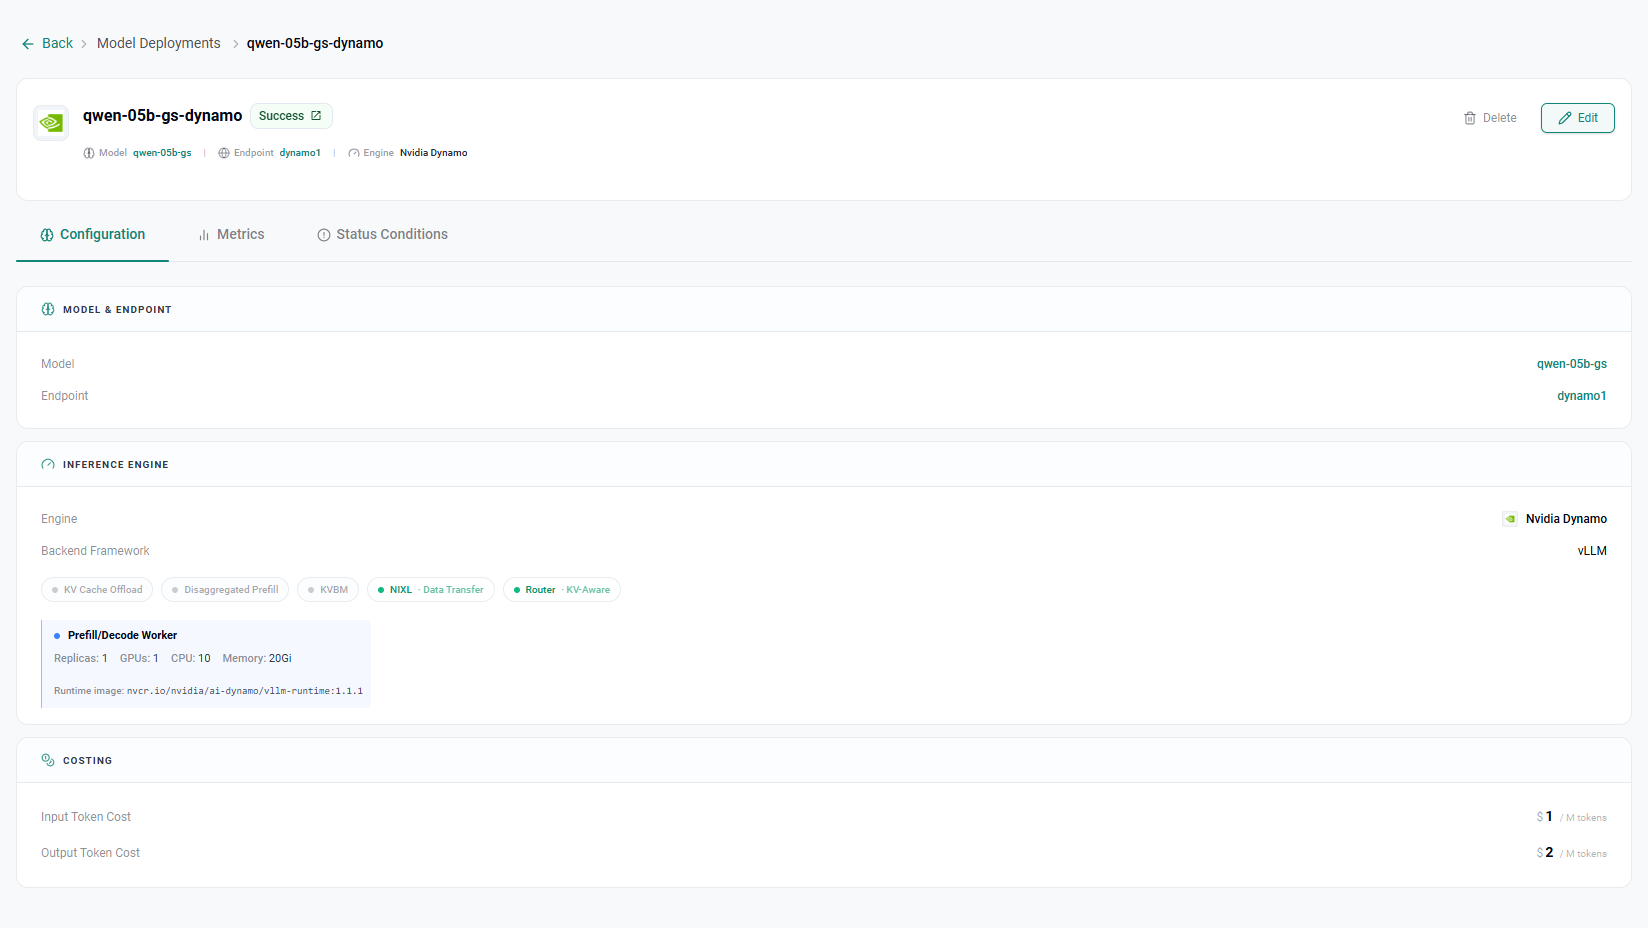
After a few minutes, the model will be deployed.
Step 2 — Share the Deployment with a Tenant
Once the model deployment has been created, it must be explicitly shared with one or more tenant organizations before tenant users can access it. This gives operators full control over which tenants can consume which models.
Navigate to Token Factory → Model Deployments, click the Actions icon, and click Manage Sharing.
Share with an Organization
- Select Specific Organizations
- Select the tenant organization/s to share the model deployment with
- Click Save Changes
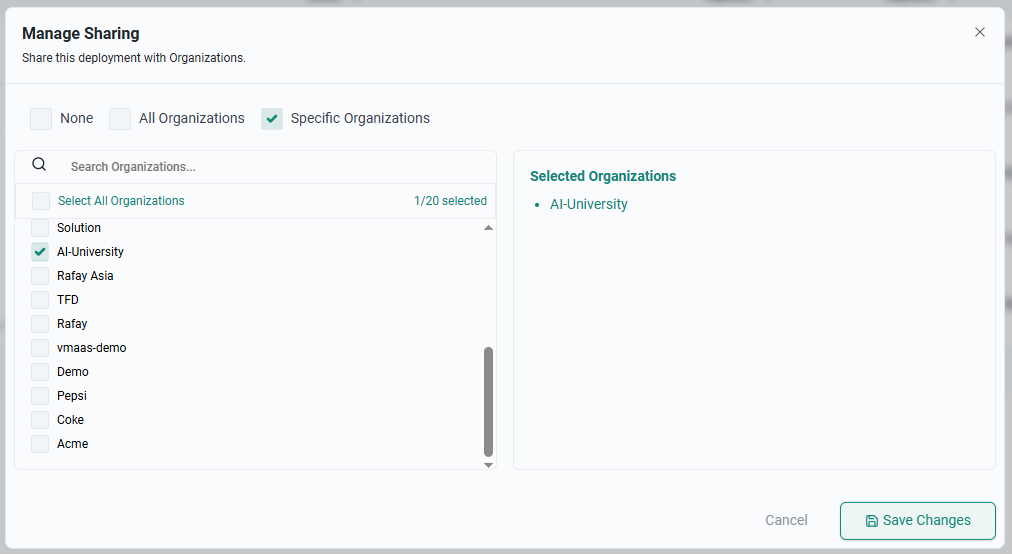
The deployment will now appear in the tenant organization's Token Factory view. Repeat this for each tenant org you want to grant access.
Step 3 — Tenant Access via the Playground
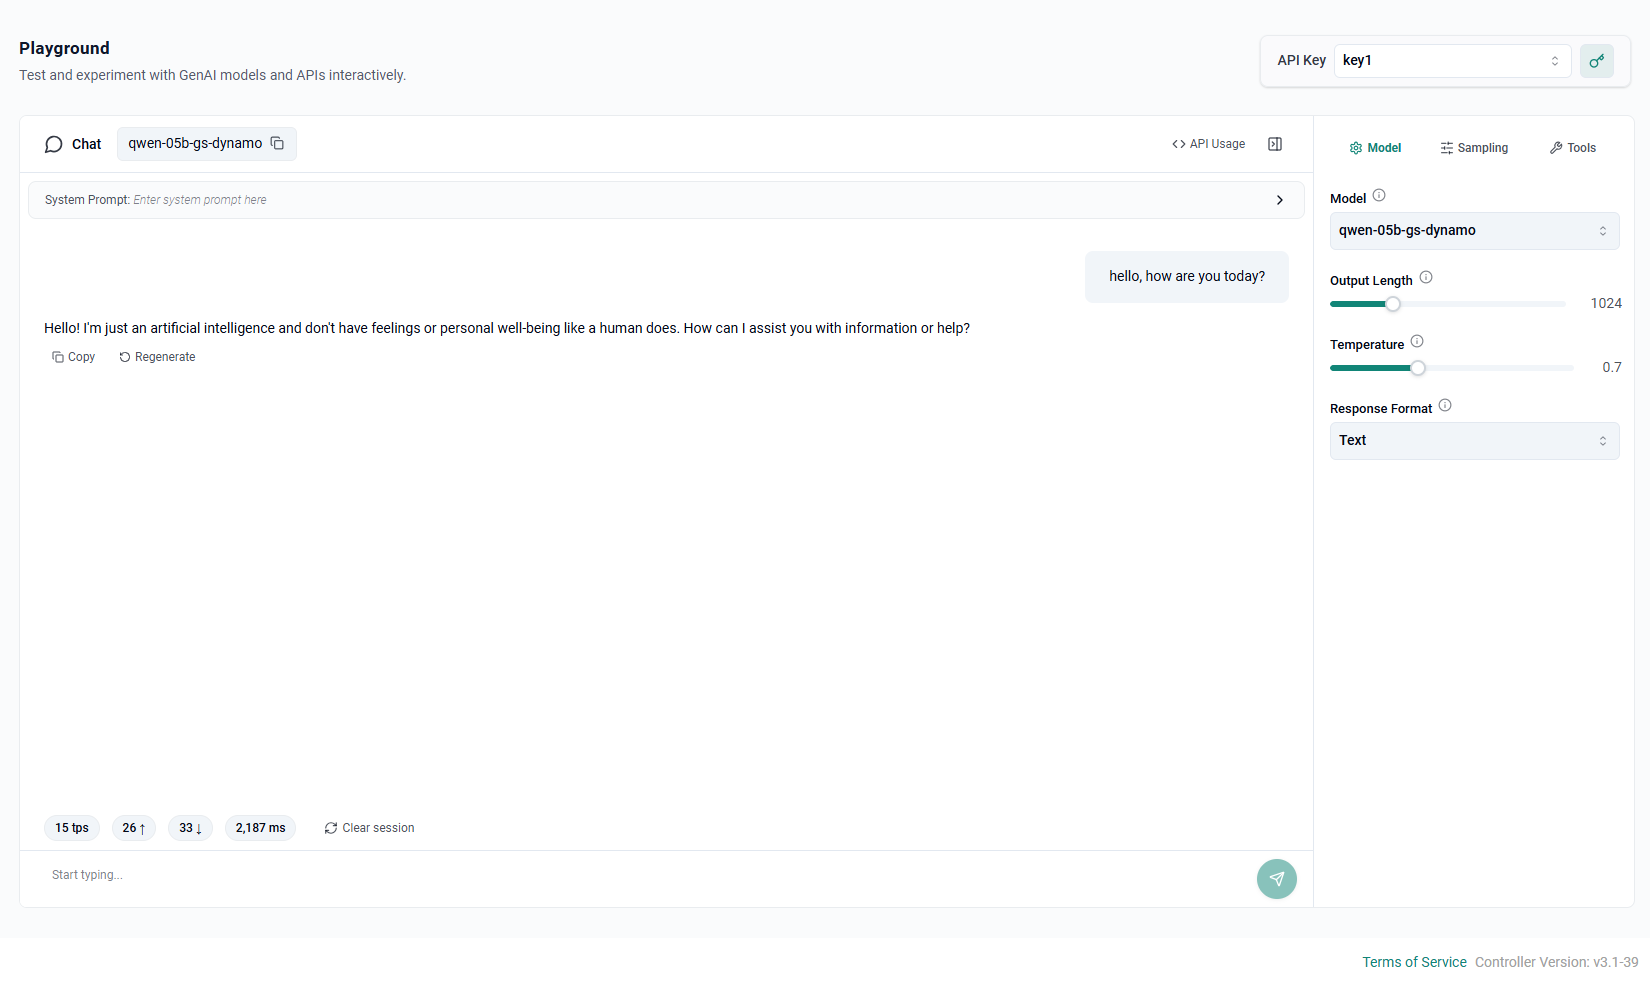
Once the deployment is running, users within a tenant organization can access the model through the integrated playground without any API client setup.
Ensure you have an API key created before proceeding to the playground.
As a Tenant User — Open the Playground
- Log in to the Rafay console using your tenant organization credentials
- In Developer Hub, navigate to Token Factory → Playground
Send Your First Request
In the playground:
- Select the model from the model dropdown
- Optionally adjust output Length, Temperature, and Response Format in the settings panel
- Type a prompt in the input box and press Send
Responses stream back token by token. TTFT and throughput metrics are displayed on the screen.
View Token Usage
Tenant users can monitor their own consumption at any time:
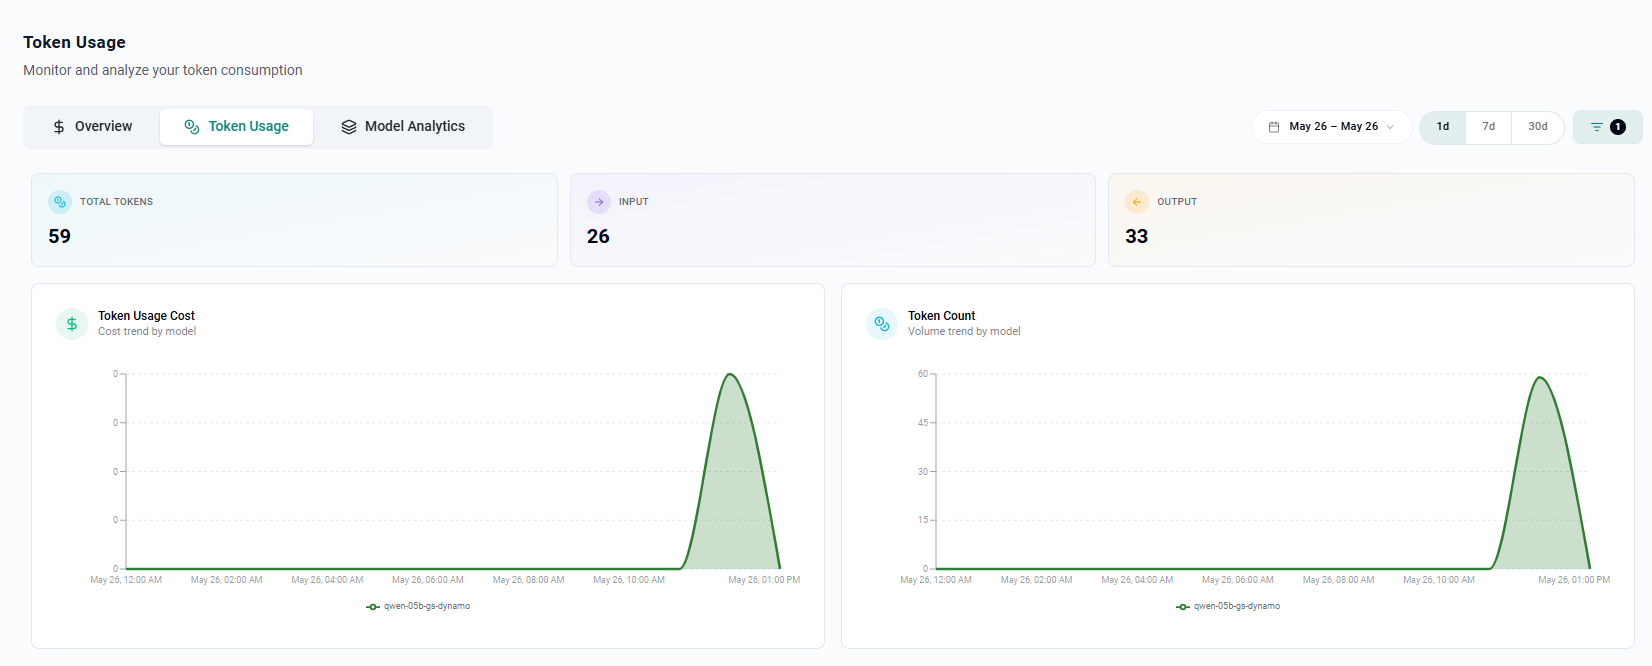
- Navigate to Token Factory → Token Usage
- Filter by model deployment
- Usage is broken down by Input Tokens and Output Tokens, matching the pricing set in the deployment model